


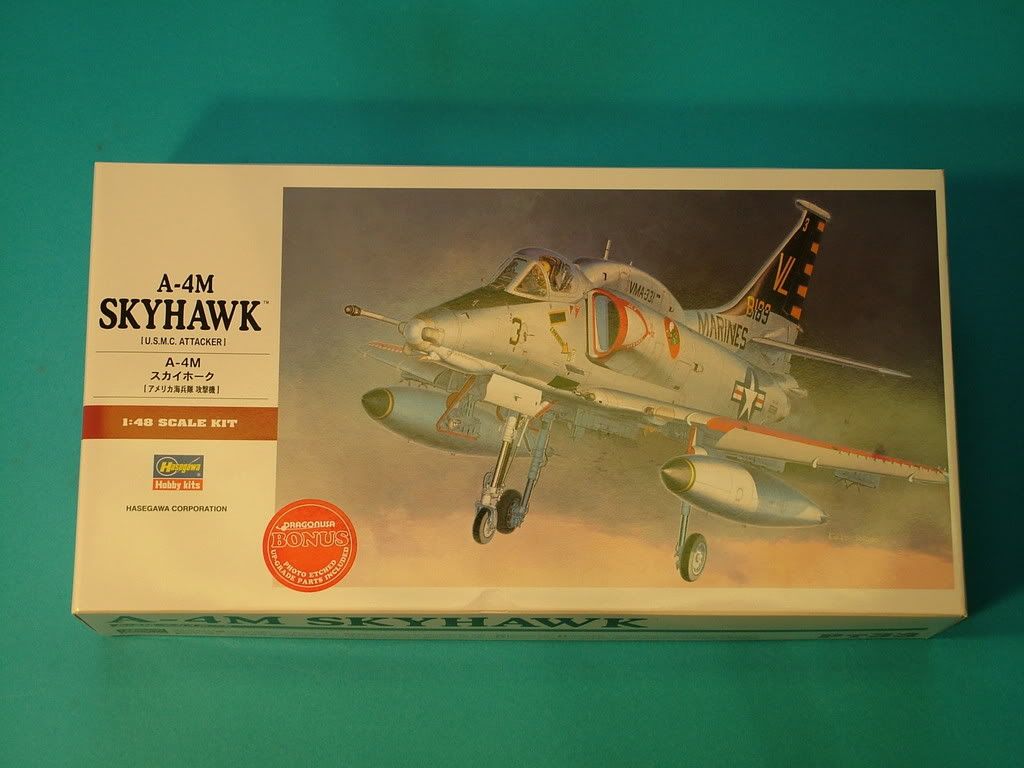
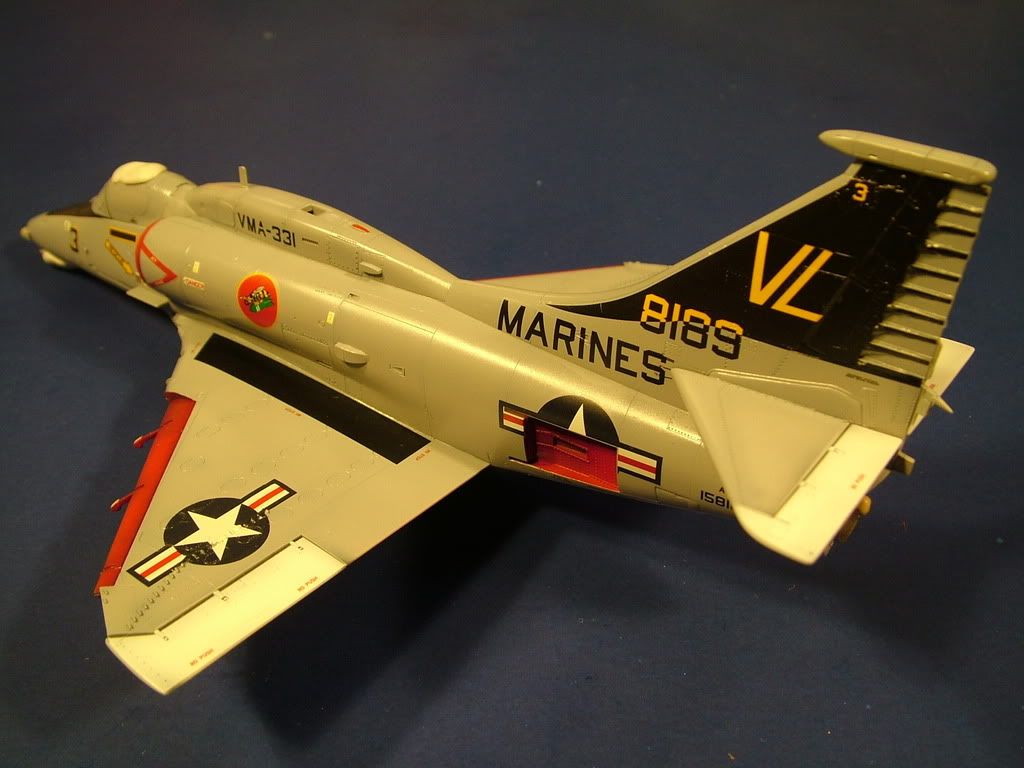
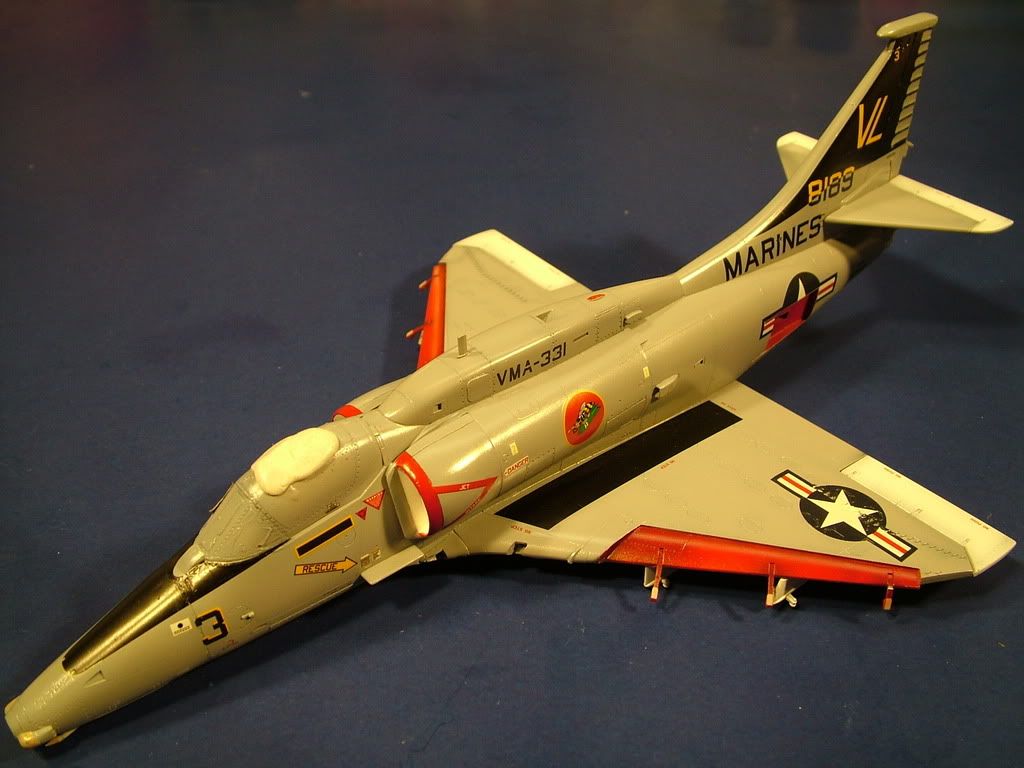
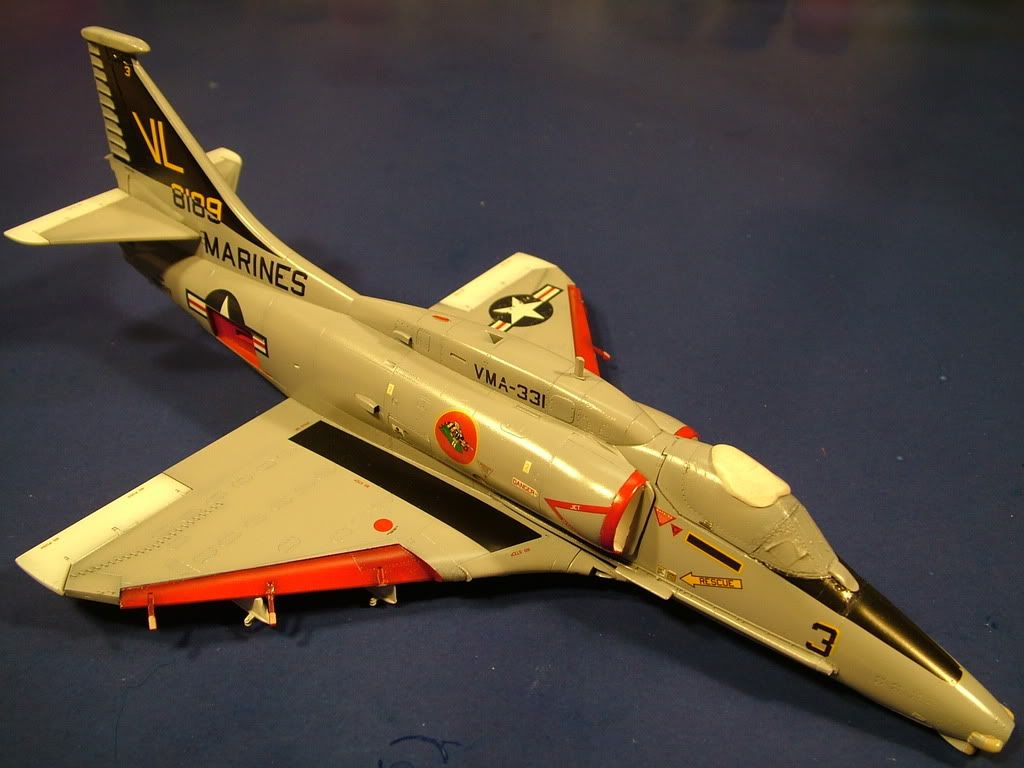
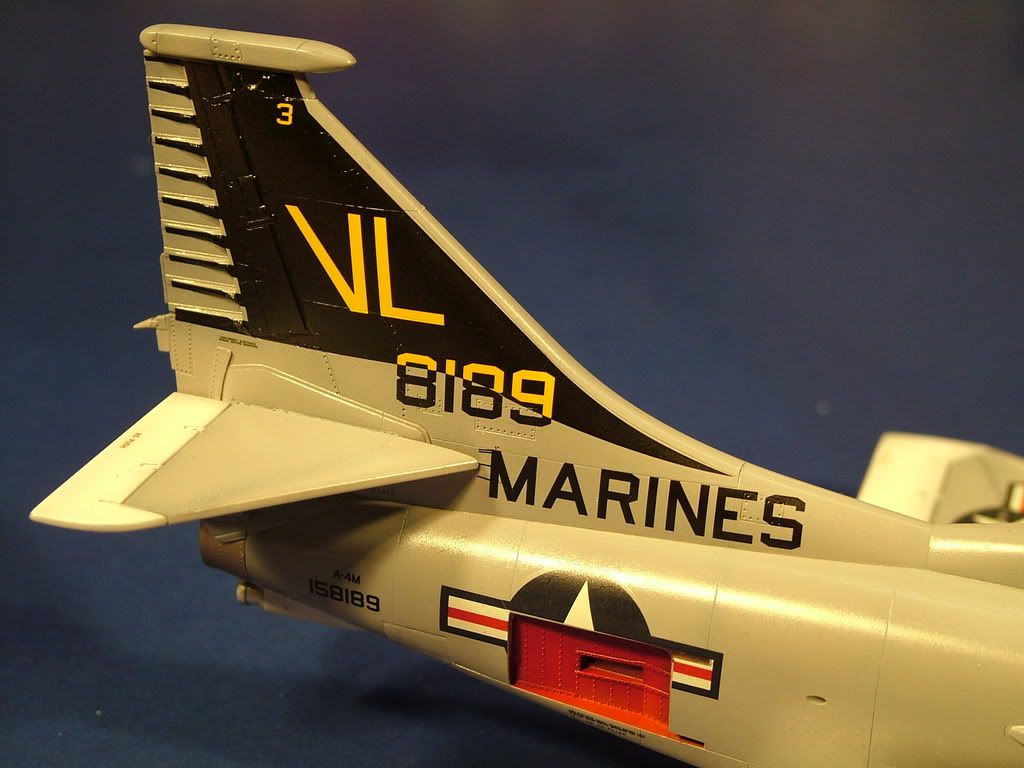
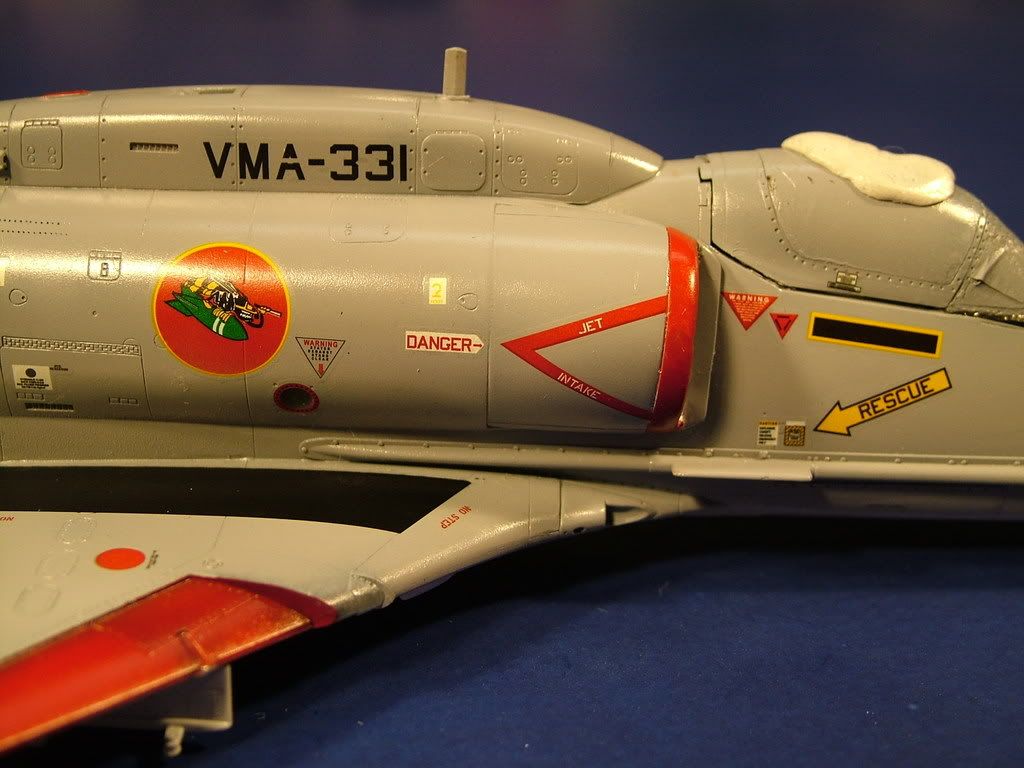
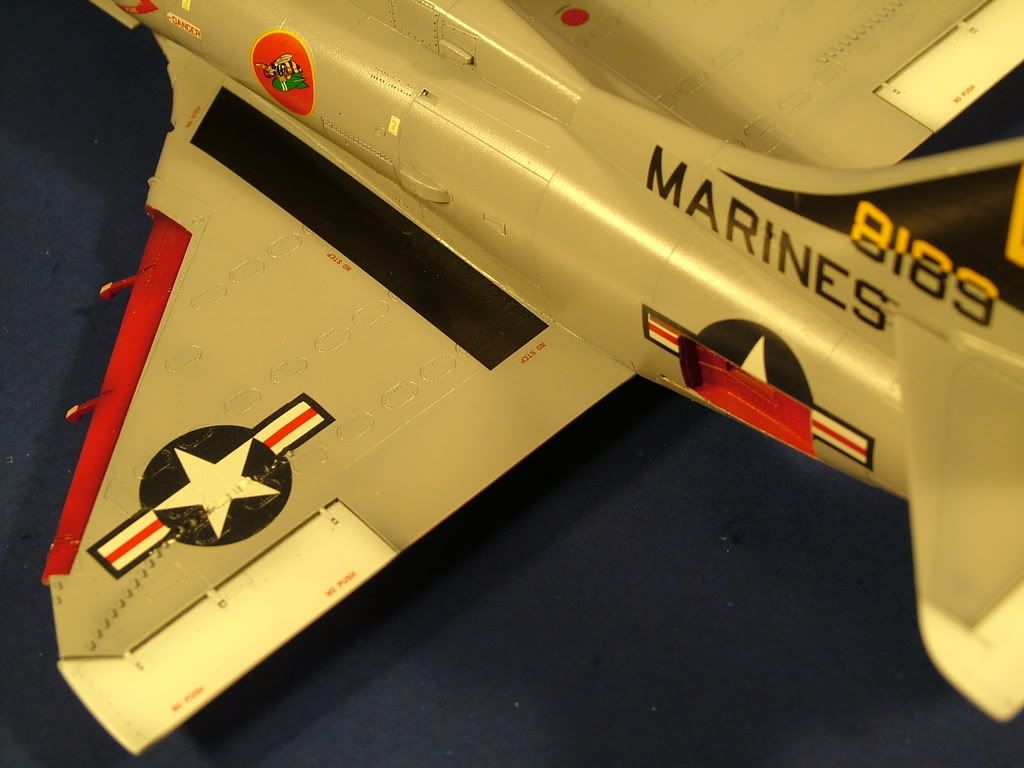
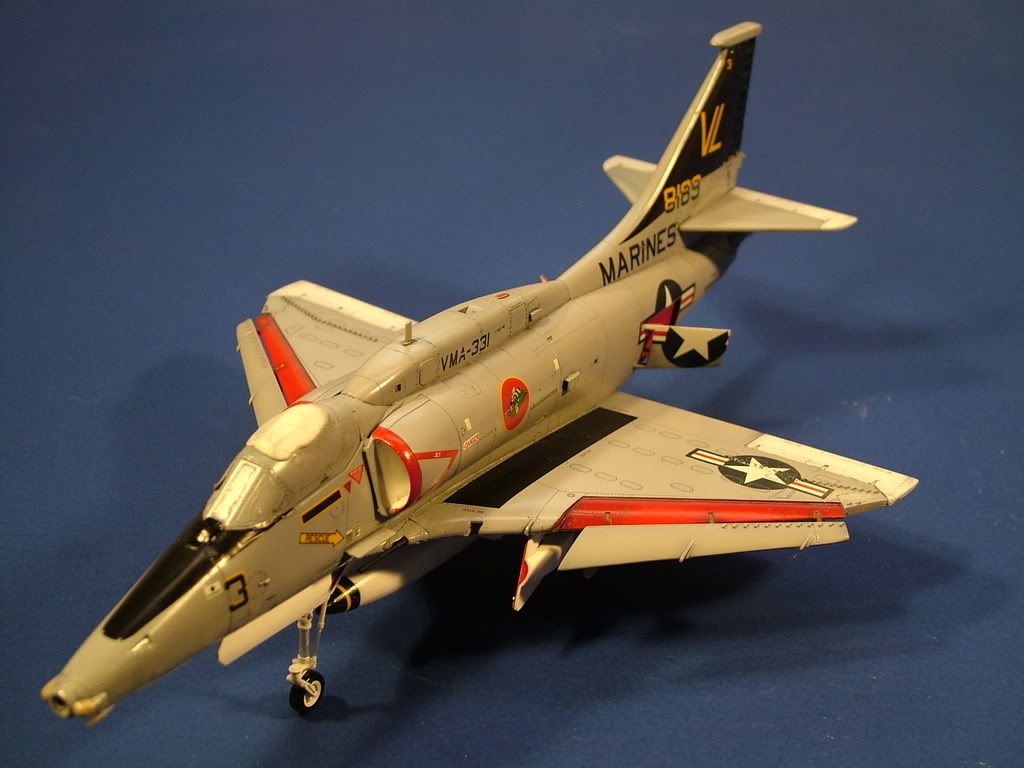
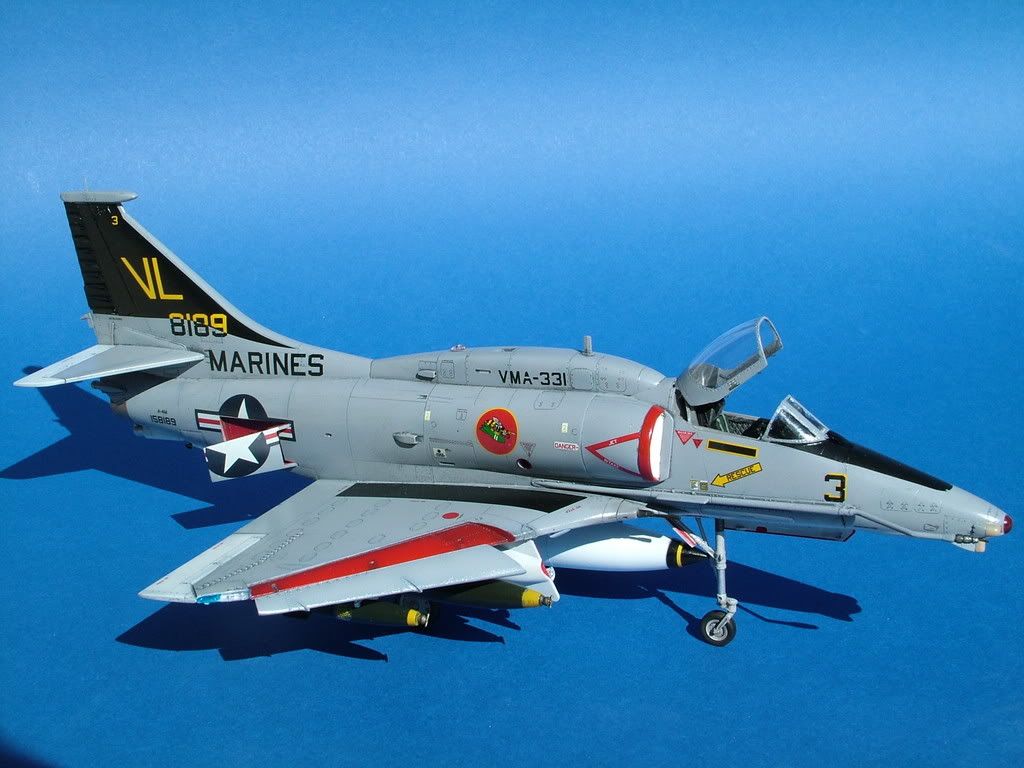
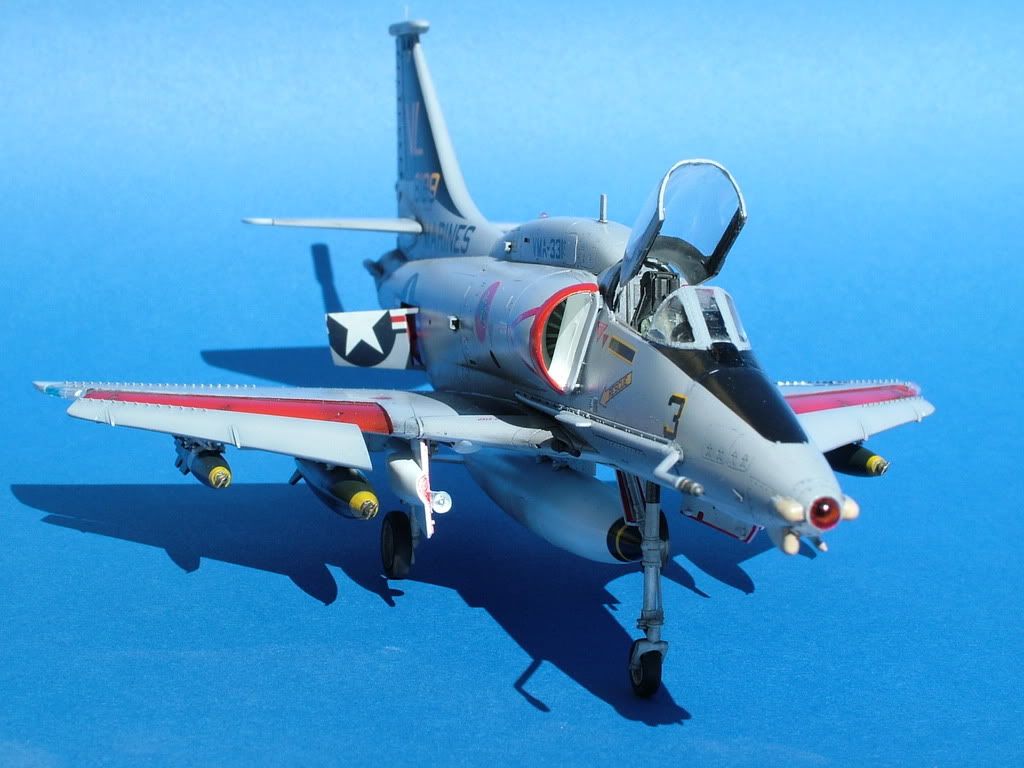
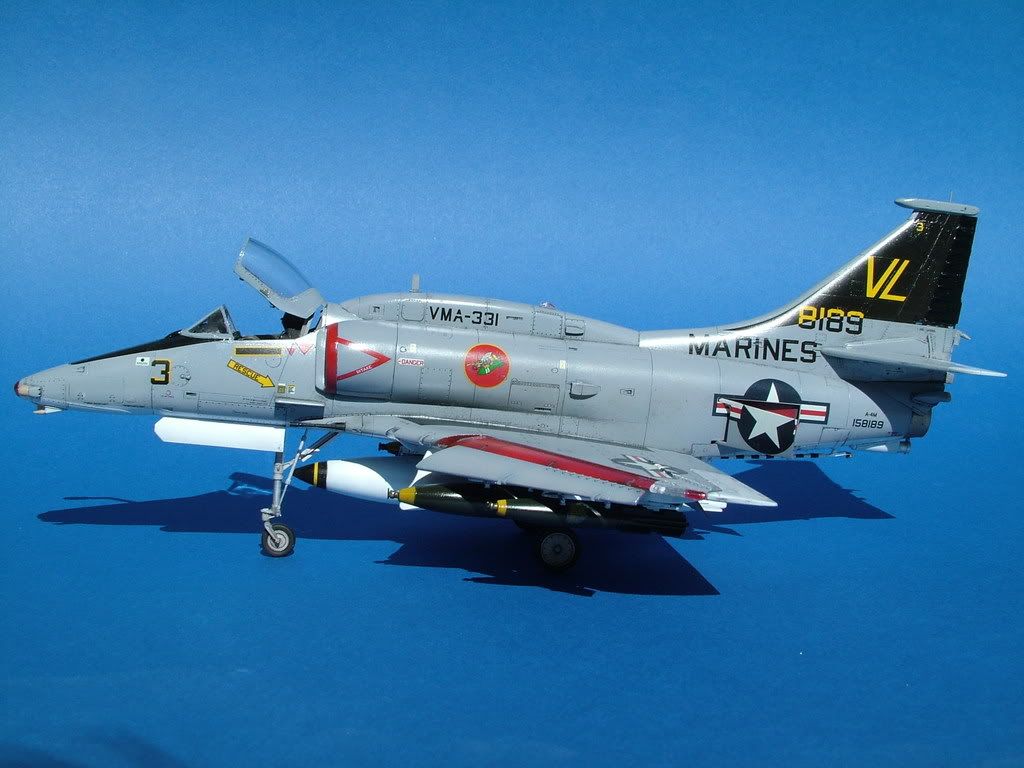
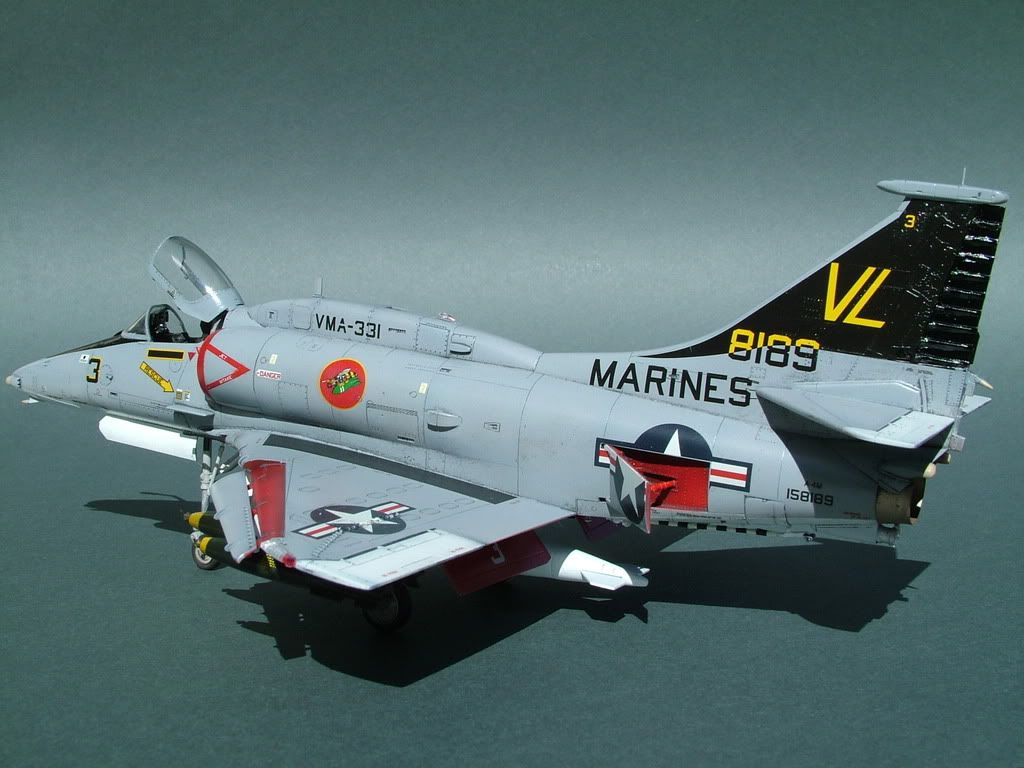
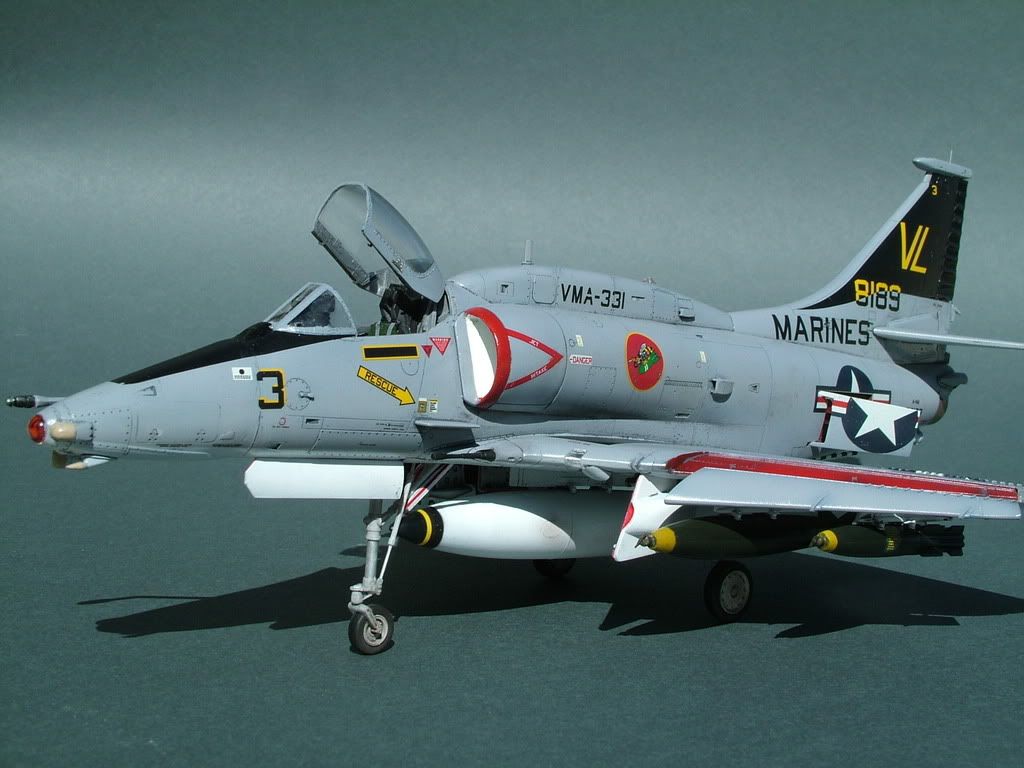
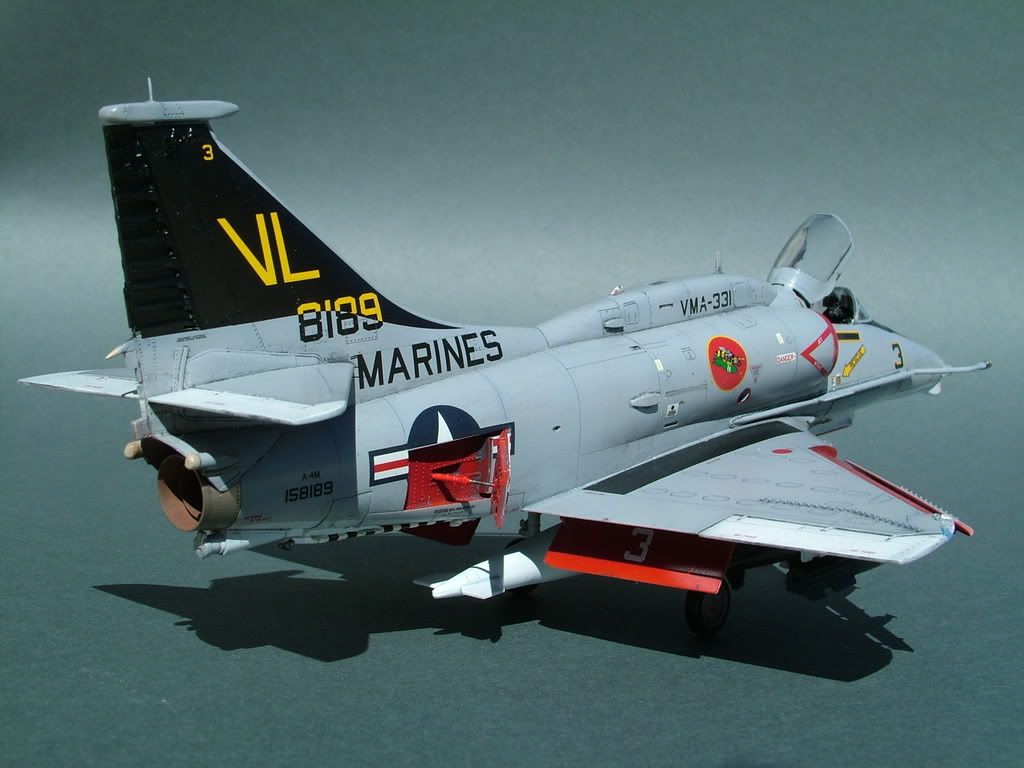
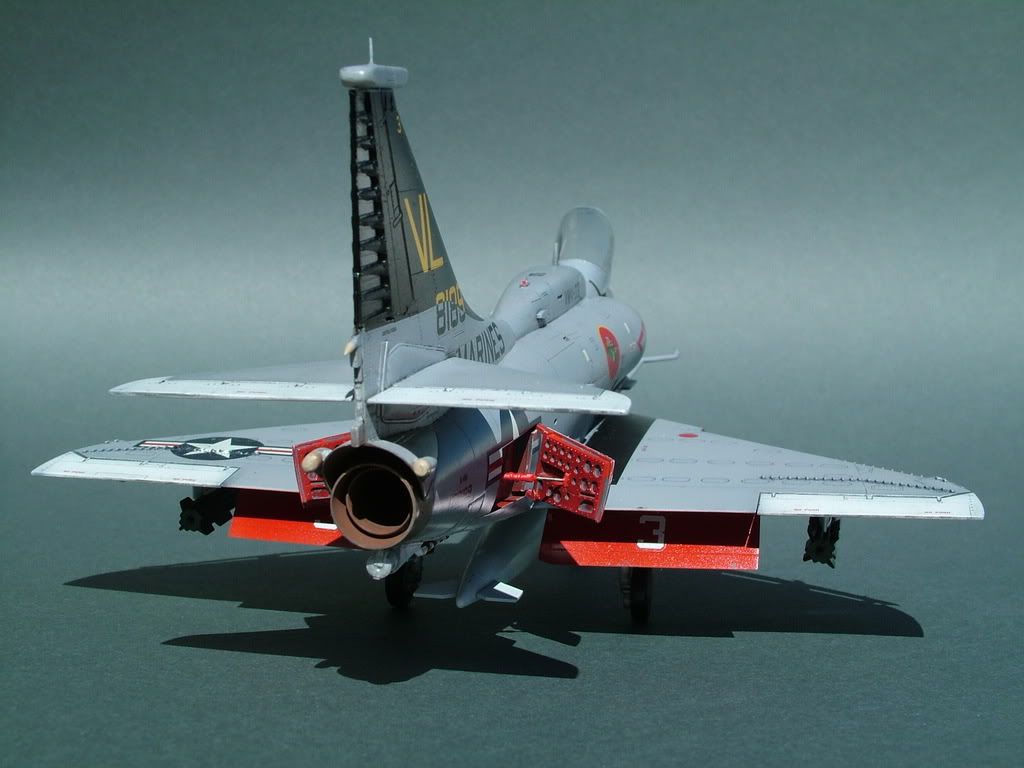
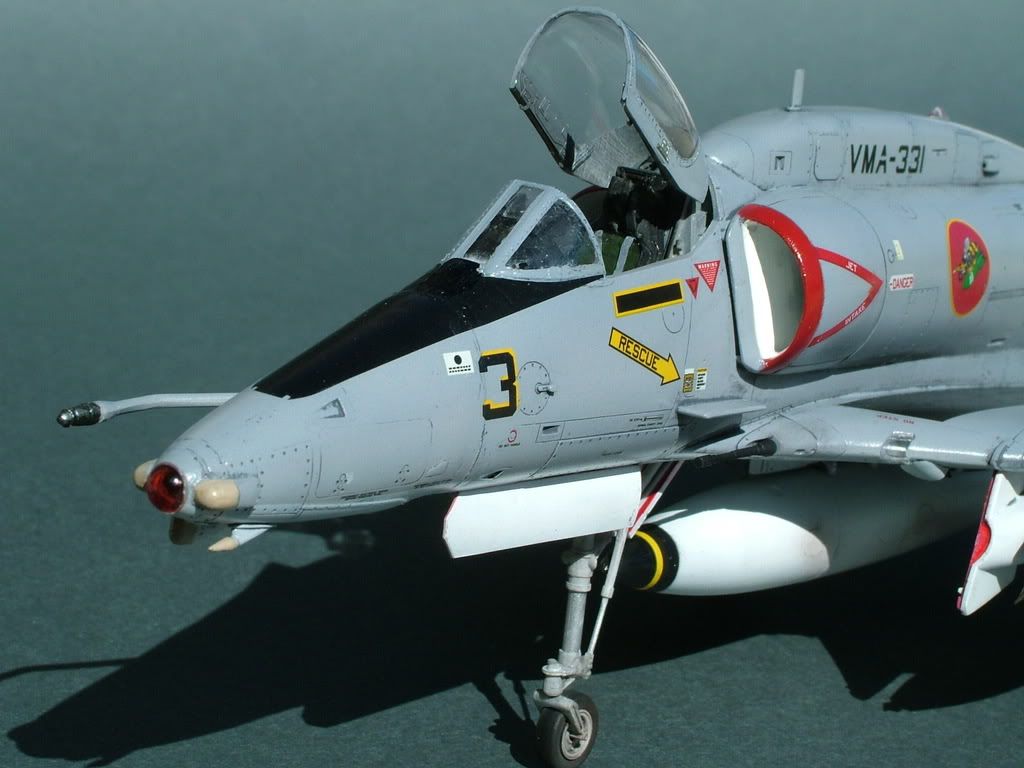
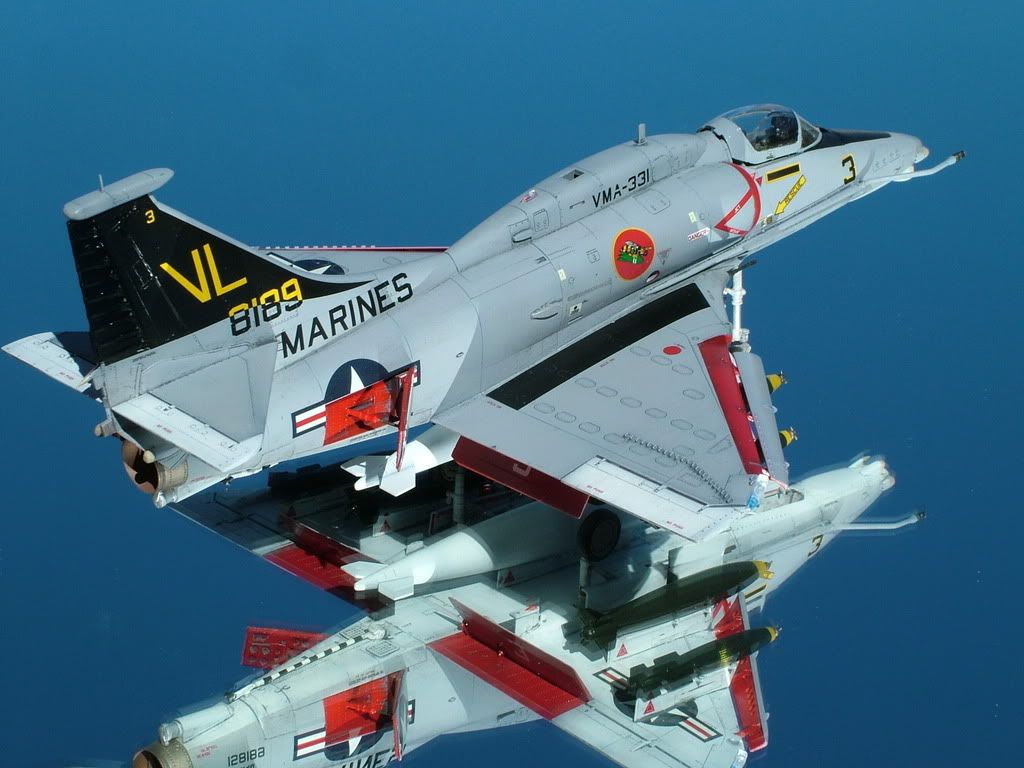
A-4M Skyhawk of the VMA-331 “Bumble Bees”
Jul 1970 - May 1971 - MAG 12 - BeinHoa AB
1:48 scale release from Hasegawa of an A-4M Skyhawk.Modeling the scheme of the VMA-331 known as “The Bumble Bees”.

Build Info:
Will be using the Tamiya paint line this time as the color scheme is quite basic and I like this particular paint line for its ease of use and I always get great results without too much of a fuss.
Pre-shading to be performed utilizing a Tamiya flat Sky Grey XF-19 as a primer coat, and a flat Black XF-1 for the pre-shading of various panel lines. The engine nozzle will be detail painted to simulate heat distortions .
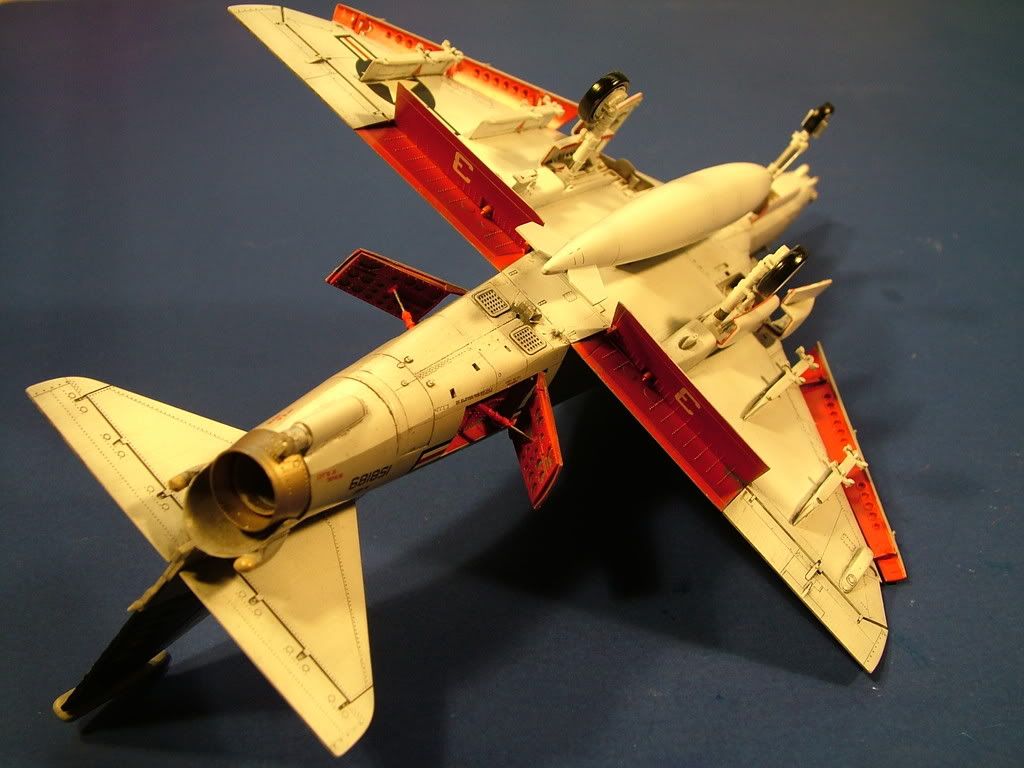
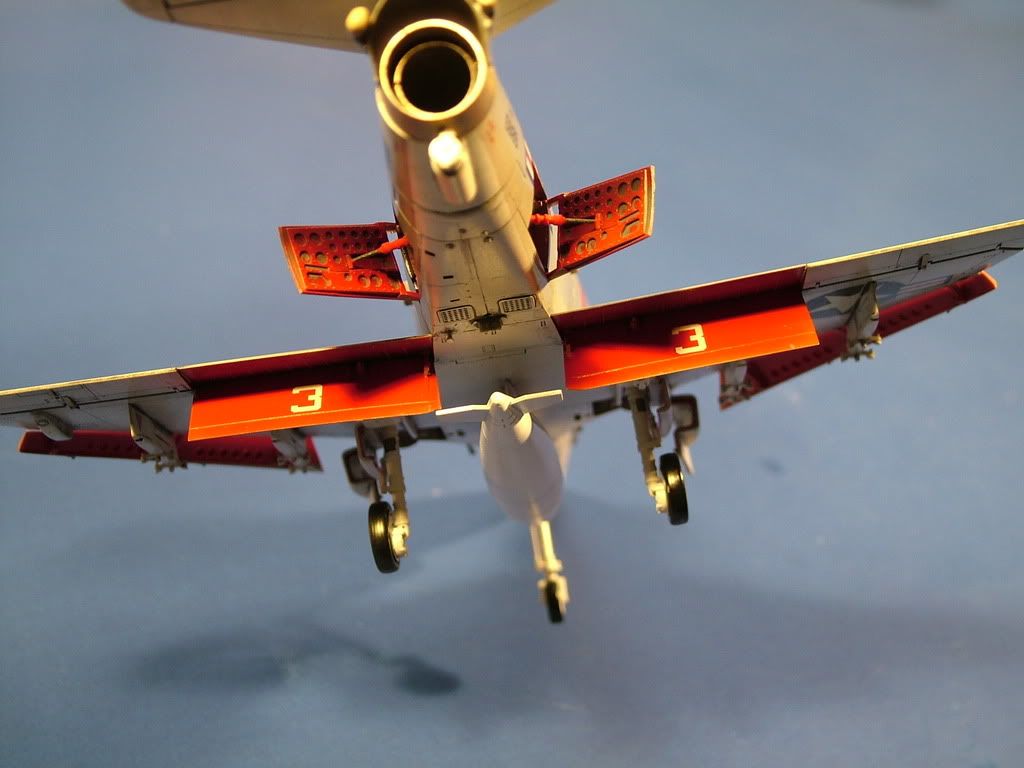
The flaps and slats will be dropped plus the speed brakes will be deployed in open position, the interior area will be painted with Tamiya Flat Red XF-7 and then sealed with Tamiya gloss clear.
The Cockpit will be overall Tamiya Neutral Grey XF-53, with some drybrushing here and there.
As is standard practice with Hasegawa, the only external options OOB you have on the pylons is a pair of external fuel tanks. As such I will be installing an external tank since rarely would you ever see an operational Skyhawk take off without them as the internal fuel load was small.
Bits of worn surfaces to be picked out with a silver artist pencil, some boot scuffs close to the cockpit will be simulated with black artist pastels, fuel stains etc on the wings will be simulated with artists’ pastels of burnt umber. Gun blast residue will be simulated with Bragadon.net weathering powder.
The next step will be then to be followed with Pro-modeler clay based washes (Dark Dirt, Light Dirt, Brown and Black) to accentuate the various panel lines and general weathering of the mono-tone camouflage and inside the wheel wells.
Finally a Testors acrylic semi-gloss coat will be applied to seal in all details.
Rerences used:
Tools & Sundries used:
Super Glue
Tamiya Extra Thin and Thick Cement
Squadron Green Putty
Tamiya Masking Tape various sizes
Evergreen Sheet Styrene and Strip
Various sanding sponges from MDC
1200 Grit Wet & Dry Paper
Dental Tools for scribing
P Cutter
Scribing Template
Micro Sol & Set decal solutions
Small curved scicors
Scalpel blade
Pin Vise
Pin drill bitts
Cocktail sticks
Future - for cockpit glass
Paints and Weathering
Tamiya XF-1 Flat Black
Tamiya X-1 GlossBlack
Tamiya XF-19 Flat Light Grey
Tamiya XF-2Flat White
Tamiya XF- Flat Red
Tamiya XF-69 Nato Black (For Tyres)
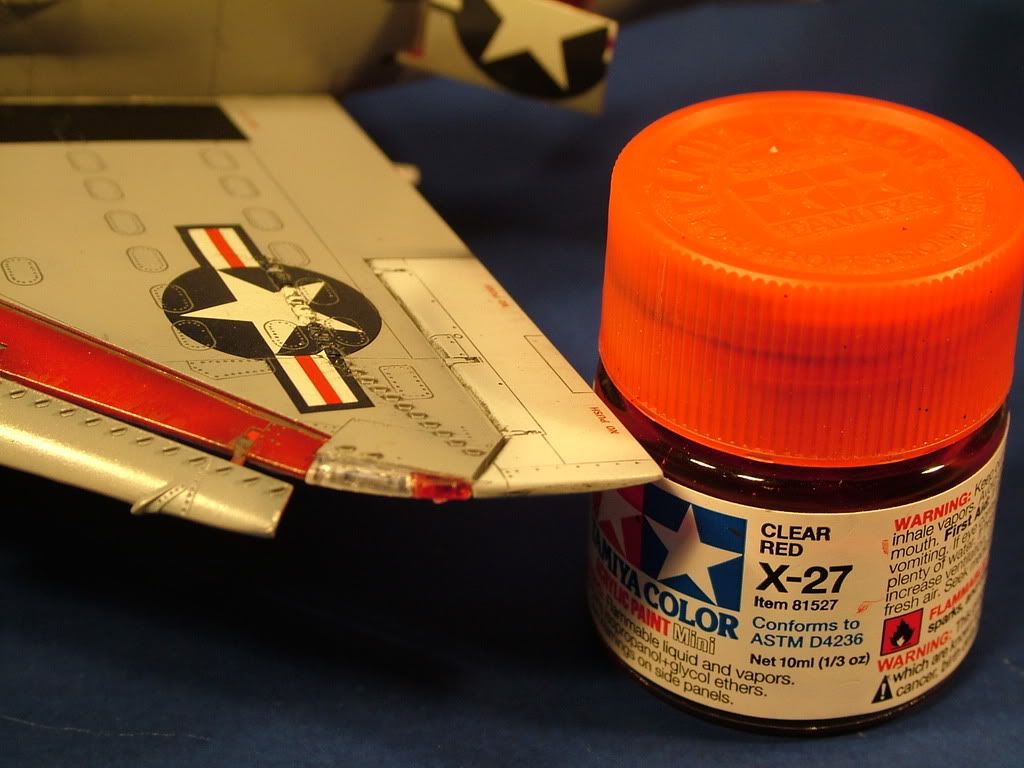
Tamiya X-27 Clear Red
Tamiya X-23 Clear Blue
Tamiya X-26 Clear Orange
Tamiya X-19 Smoke
Tamiya XF-67 Nato Green
Tamiya XF-61 Dark Green
Tamiya Xf-57 Buff for radome
Valejo Model air 050 Light Grey - for the top side Grey
Model Master Jet Exhaust
Model Master Laquer Thinner
Model Master Semi Gloss Laquer
Model Master Gloss Laquer
Sharpie pens for Red oulines of doors
ProModeller Dark Dirt & Rust Washes
WeatheringPowdersfrom http://www.bragdonent.com
Aftermarket Parts used:
Aires cockpit set #4280 to replace the kit version
Tamiya Weapons Set A
Box Art :
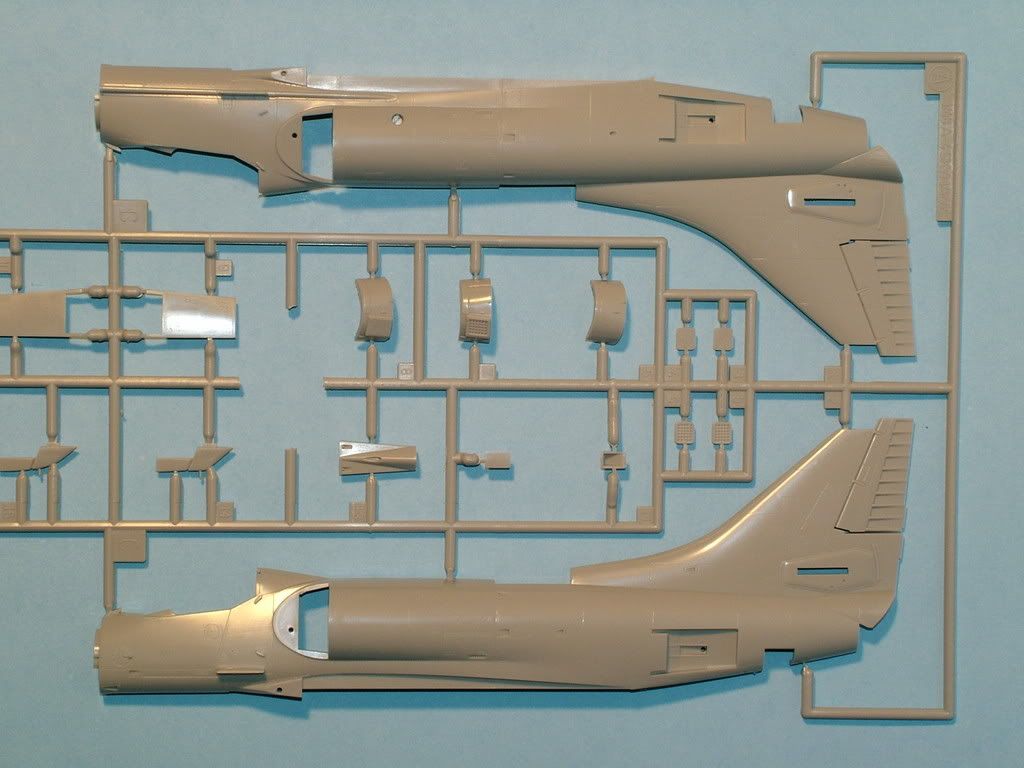
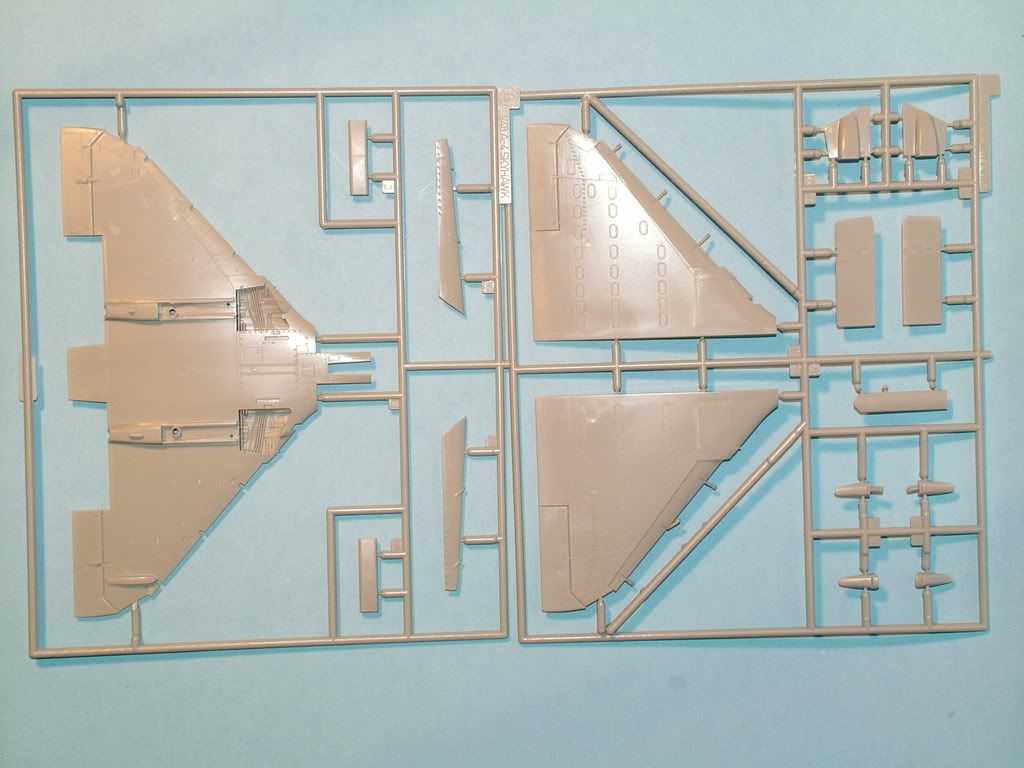
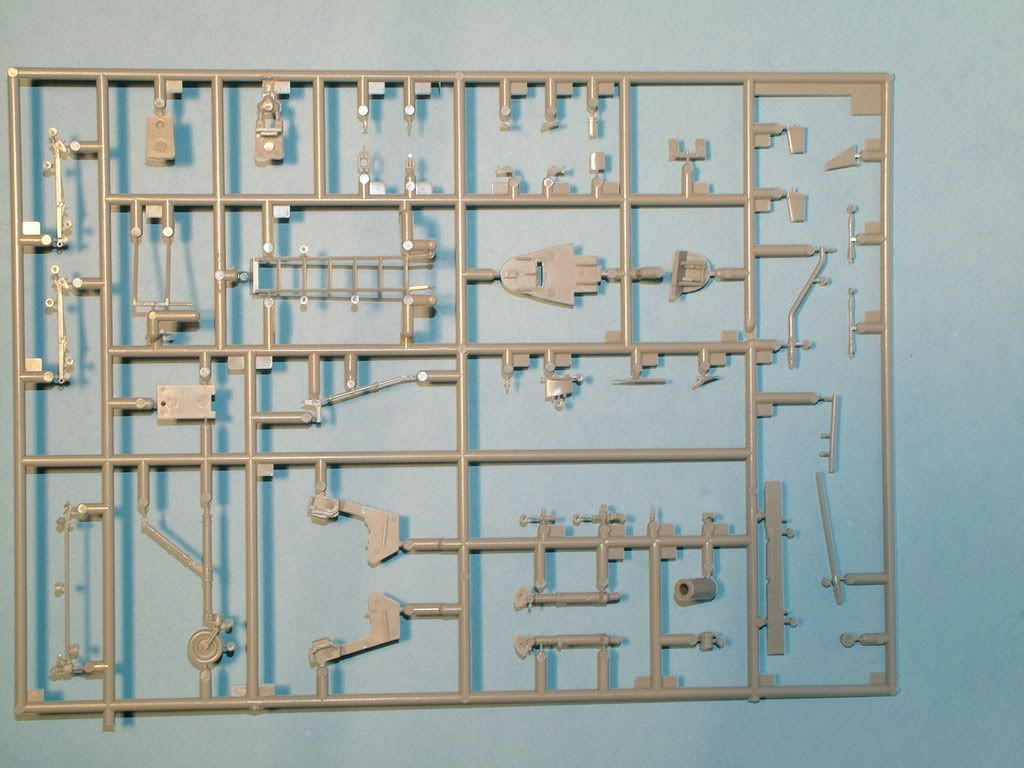
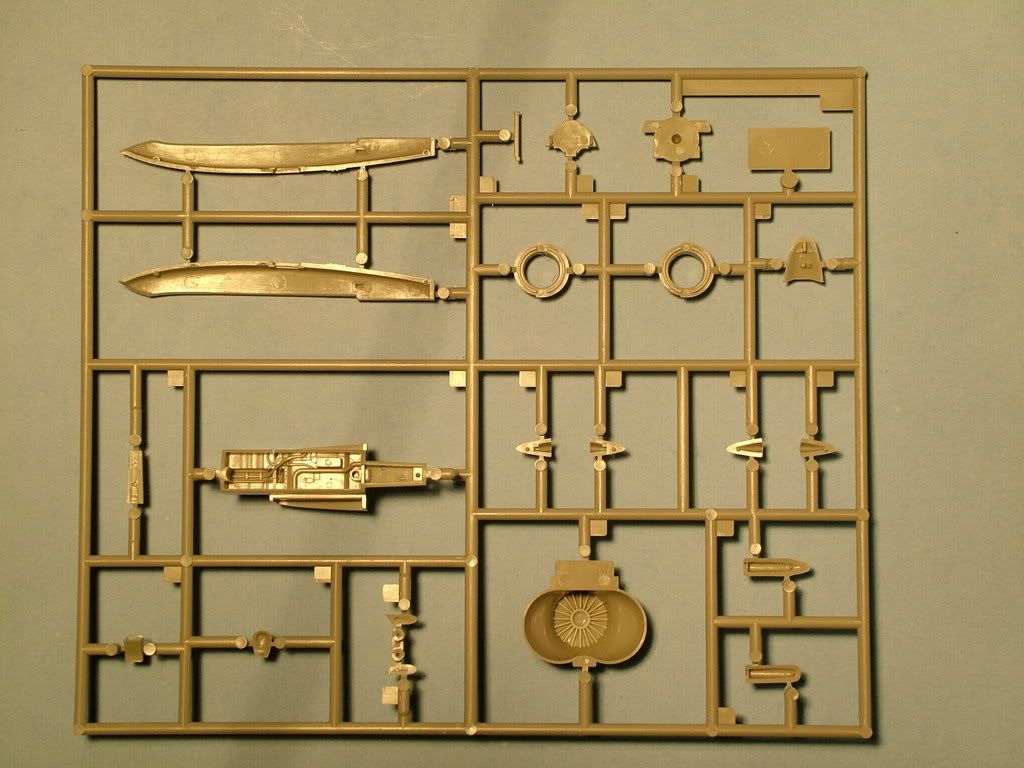
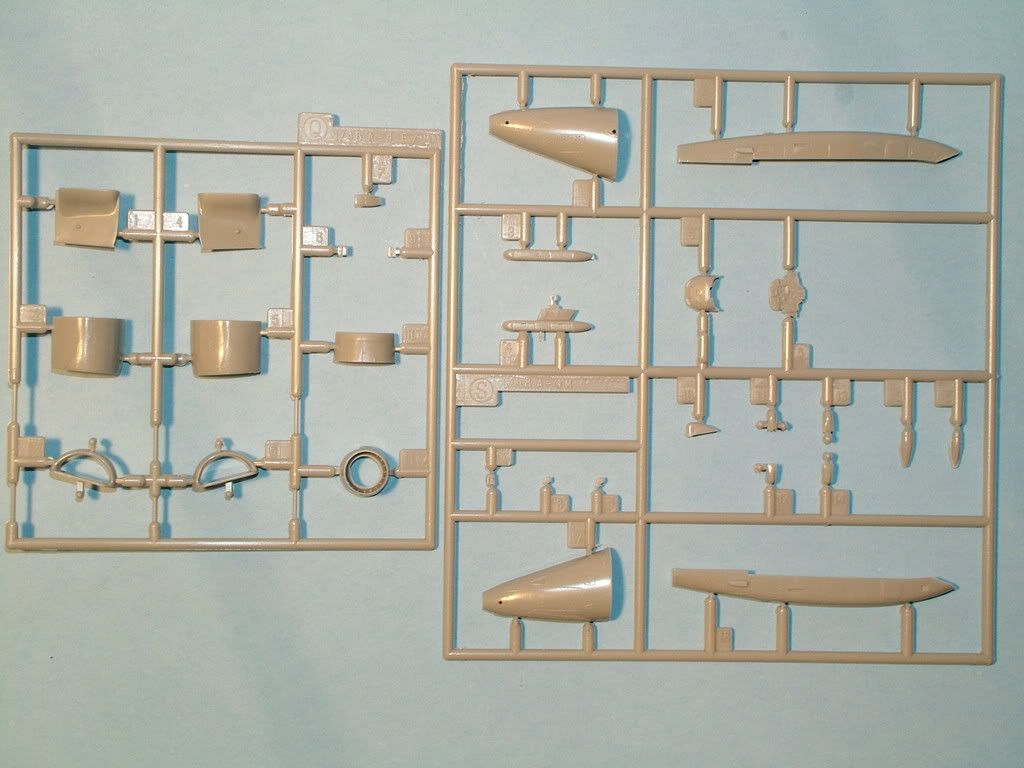
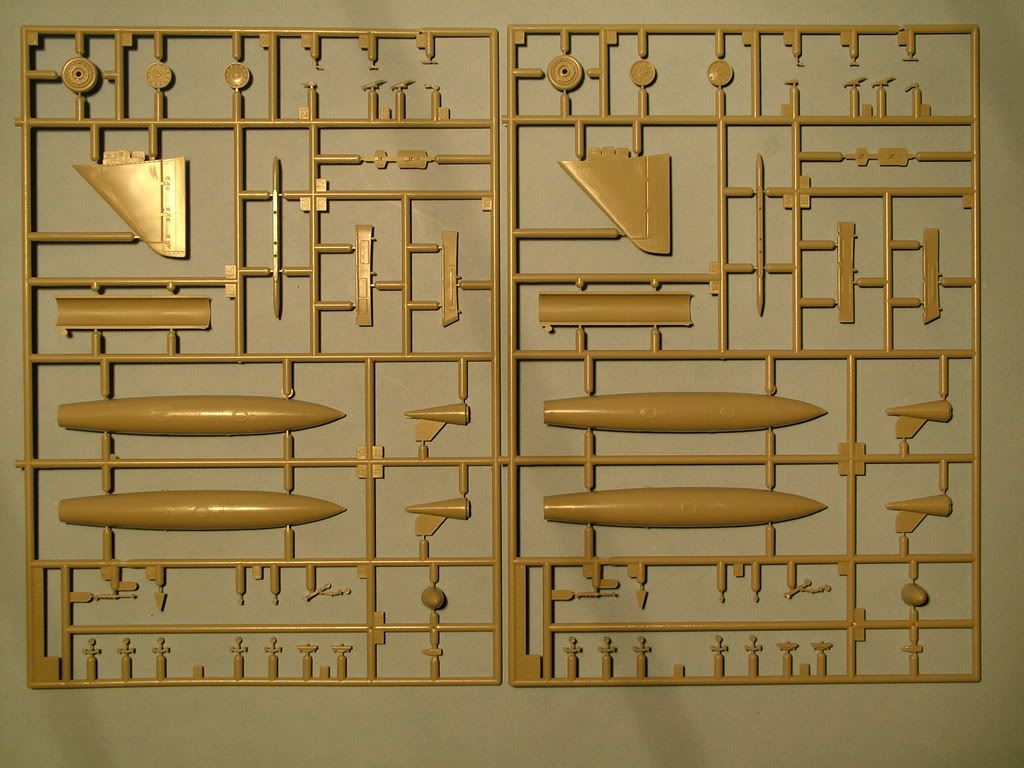
Kit overview:
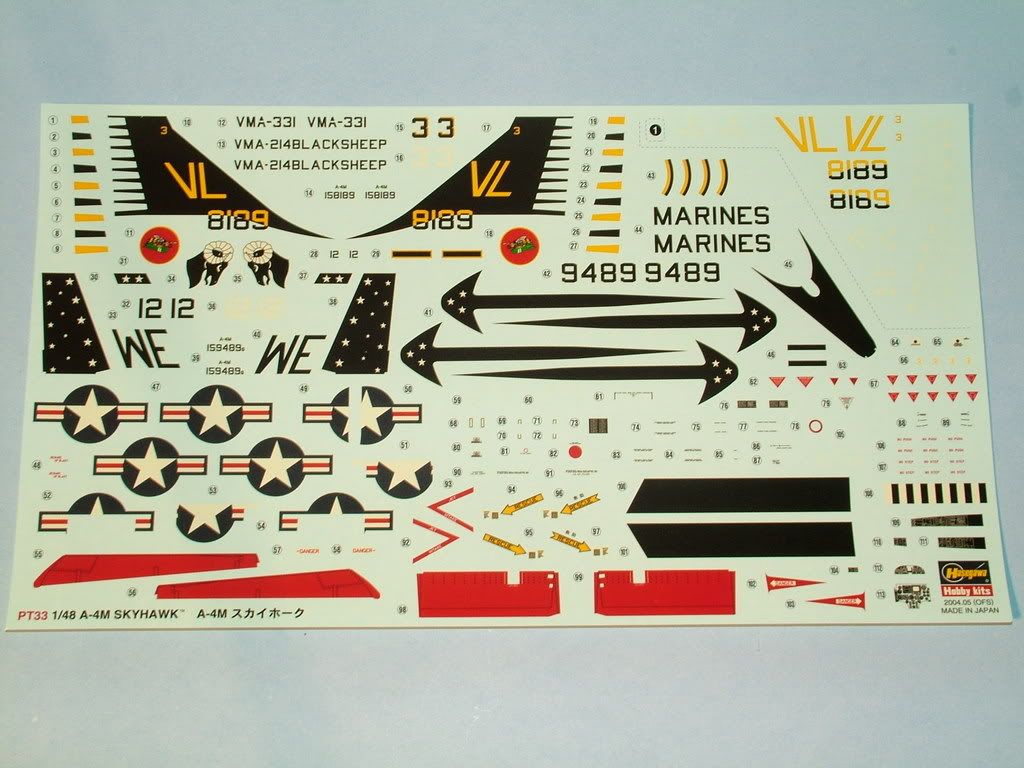
Kit Decal Sheet:
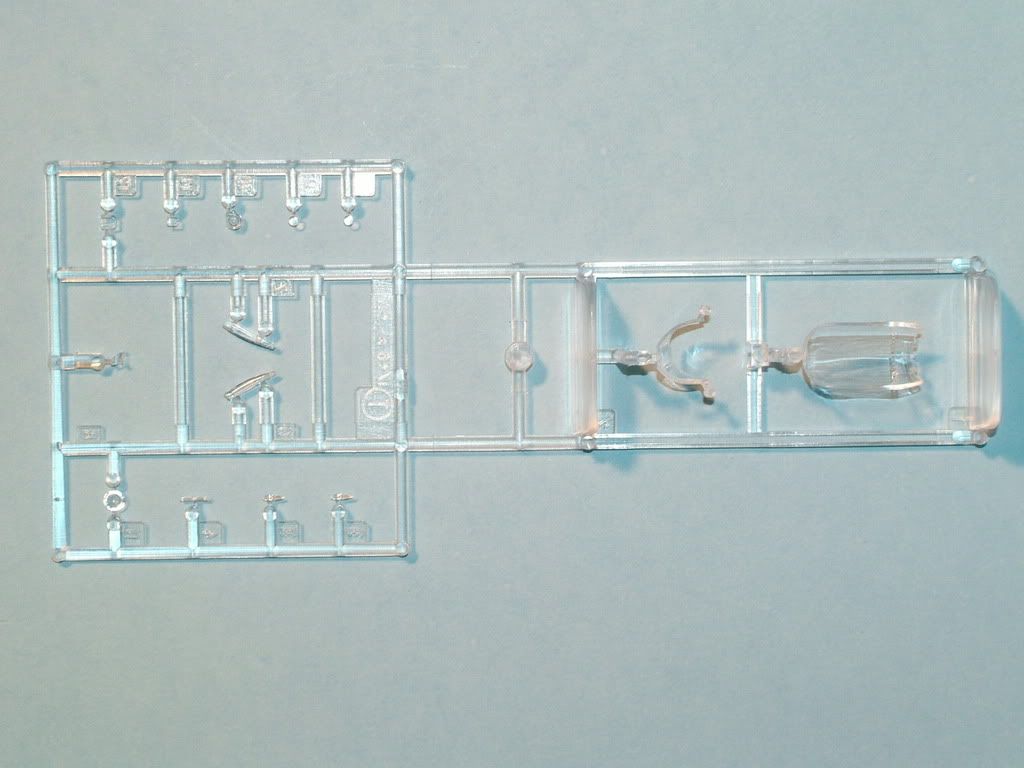
Clear sprue’s:
This clear tree is packaged separately and has nice shields molded onto the trees to protect the canopy and windscreed. Nice job Hasegawa!
Cockpit sub assembly:Aires CockpitReplacement:
The cockpit isn't bad in the Hasegawa Skyhawk series and this one is no exception. But.... but I couldn't resist the temptation to work another Aires cockpit...it was on sale (honest)

First up cleaned up the casting blocks and here is a comparison of the Aires vs. the Kit version: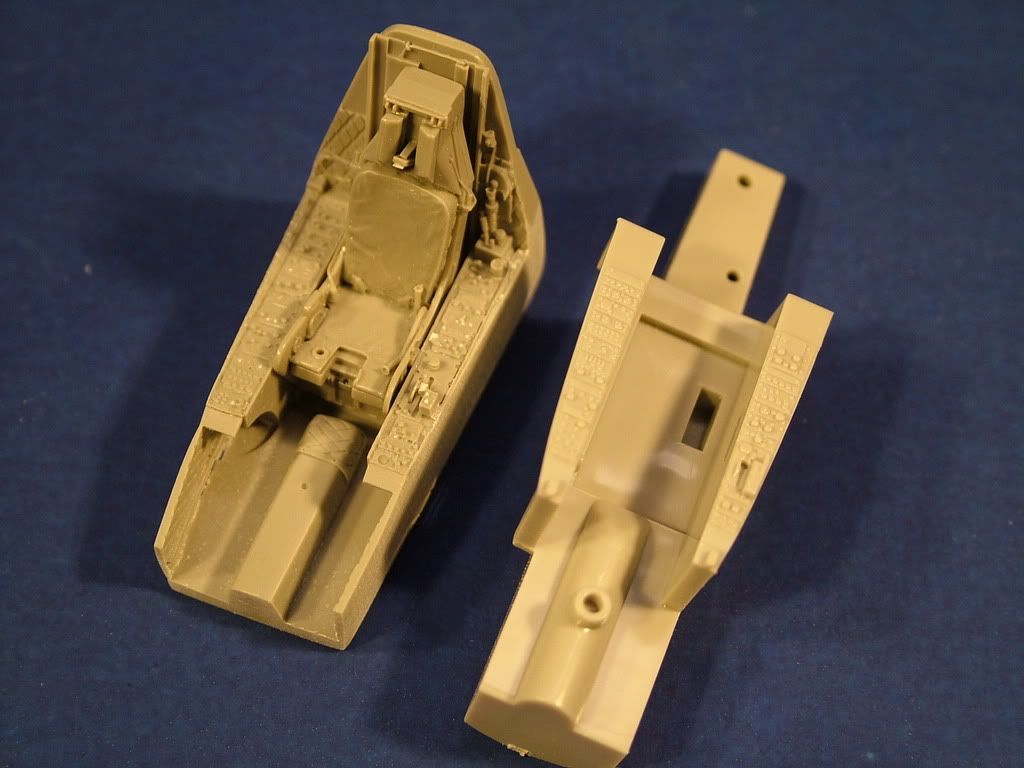
Side Panels all thinned down to "paper thin" and the main tub part sanded down to shape.
Side panel and the tub all lined up and dry fitted inside the main fuse: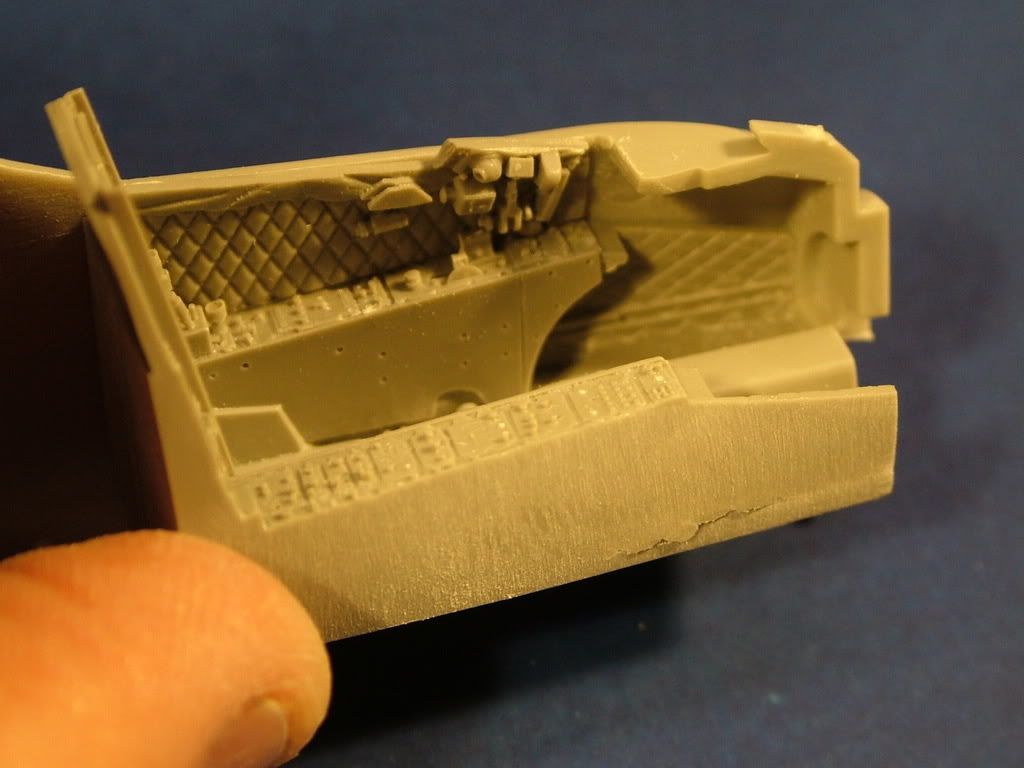
Wing build assembly:
Underside,the wing consists of three pieces total, plus two flaps and two slats: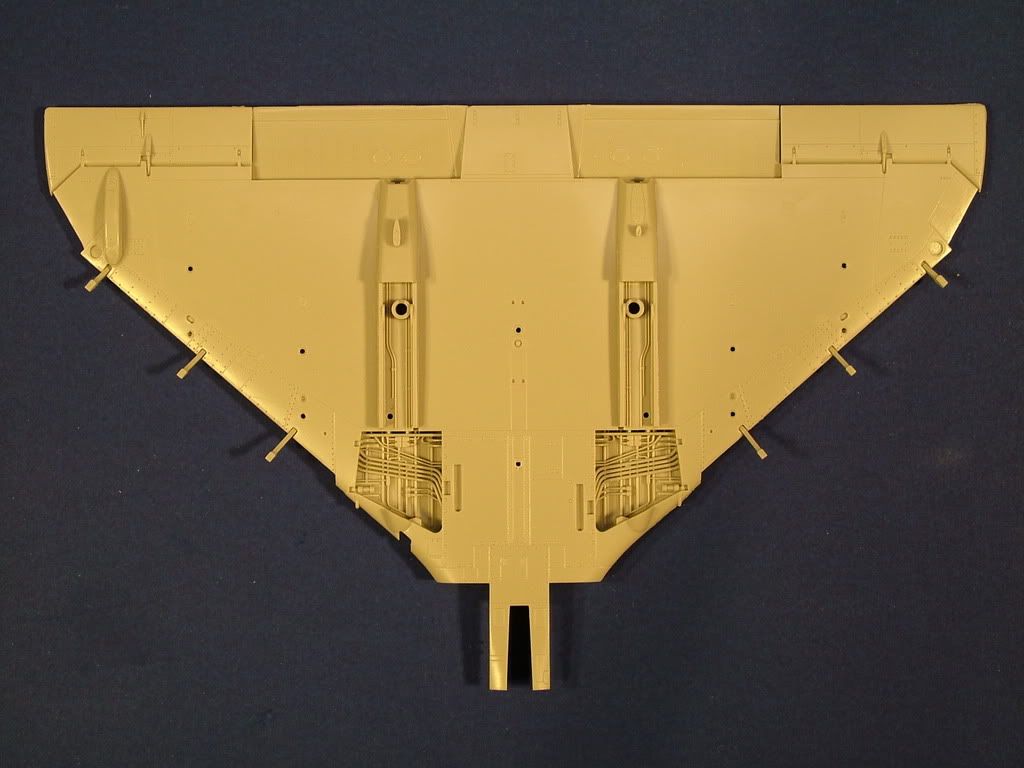
Very much liking the inner wheel well details: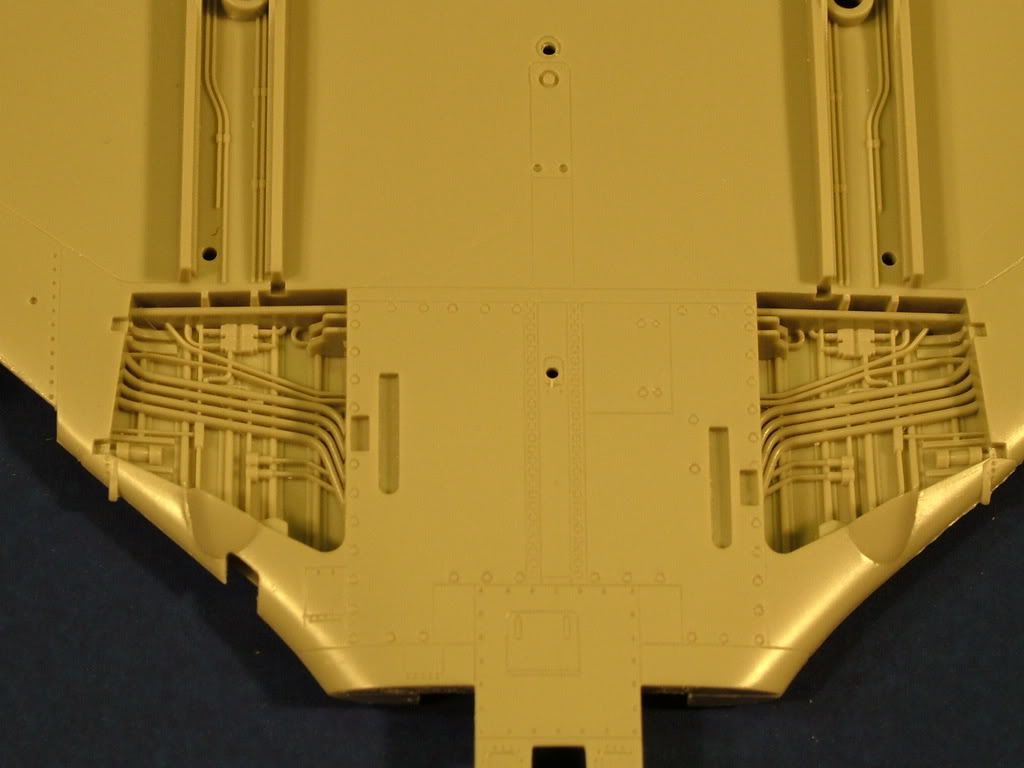
Elevators/Ailerons& Flaps and Slats sub assembly
Main Flap assembly, all cleaned up,some small ejector pin marks, sanded down and the main panel scribed back in.
Left One is finished up, right one you can see the ejector pin marks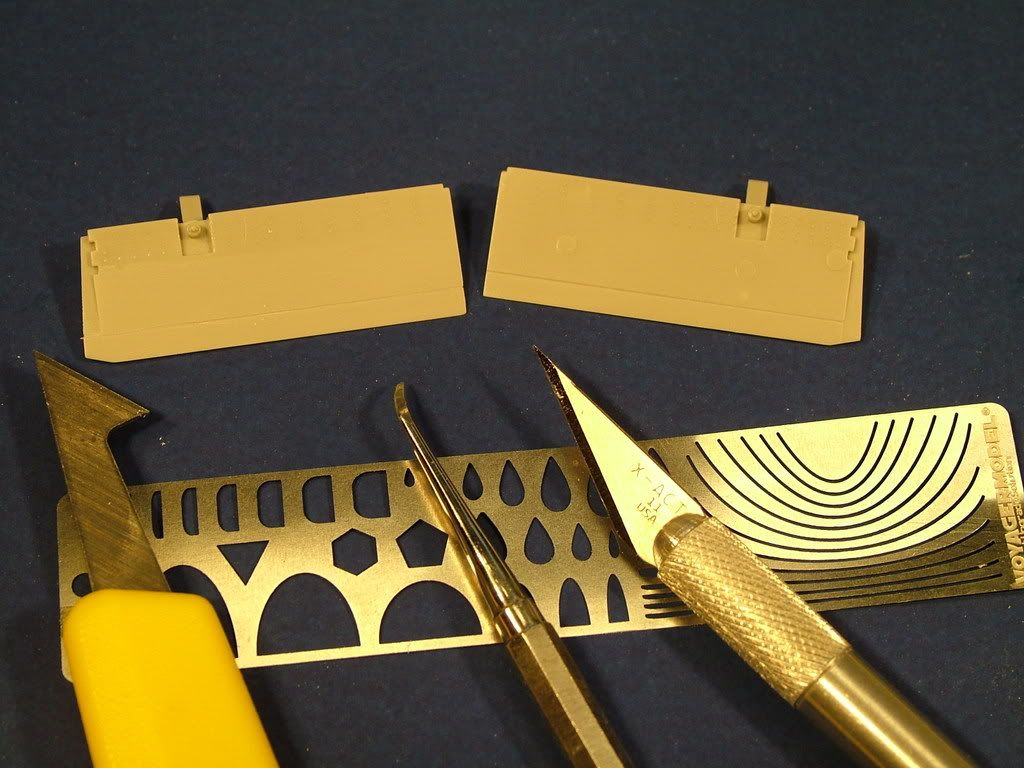
Flaps posed on: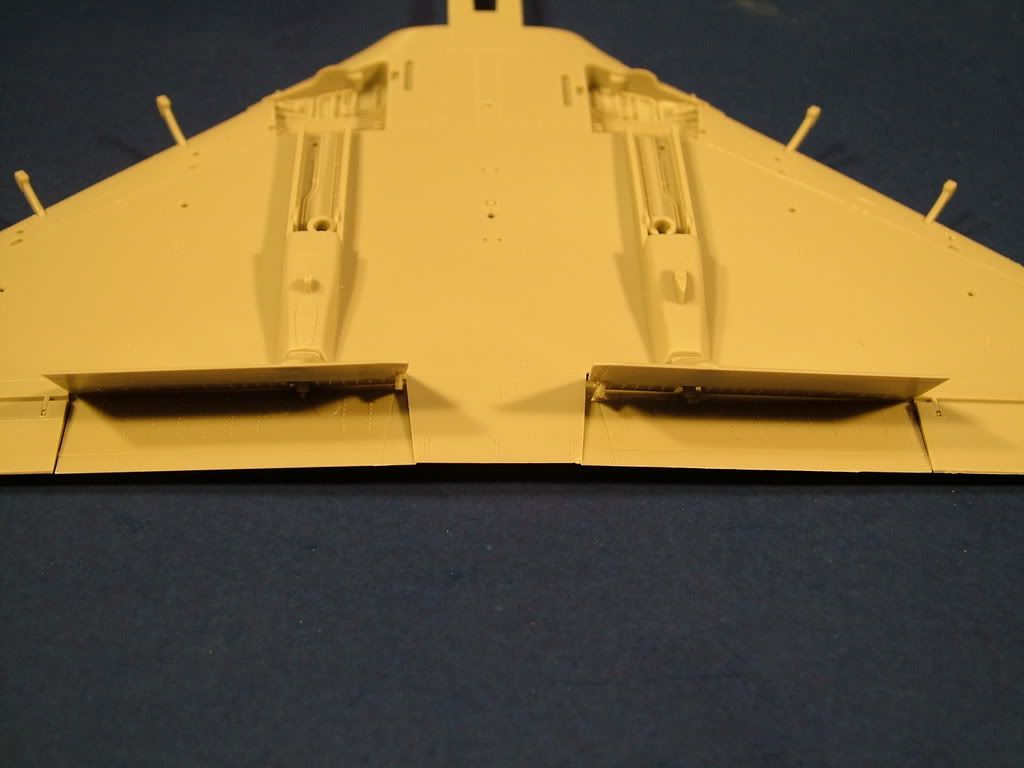
Bottom one is just posed on, top all sanded, re scribed and glued in: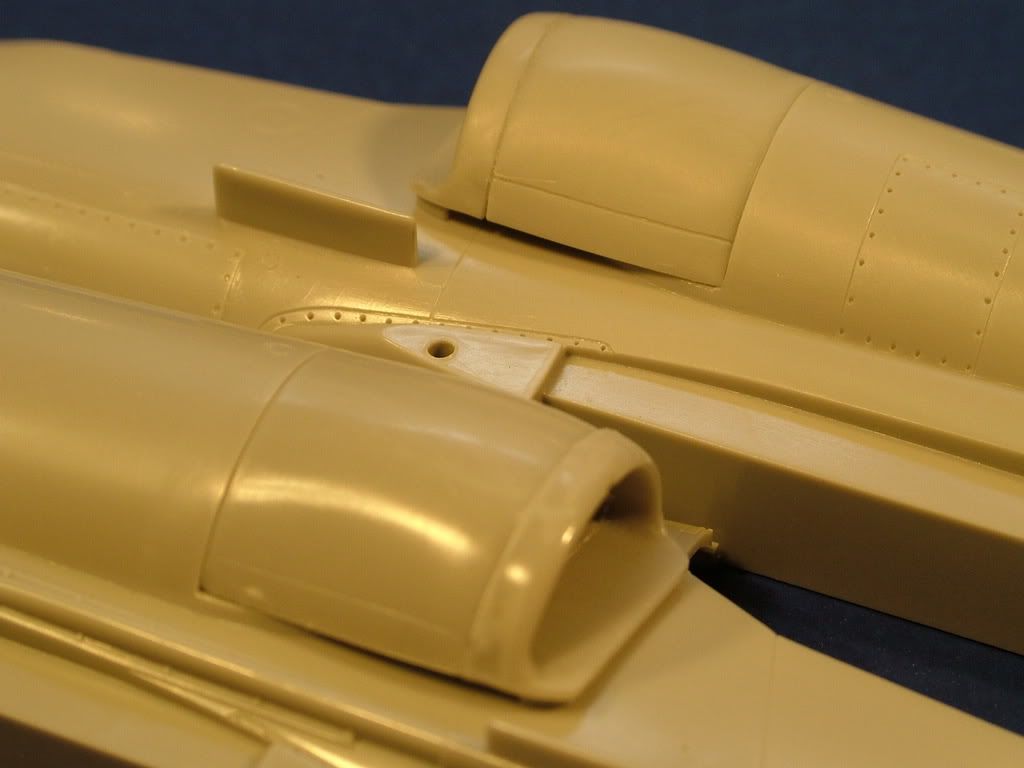
Worked the intakes and sanded them down nice and smooth.
Lot's of sub-assembly's for small parts cut from sprues and cleaned up, sanded smooth:
Main fuselage build:
Some significant sanding and matching up of the bottom nose gear wheel well took most of my day.
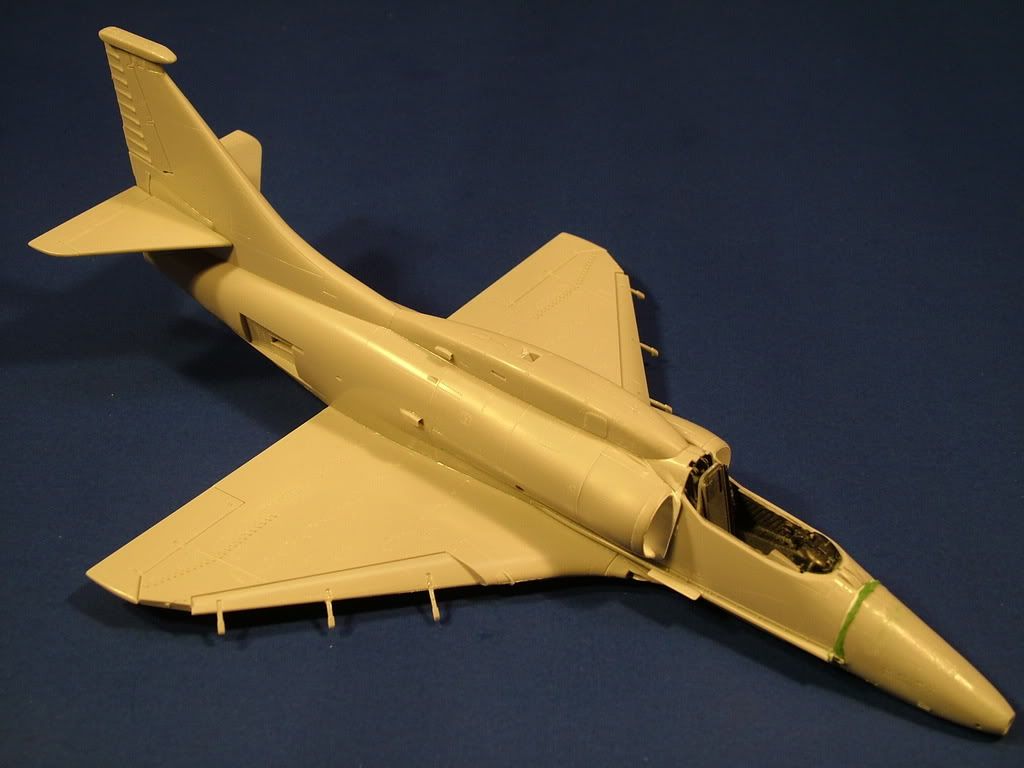
All in all I got her all dry fitted together.
Nothing glued....but she is in, without major strain on the plastic nor gaps anywhere.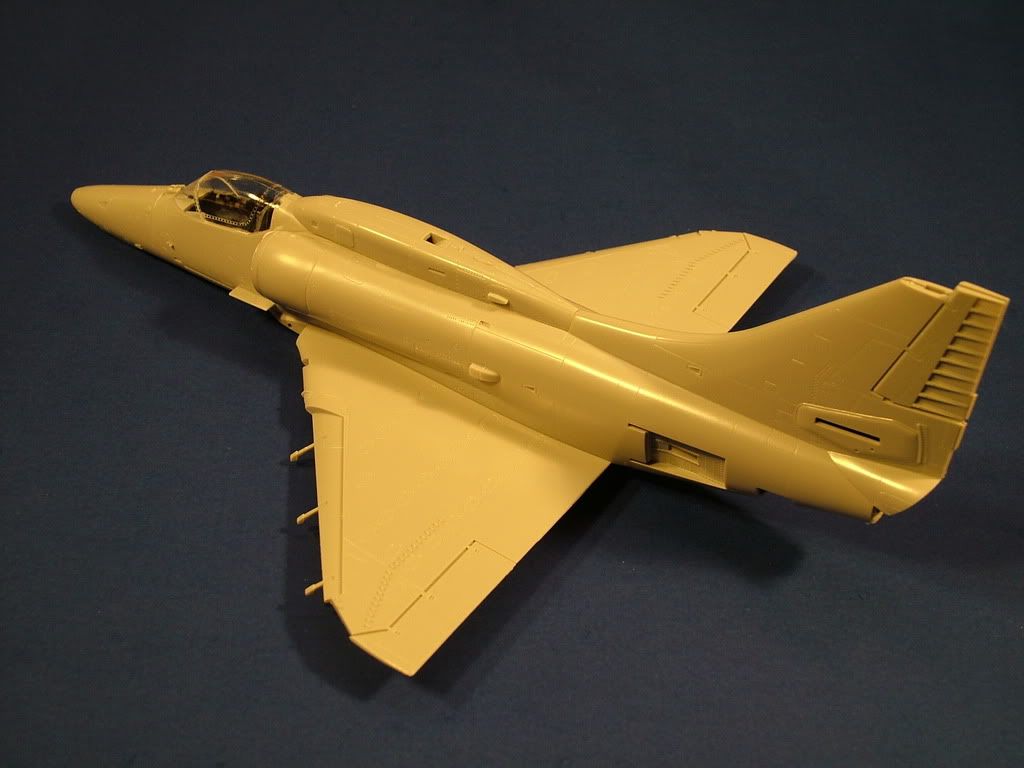
Painted up the rear exhaust and did the little trick of "rolling paint" like Phil shows in his F-18 build as to fill the inside seam.
Overview of the cockpit, still nothing glued, the top "gap" is just because it is all "pressed together" right now.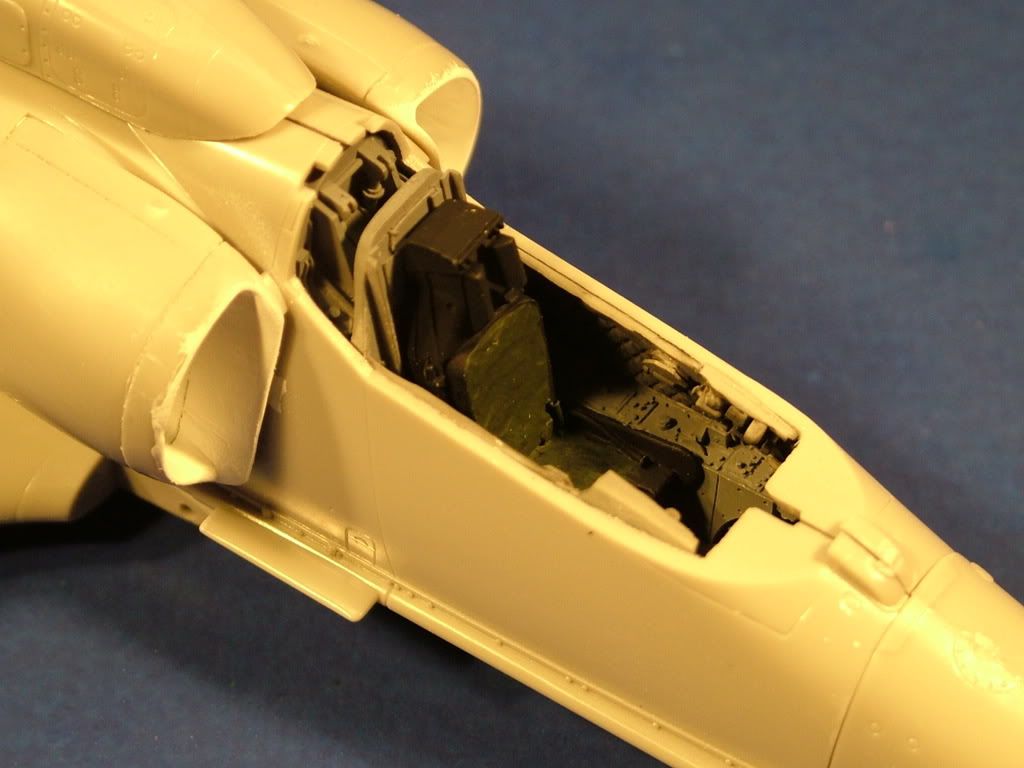
Quite challenging day fitting, sanding, fitting sanding, checking.
After inserting the nose wheel bay she ended up with a gap in the nose cone to fuse join, so ended up going back and forth with dry fitting her.
Tail parts and elevators, main wing all mated up and glued together without ANY gaps....so I thought I was home free.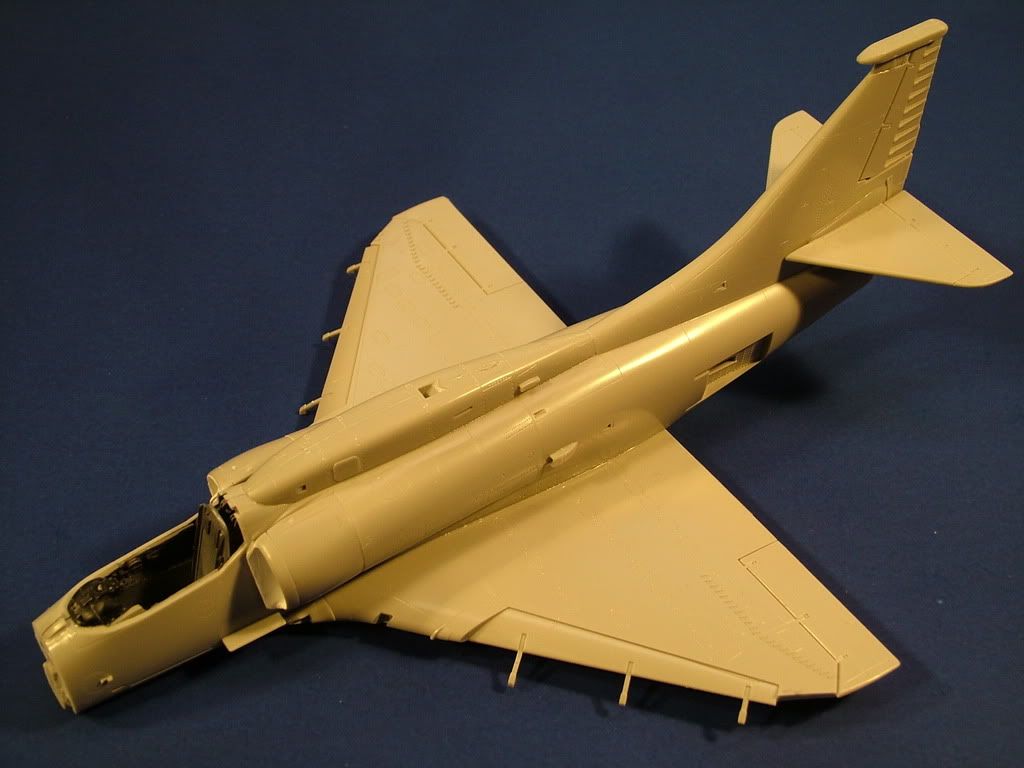
Nose cone with lead solder "weight" super glued in:
Nose cone and tail cone on and filled with just the slightest amount of Mr Surfacer 1000:
Bottom of the tail conesanded smooth afterMr Surfacerdried, then the Engine tail cone was glued on... and first primer coat of white in the main wheel bays:
Nose section with Squadron Green Putty:
Did some minor sanding around the main joins and hope to start re-scribing some of the detail back in.
Also had the cockpit front glass and main canopy dipped in Future and placed under a cup to let dry for the next 24 hrs.
Weapons build / installation sub assembly:
Hasegawa Weapons set: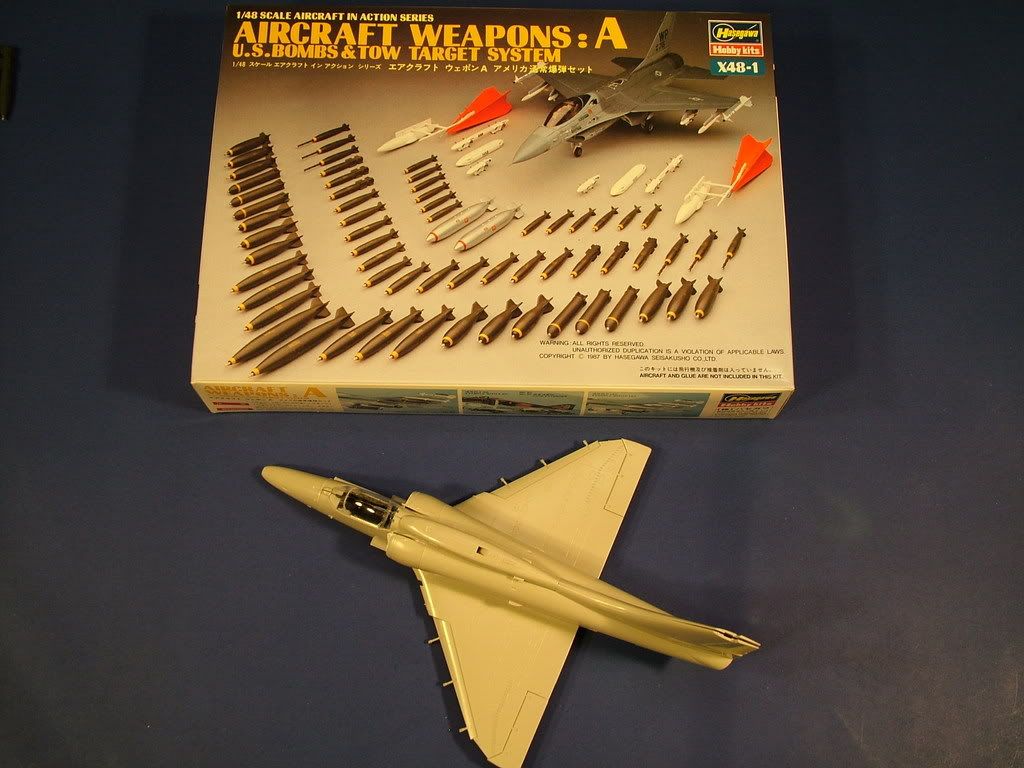
Ingredients for success: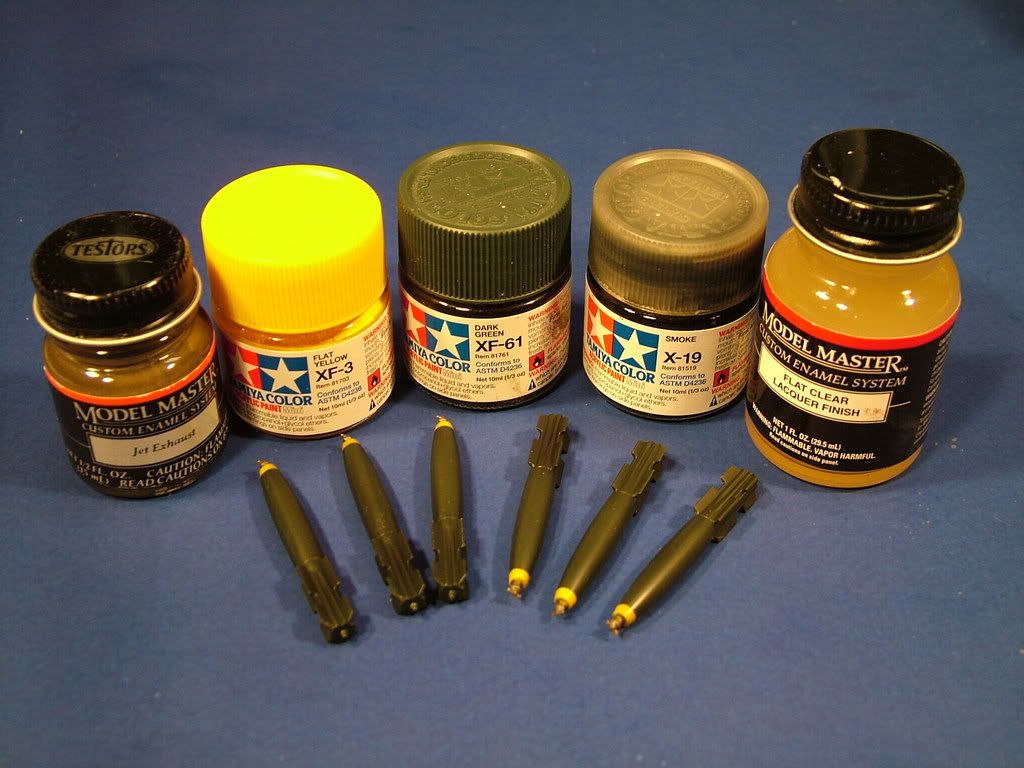
Painted the bombs overall Tamiya FlatDark Green over the top of the Black Green prior applied, then Tamiya Flat Yellow. Used Testors Metalizer Jet Exhaust as that mimics the coppery color of the fuse better.
Then a coat of Tamiya smoke to provide depth to the retarder fins and tone down the bright yellow. Once that was dried used Testors laguer Flat coat to seal it in.
Prepped the cockpit glass and canopy with a second dip in Future. Cleaned up all themany small parts to count.
Checked the seam lines with some Tamiya Dark Grey brushed on neat. Sanded down everything as smooth as possible. Lightly re-scribed where needed. Then started installing all the little antennas, fueling probe, etc.
Seam Check Top: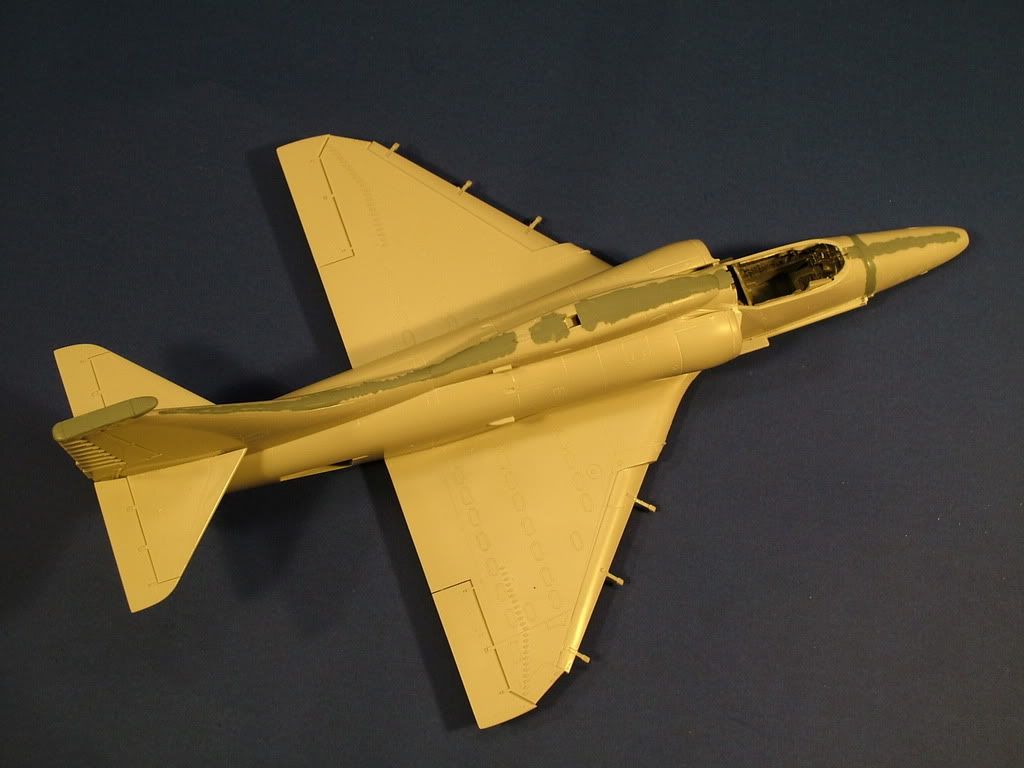
Seam Check Bottom:
Once all the small parts where glued on...time for some Plastic Prep.
Starting to look like a "Heinemann's Hot-Rod":
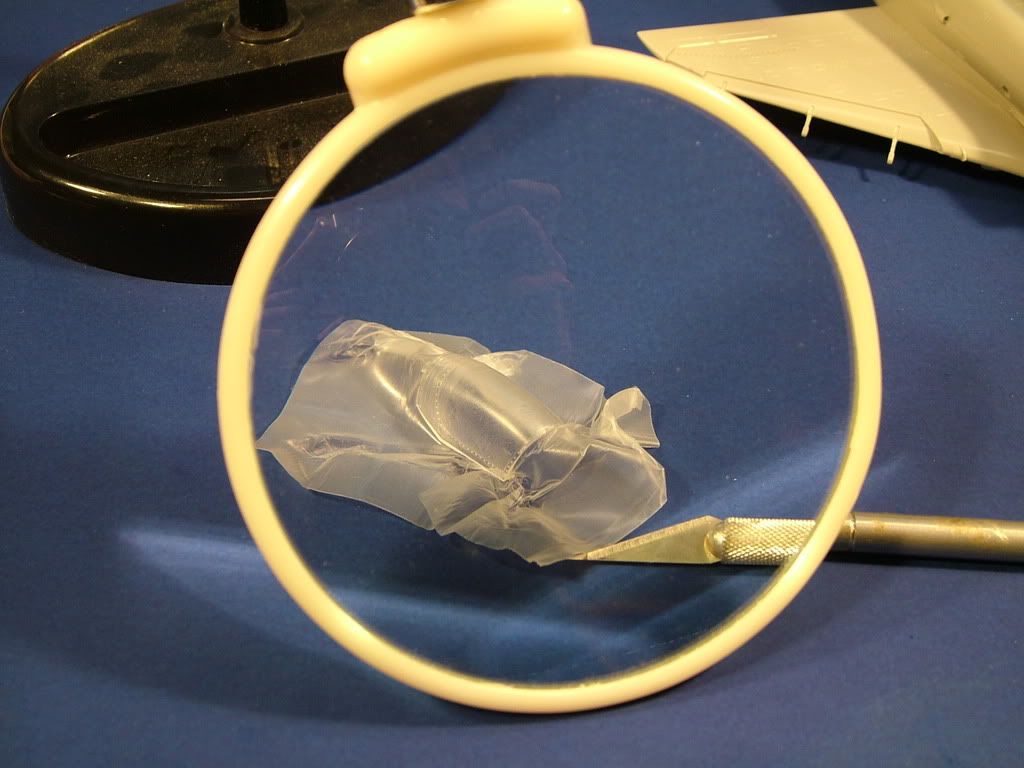
Para Film usage to trim out the cockpit glass:
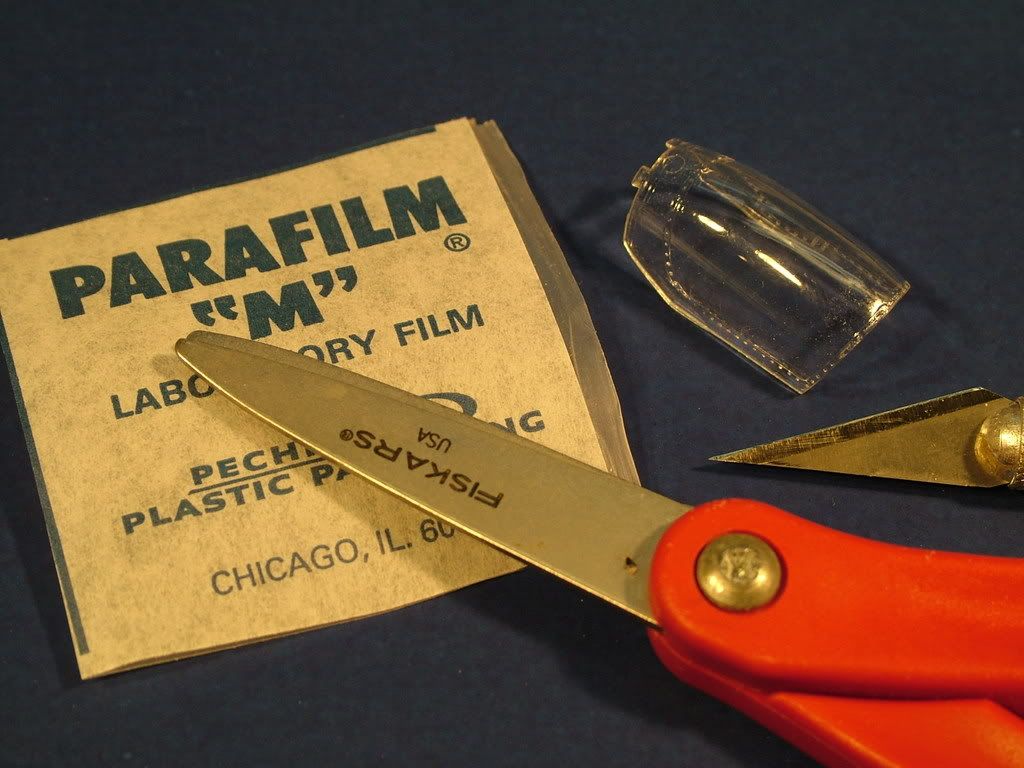
All pulled over the canopy, warmed up with finger pressure until it all was smooth as could be:
Excess trimmed of using a brand new scalpel blade:
Just follow along with your knife on the cockpit trim. 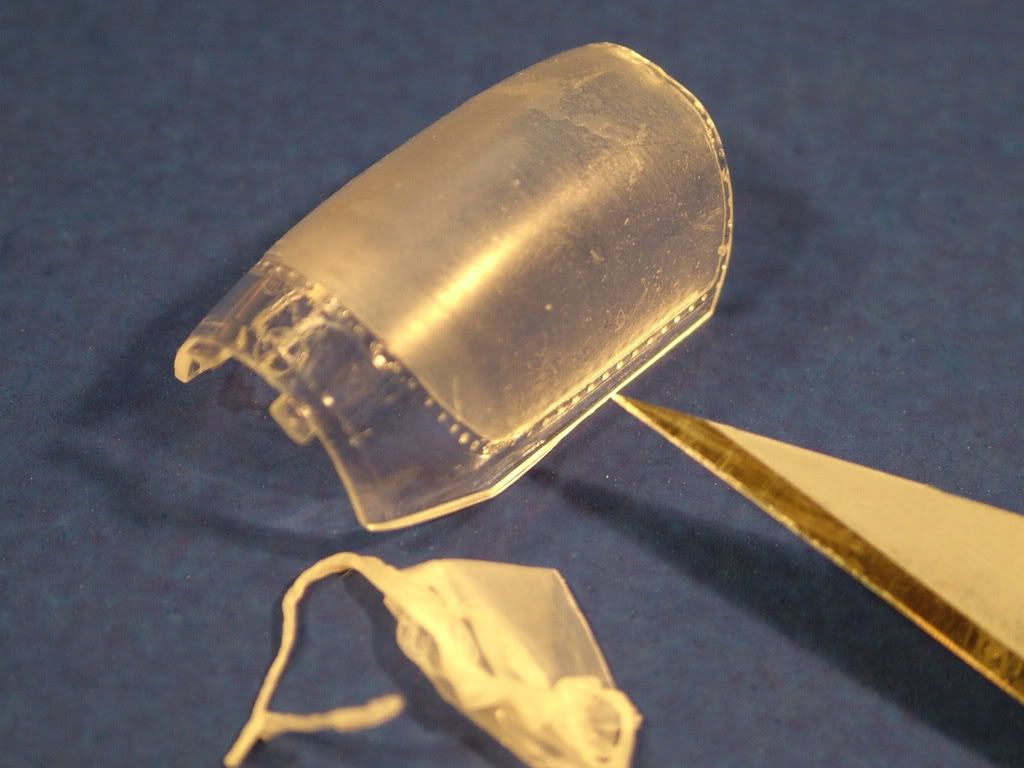
On to getting the Cockpit finalized with the HUD: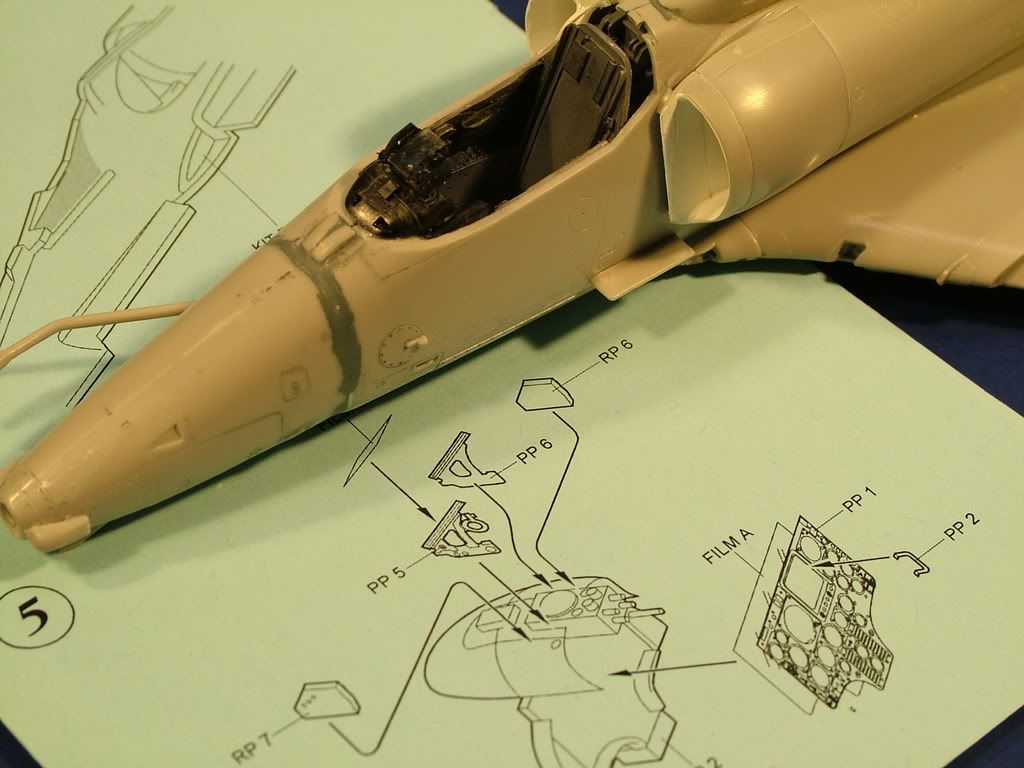
Close enough for my eyes:
Painting phase:
Installed front glass and canopy was pushed on top gently with a blob if "blue tack":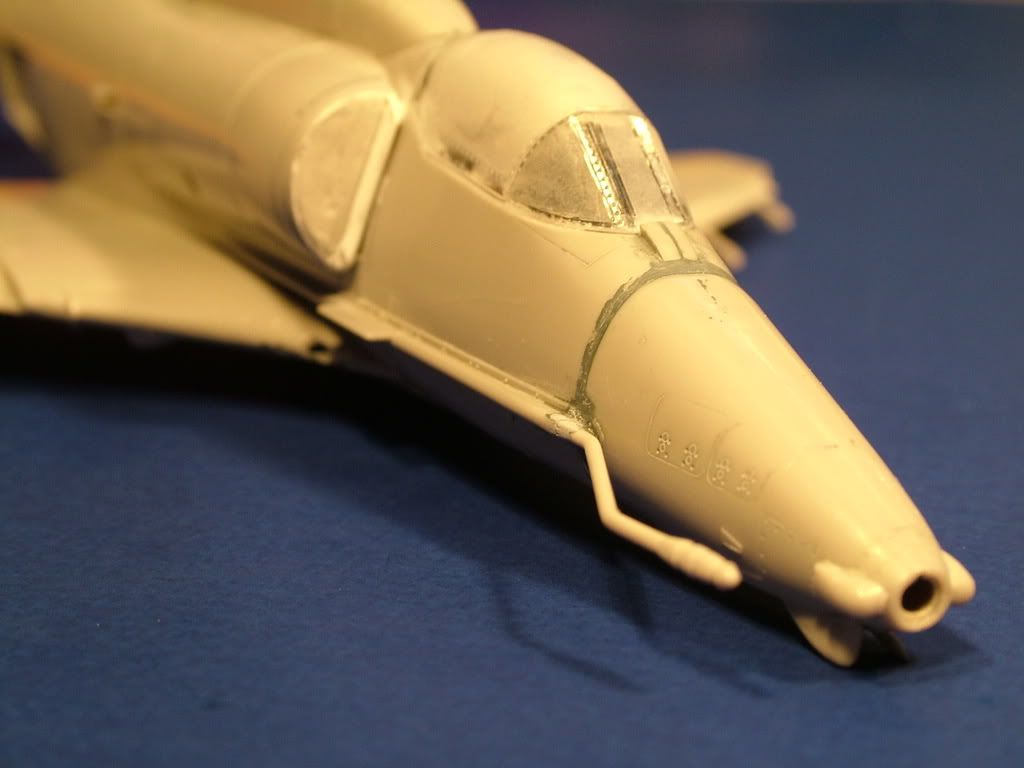
Double checked alignment of the front windscreen while the Gator glue was still tacky and adjusted a little. Then pushed "blue" tack into the engine intakes to protectthe shiny whiteinteriors: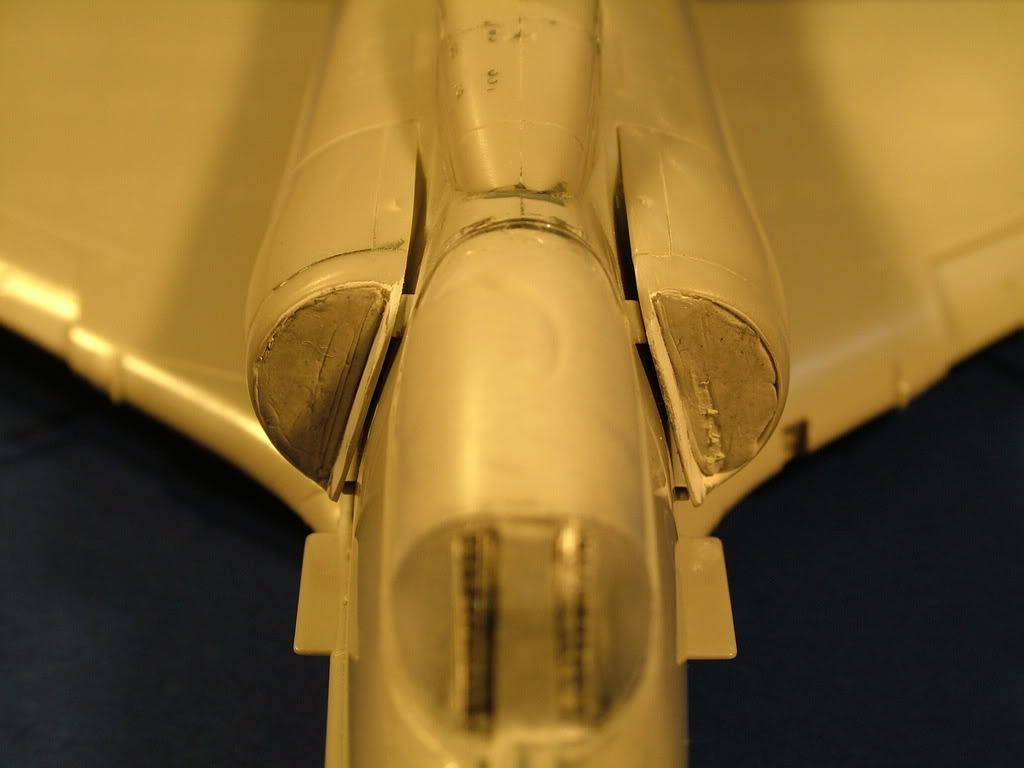
There she is in all her primer glory, using Tamiya Sky Grey at 60% thinner to 40% paint.
Light dusty coats several passes: ere
ere
Top seam looking good, with just a couple re-scribe corrections to go:
Nose joint looking pretty good, might still go through one more pass with some paint "filler":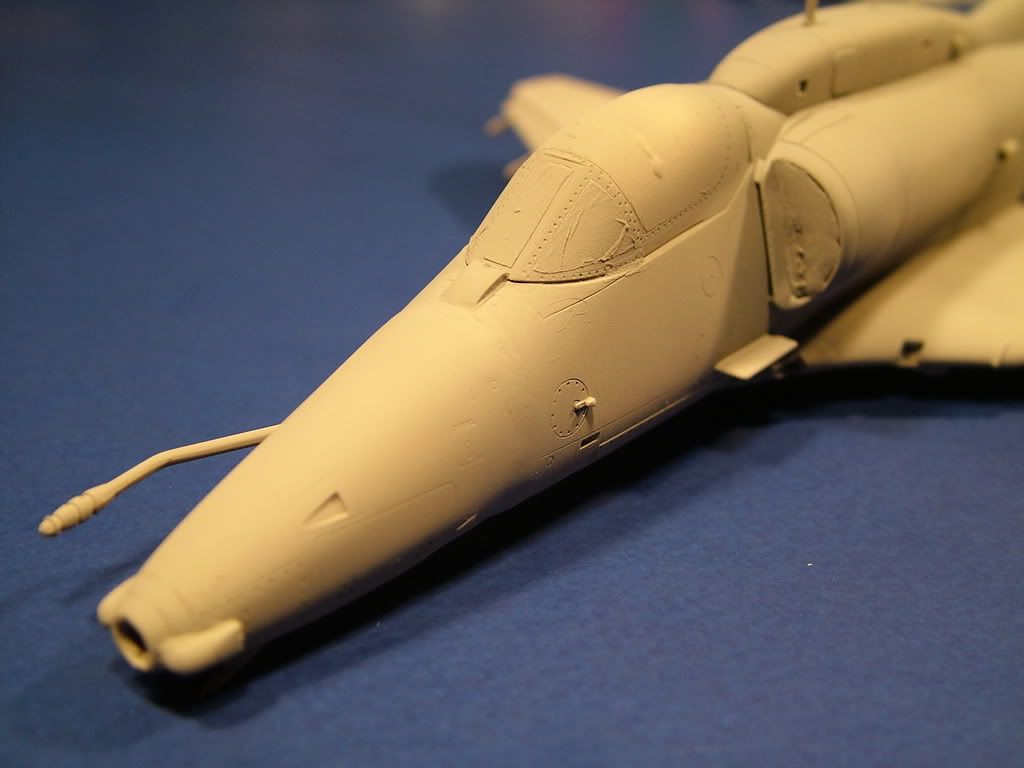
The "hunch" looking sharp:
Front bottom wing join looking spiffy and the bottom nose joint worked out great: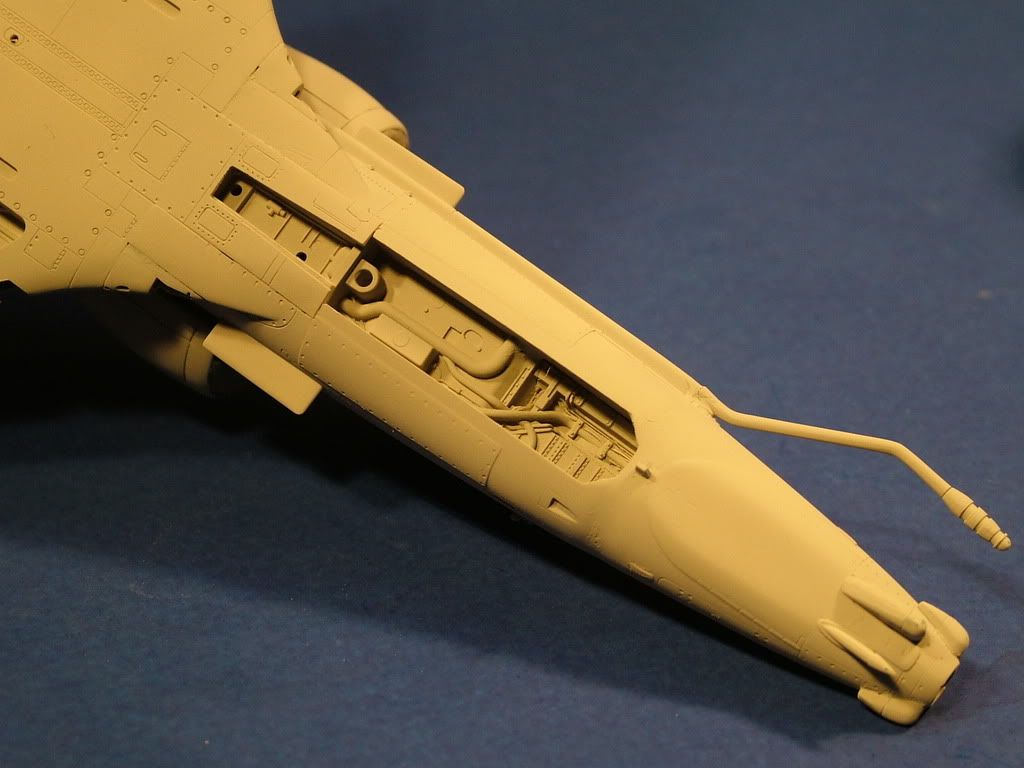
Rear bottom seam could still use a little help though: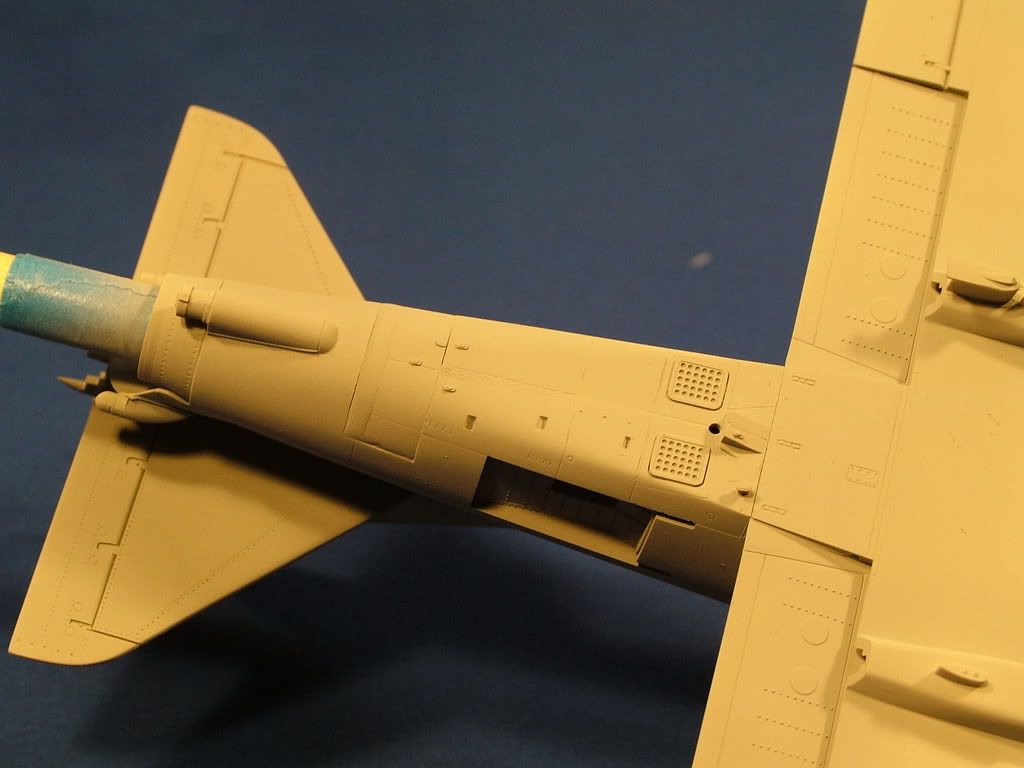
Overall top shot: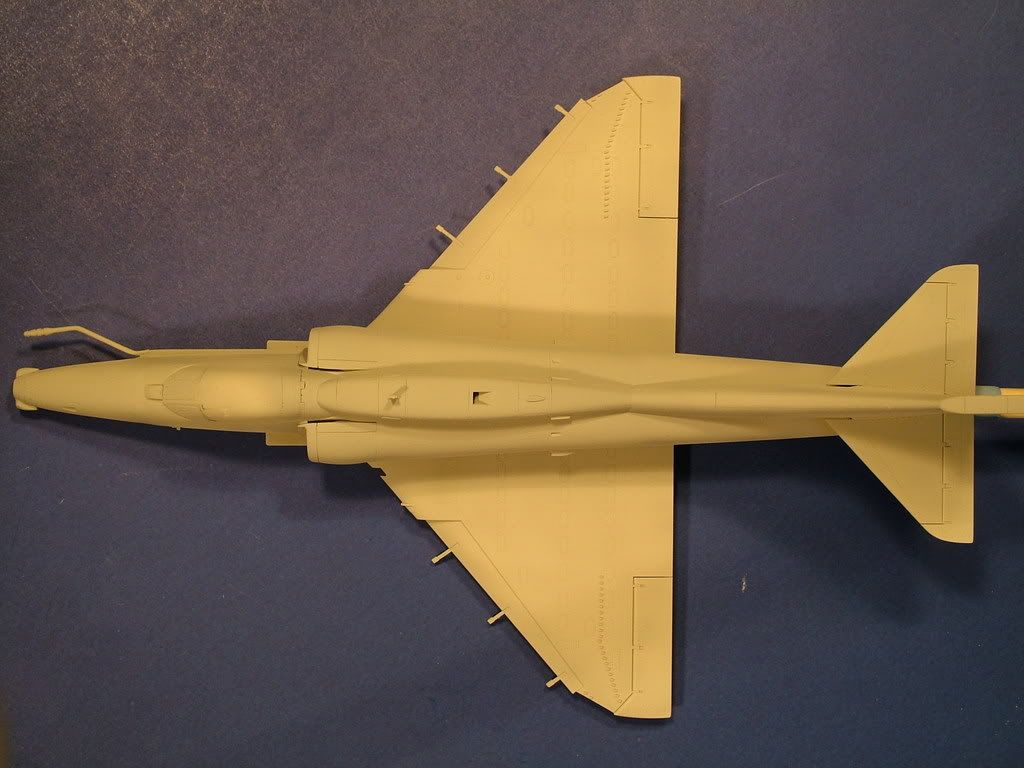
Nose section filled and re-scribed, pre-shading completed with Tamiya XF-1 Flat Black.
Used a 60%thinnerto 40% paint ratio and using approximately10 PSI, using a Badger Airbrush 100 LG with XF head and XF needleto get the below results.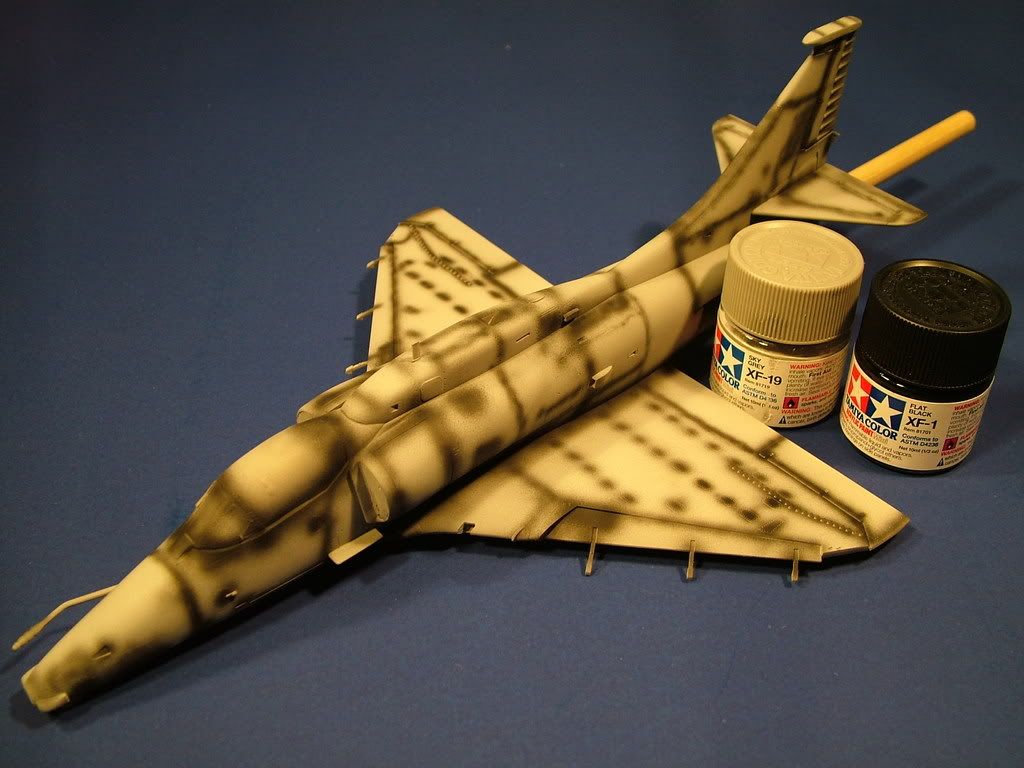
Opposite side: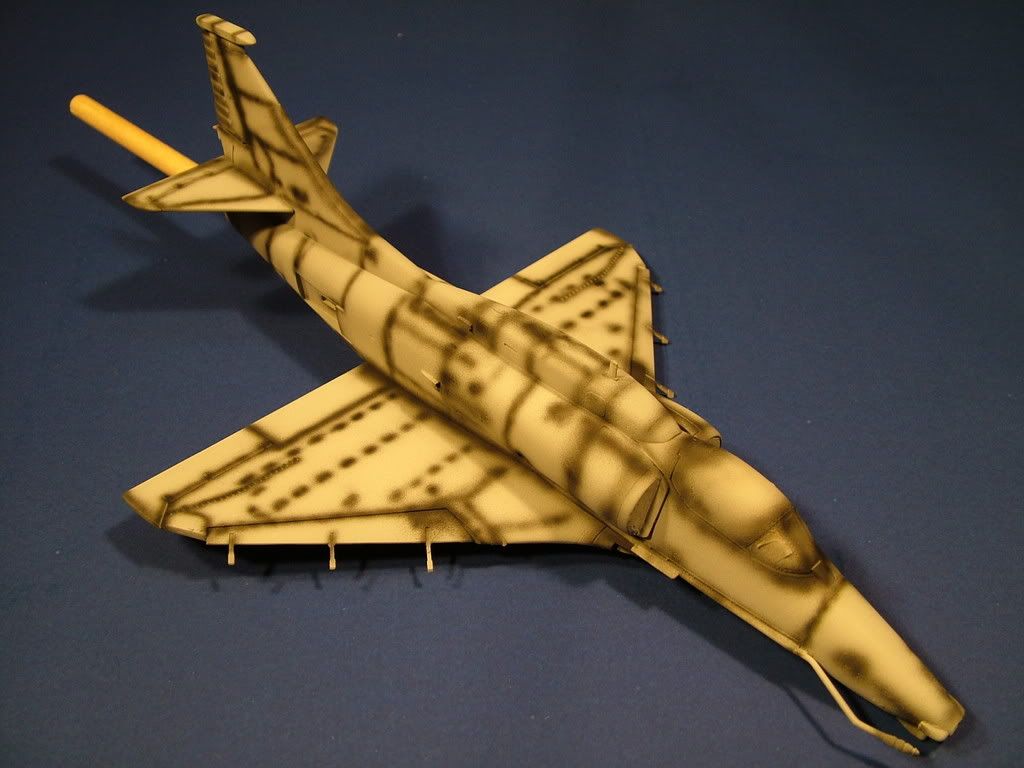
Bottom: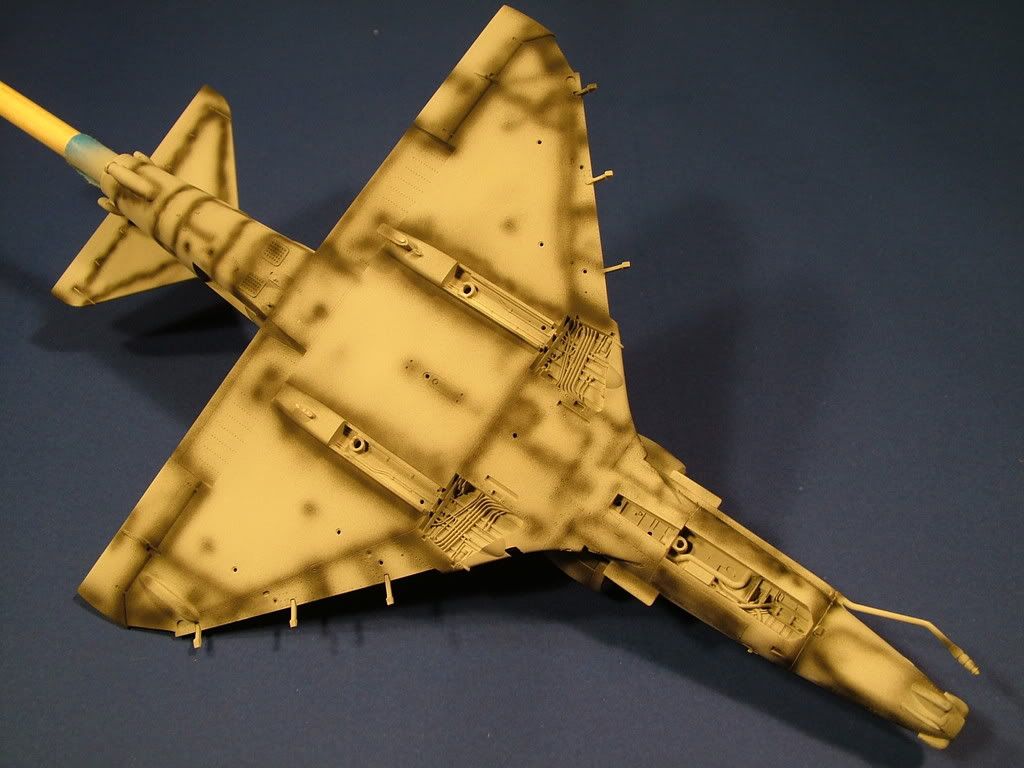
Completed the White on the bottom and all flying surfaces using Tamiya Flat White XF-2.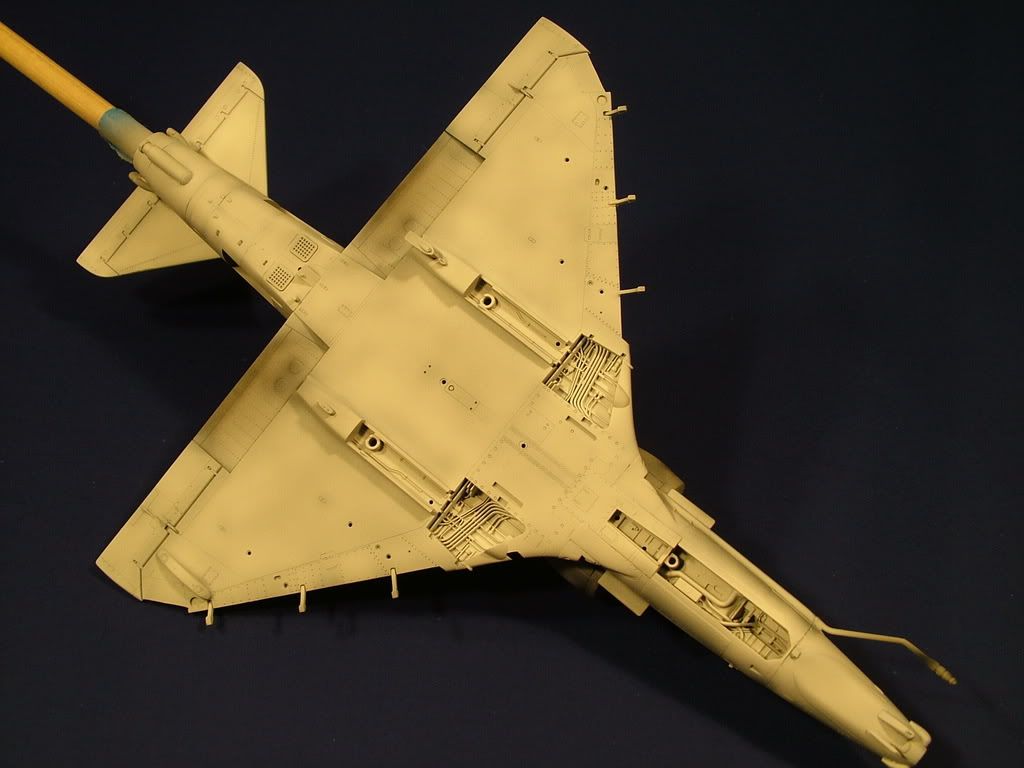
Top Ailerons and Elevators are now White as well. Ended up with some great effects from the pre-shading.
Utilizing Tamiya Flat Red XF-7 to bring the interior of the air brake to life. Again the pre-shading with the Flat Black did wonders, although a little hard to discern in the pictures.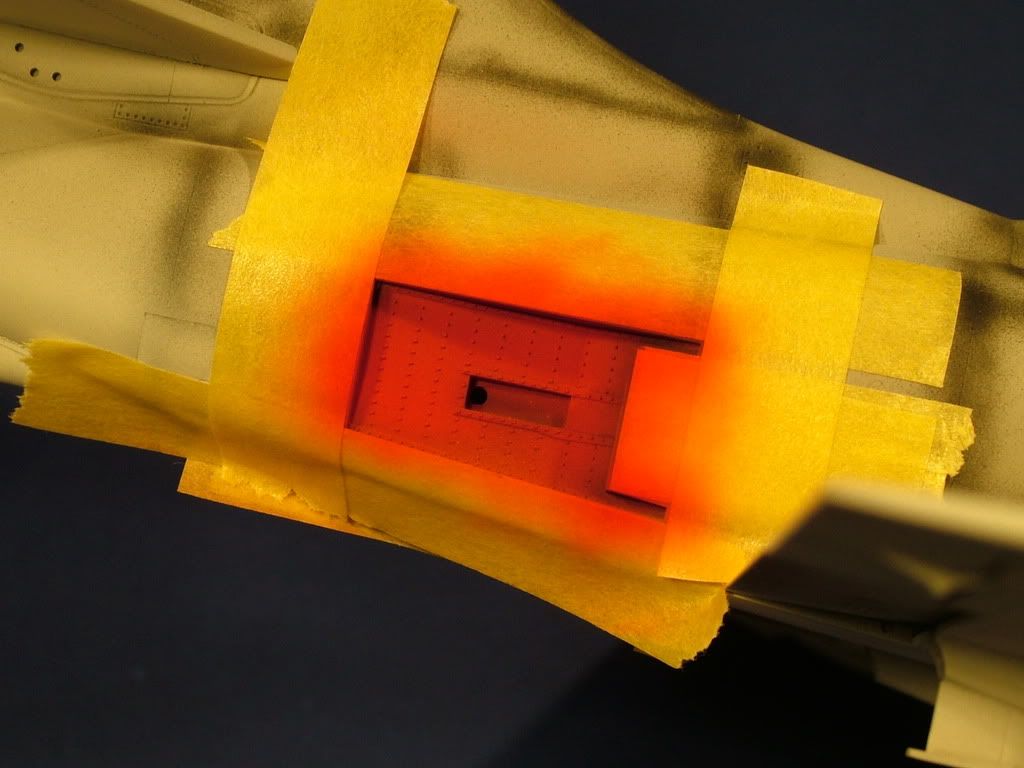
Interior of the Flaps are painted up Red: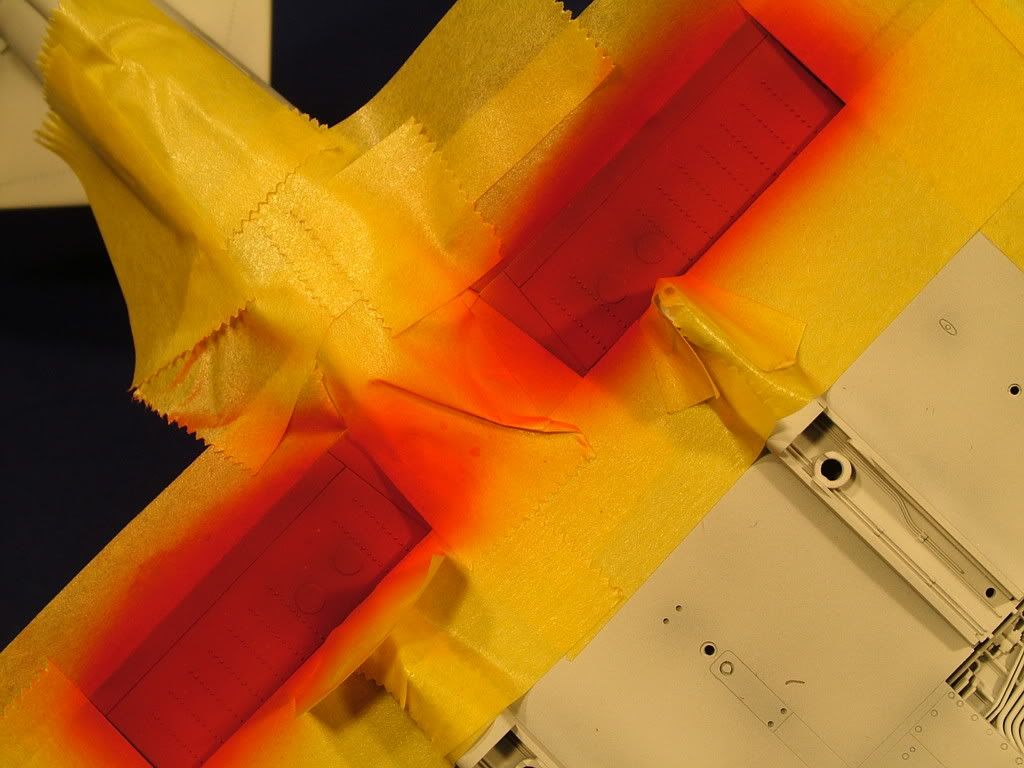
All the small parts primered up and pre-shaded where possible: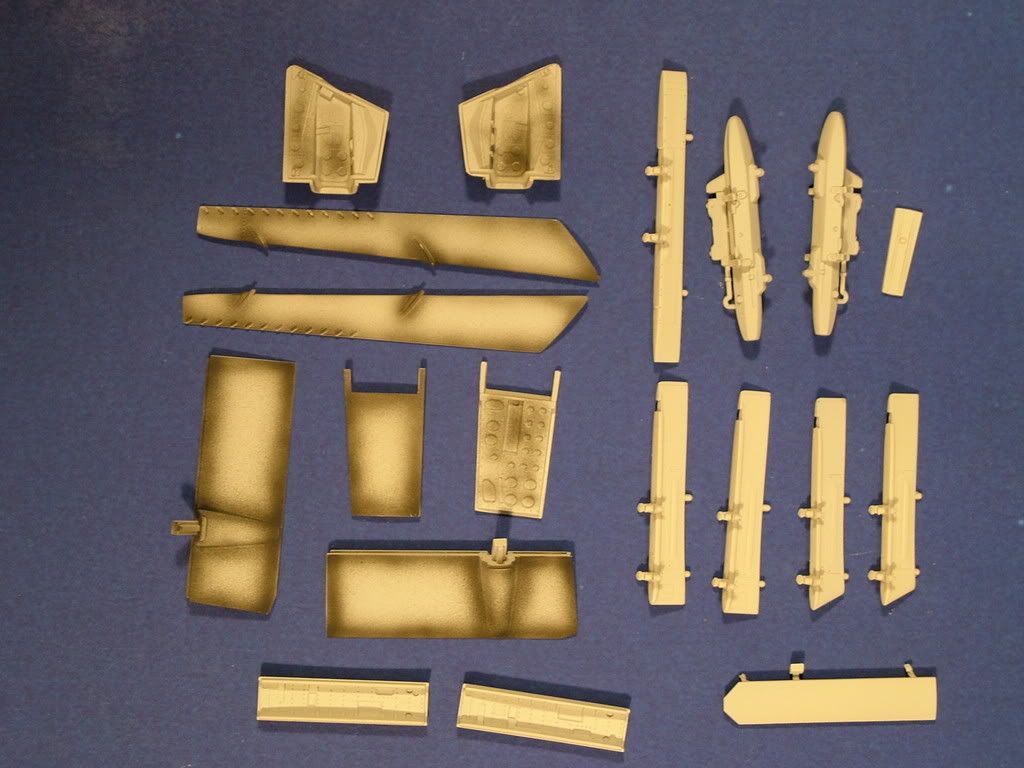
The tanks were completely sanded down and re-scribed, then primered and pre-shaded: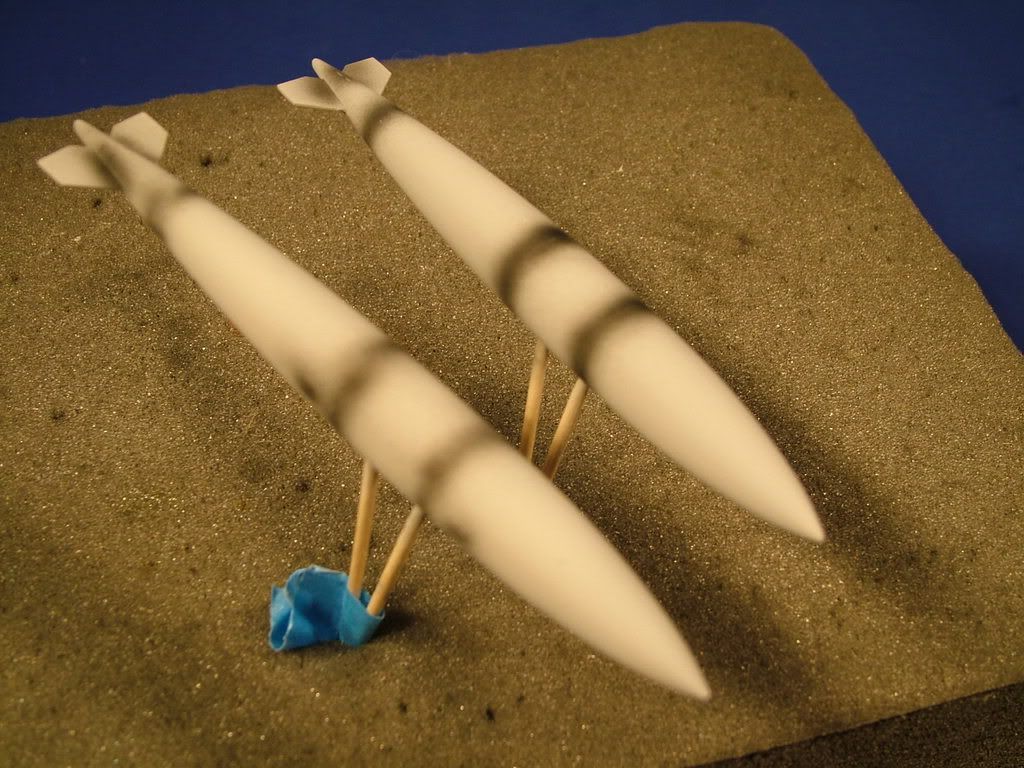
Some blue tack (white in my case) and some tape here and there masked off the critical areas to prep for the overall Light Gull Grey.
Using the Vallejo Model Air Light Grey (050) as the Tamiya shades of Grey (in my eyes) are a bit off. 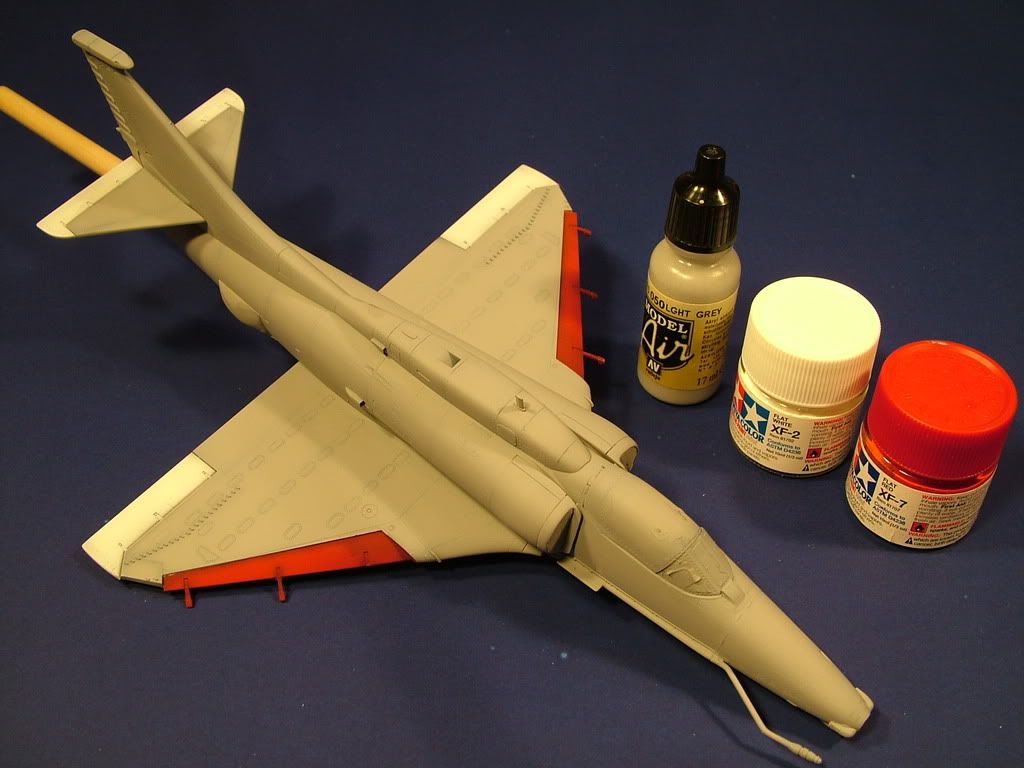
You might notice I managed to knock of one of the slats holding pins. this is the third time  . Goes to show you ... once you break a small part...leave it off till the very end then glue it back on...and save some frustration.
All the small parts have been painted up with flat White, Light Ghost Grey or Red now.
Painted up the wheels using the method Phil shows in his video by placing a fairly wet paint close to the rim and then flood and let capillary action run it around the rim, then slowly fill in the rest of the tire.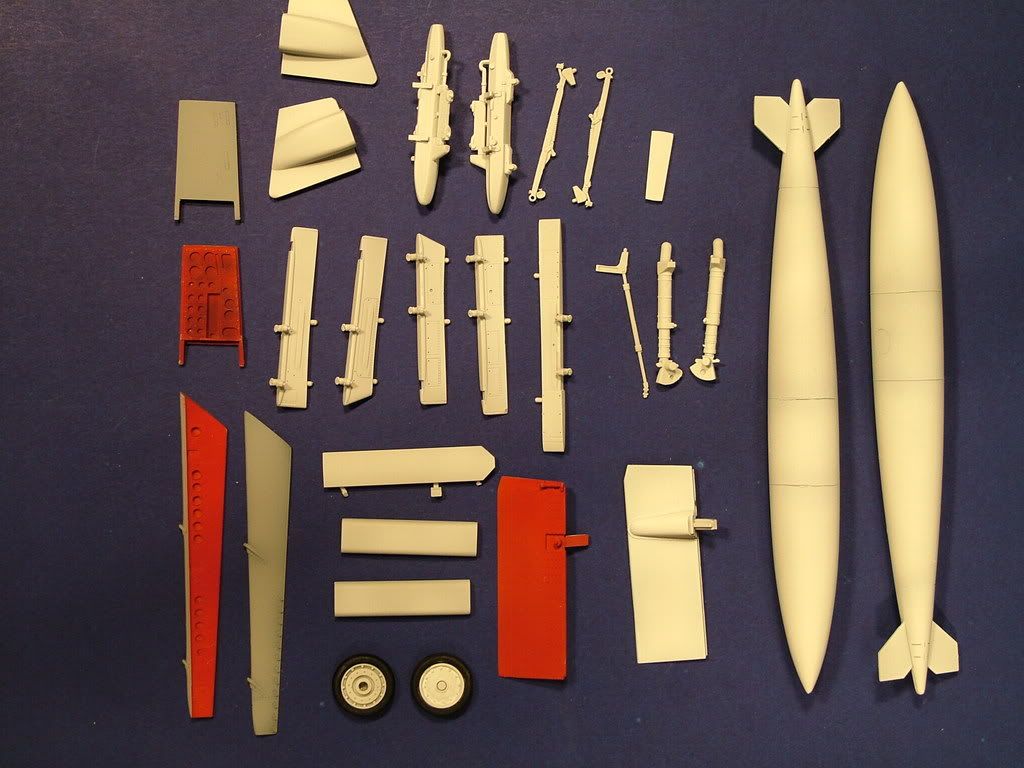
Masking off the jet intakes and airbrushed the red rim at 8 PSI with 60% to 40% thinner to paint. Light gentle dusty coats, drying off with air in between each coat, slowly building it up to get the right shade of red to match the decal set chevrons.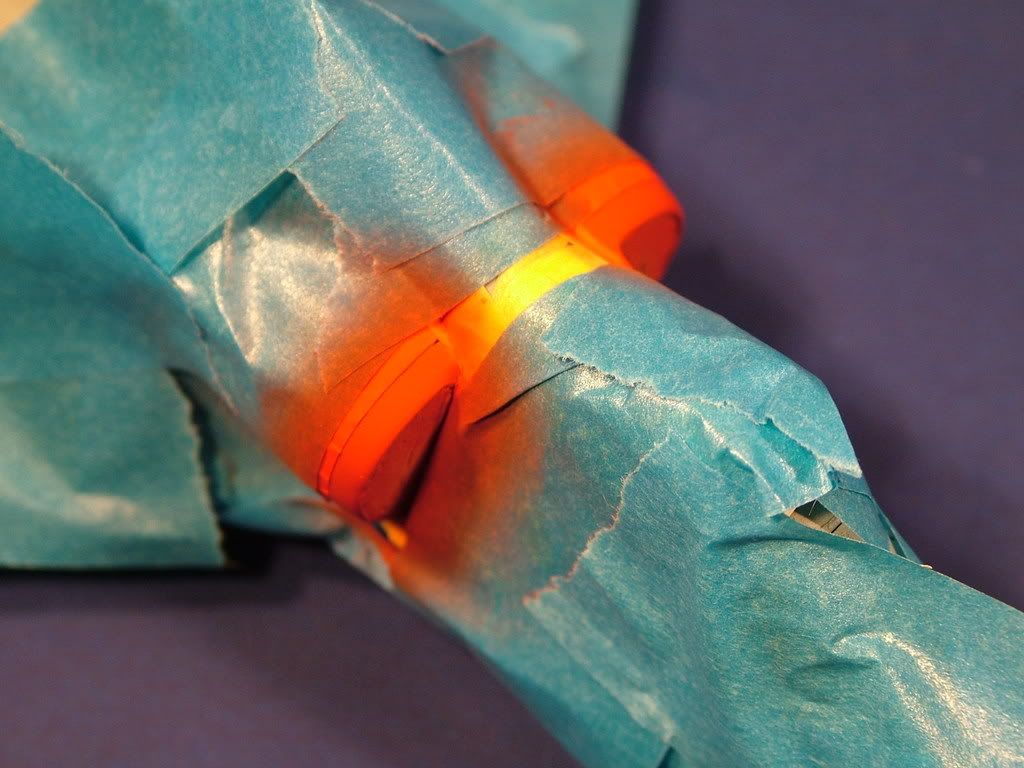
Unmasked: 
The weapons stationsglued on with Tamiya thick weld: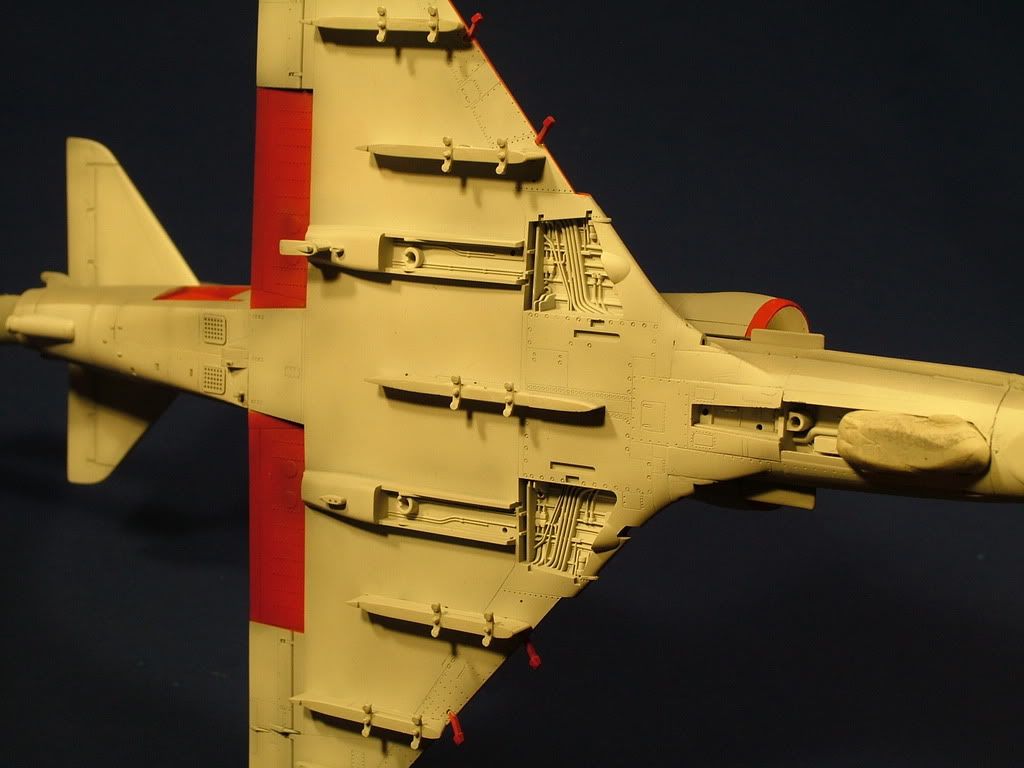
Finished up the Exhaust nozzle with Model Master Metalizer, Jet Exhaust and Burnt Metal on the outside: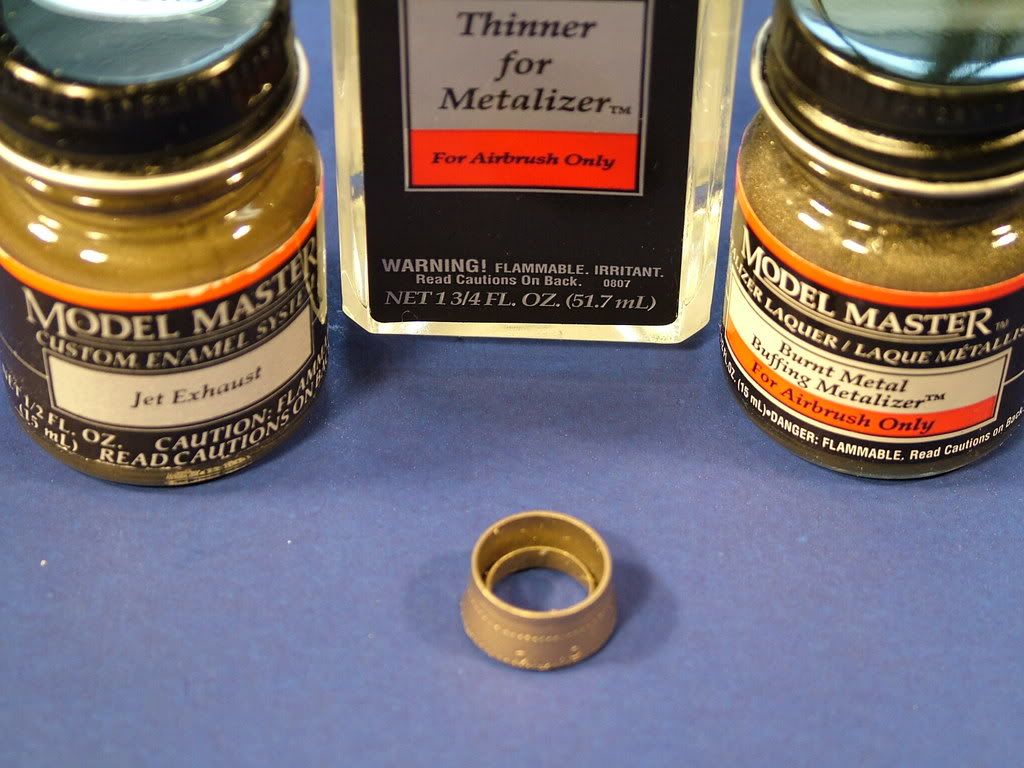
Clear coating phase:
Airbrushed Model Master Gloss Clear. Several coats, started with a 50/50 Mix ofthinner to Clear coat, then 60/40 and a final coat of 75/25. Airpressure of 15 first coat, 10 second and finally8 psi on the third coat.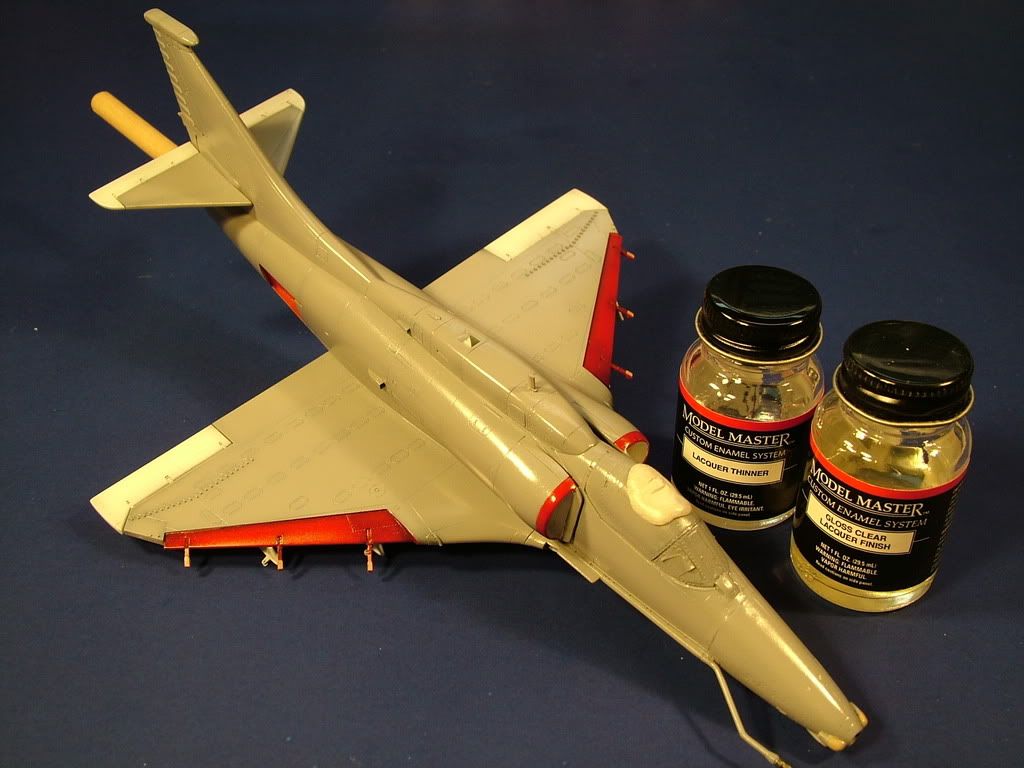
Decaling/Decal set &Sealing of decals:
Decalling tools, Small sciccors, tweezers, some distilled water (leaves no water marks) Decal solution Solva Set andSol, new Scalpel Blade: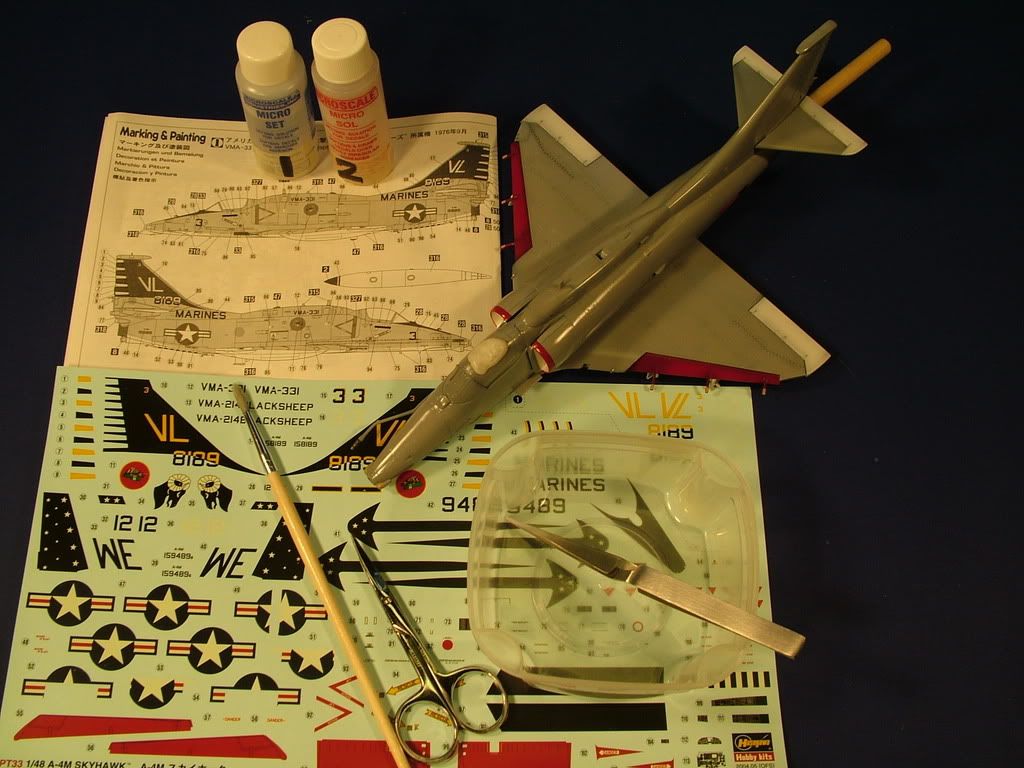
The Hasegawa Decal set was a charm, all decals adhered wonderfully, the tail fin went through several coatings of Solva Set and Sol, but other than the Stars and Bars on the top wing which had to go over the spoiler gates, all went very easy and truly livened her up.
Small "bits and pieces"painted up, just a few more small decals: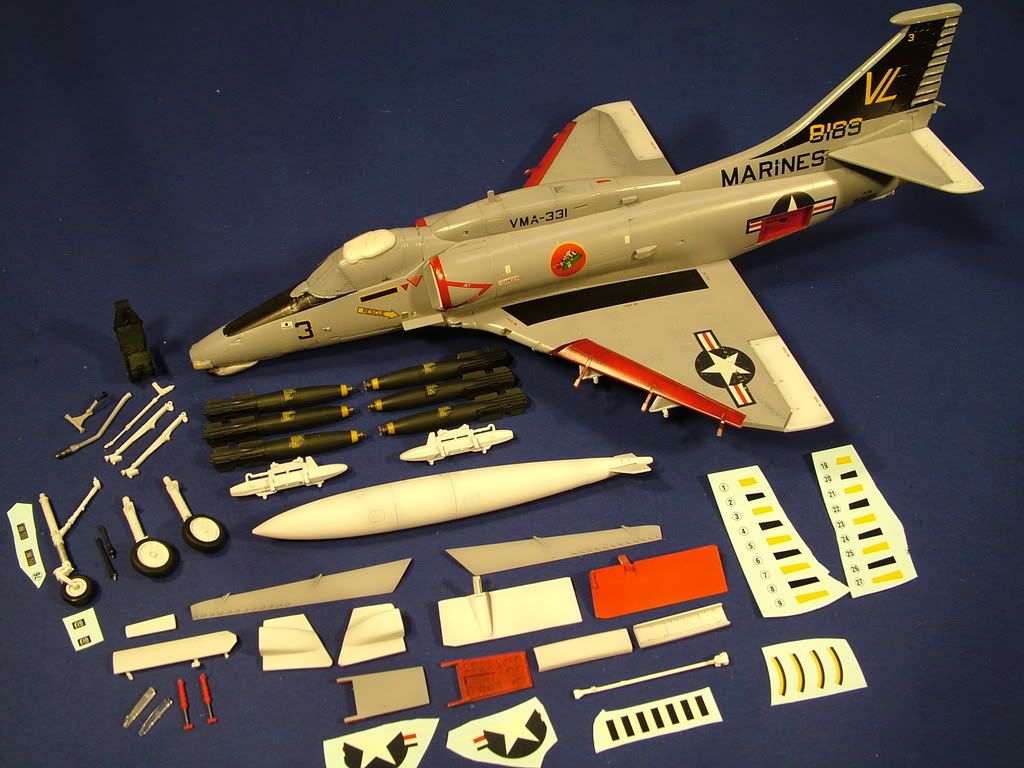

Trimming of the red outline on the doors is done with various sized "Sharpie" brand paint pens: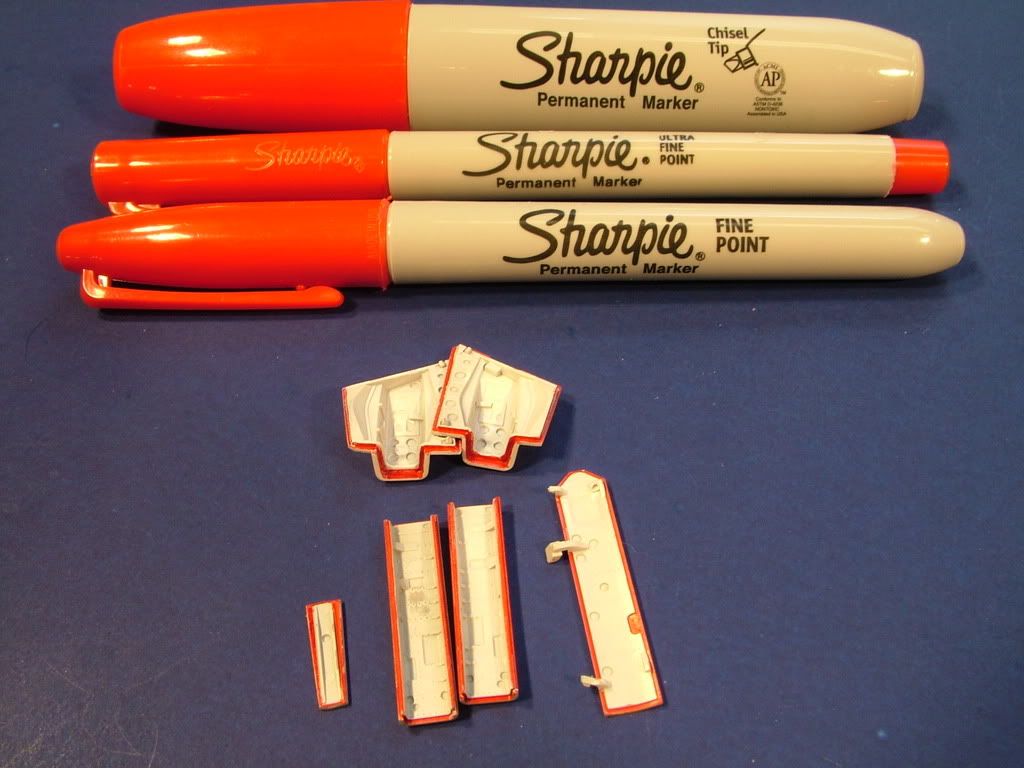
Pro-Modelers wash / general weathering phase:
Dark Dirt Wash on top surfaces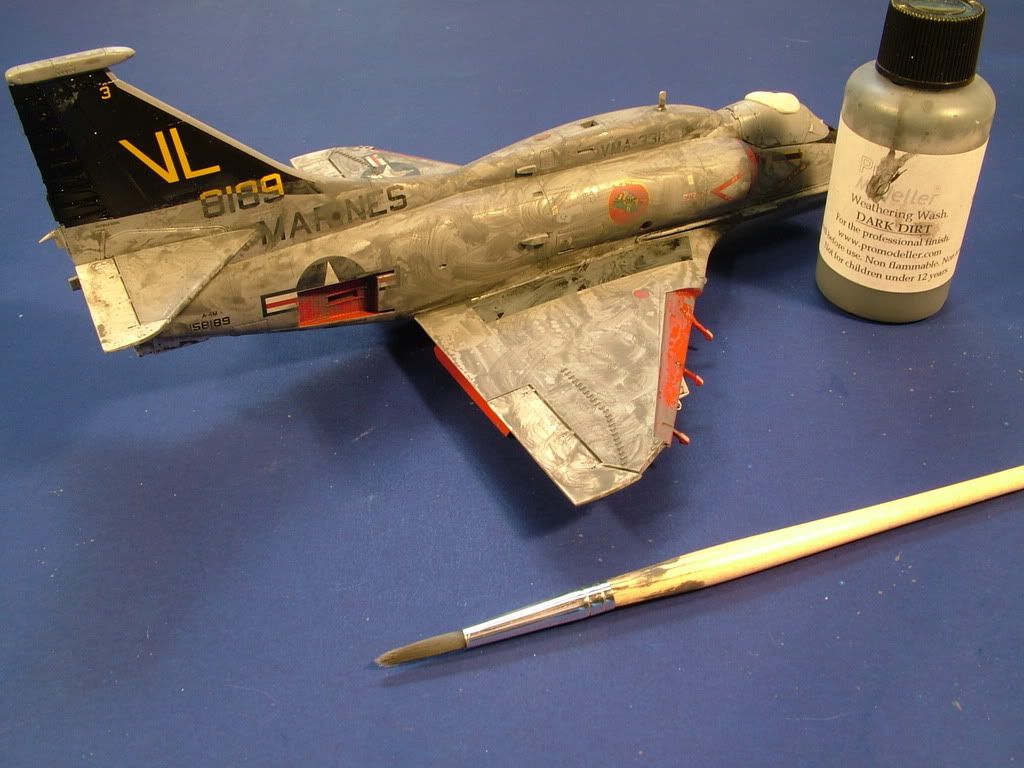
Bottom surfaces, also used some Rust to give a different tone to the wheel wells: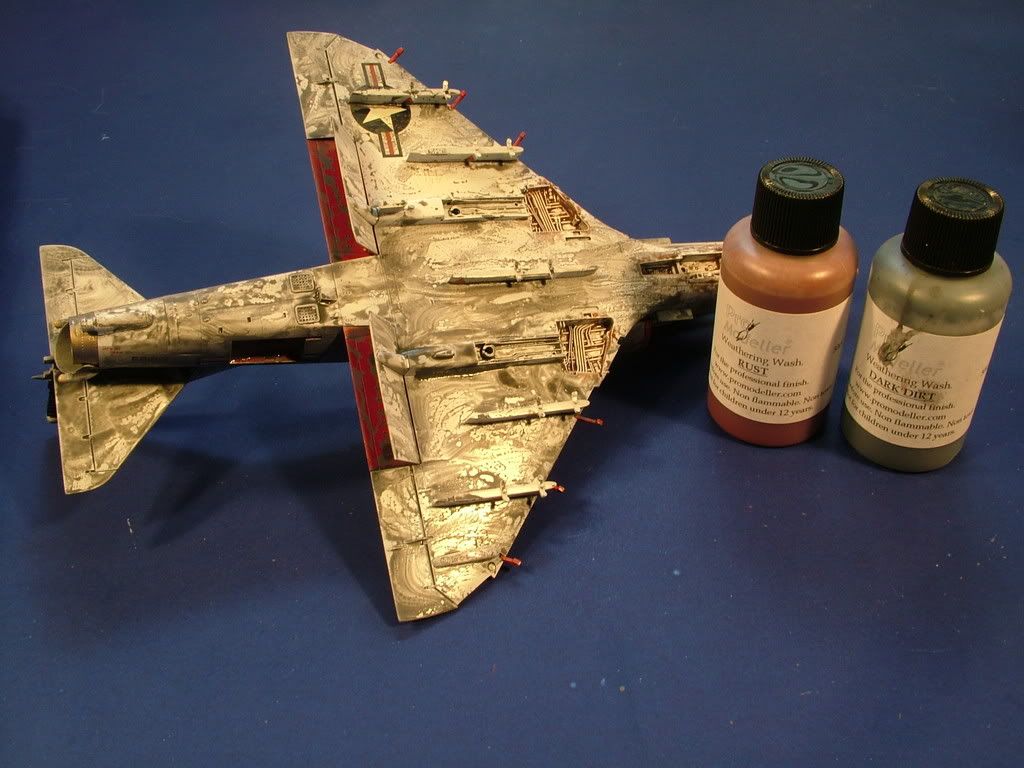
Gear build/painting sub assembly &Gear installation phase:
Removed the wash and glued on the tricycle landing gear, Slats, flaps, Center line Drop Tank, Gear Doors are installed: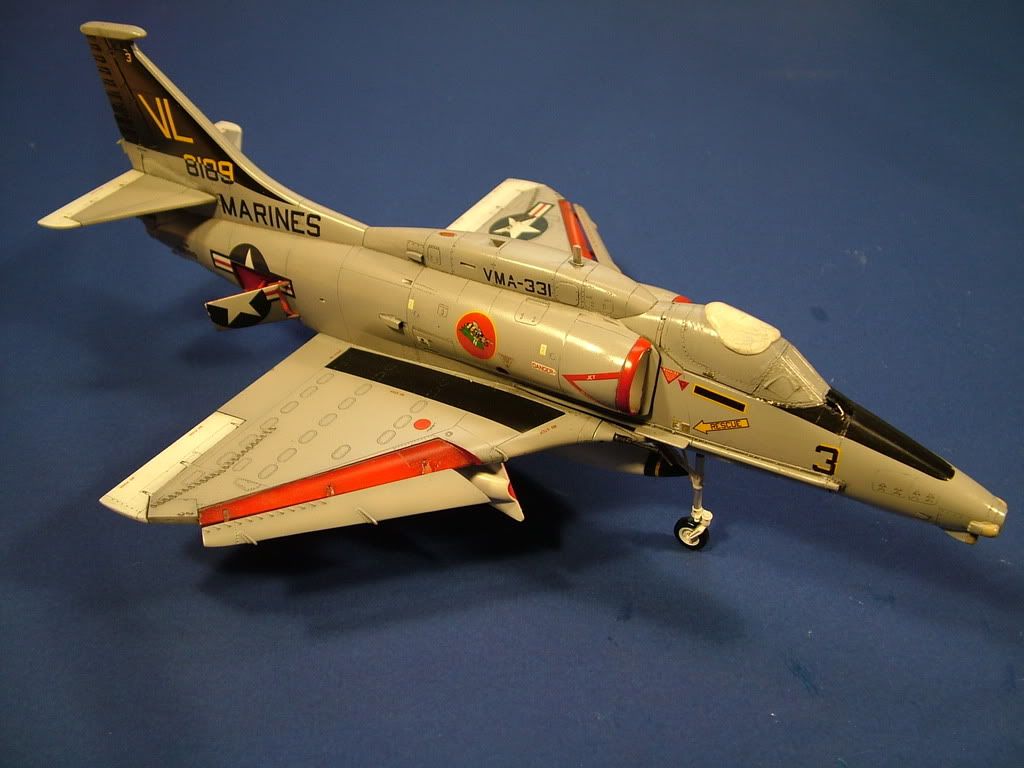
Air brakes installed:
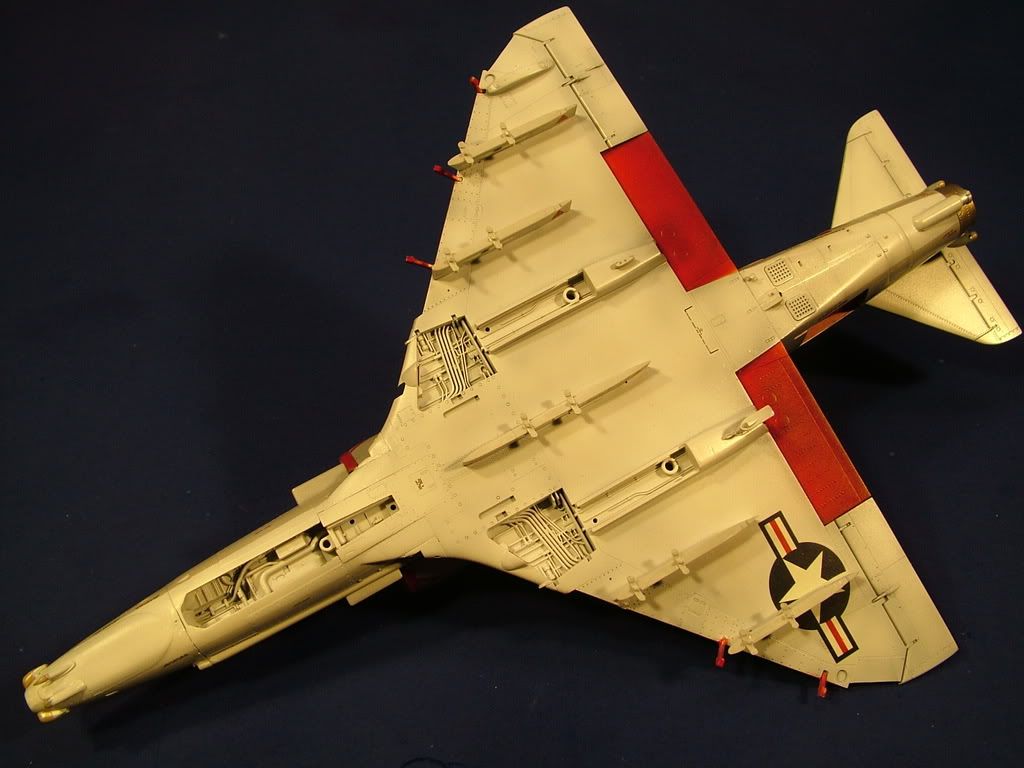
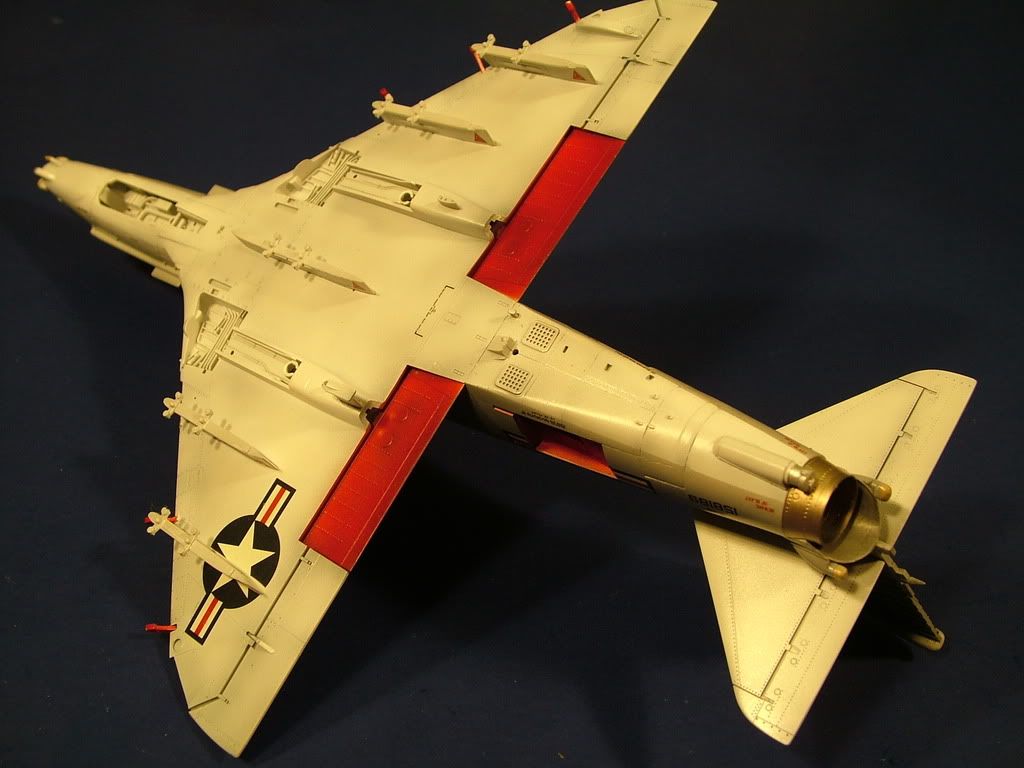
Underside revealing some excellent detail: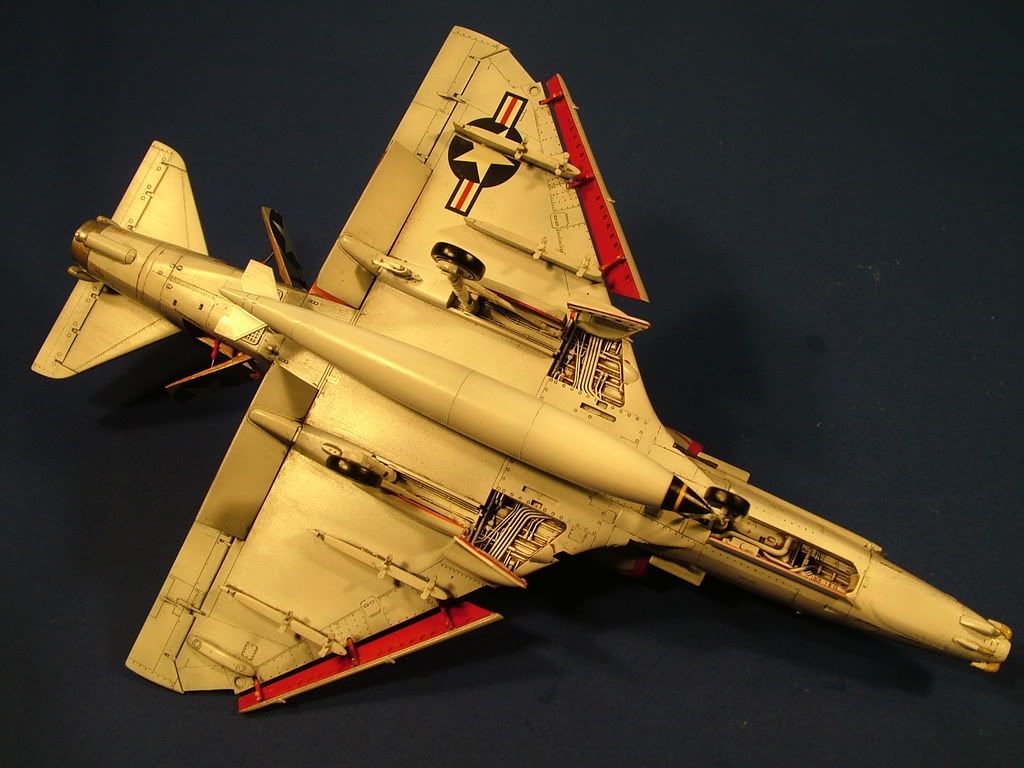
Last small clear pieces added and painted up using the Tamiya Clear colors line: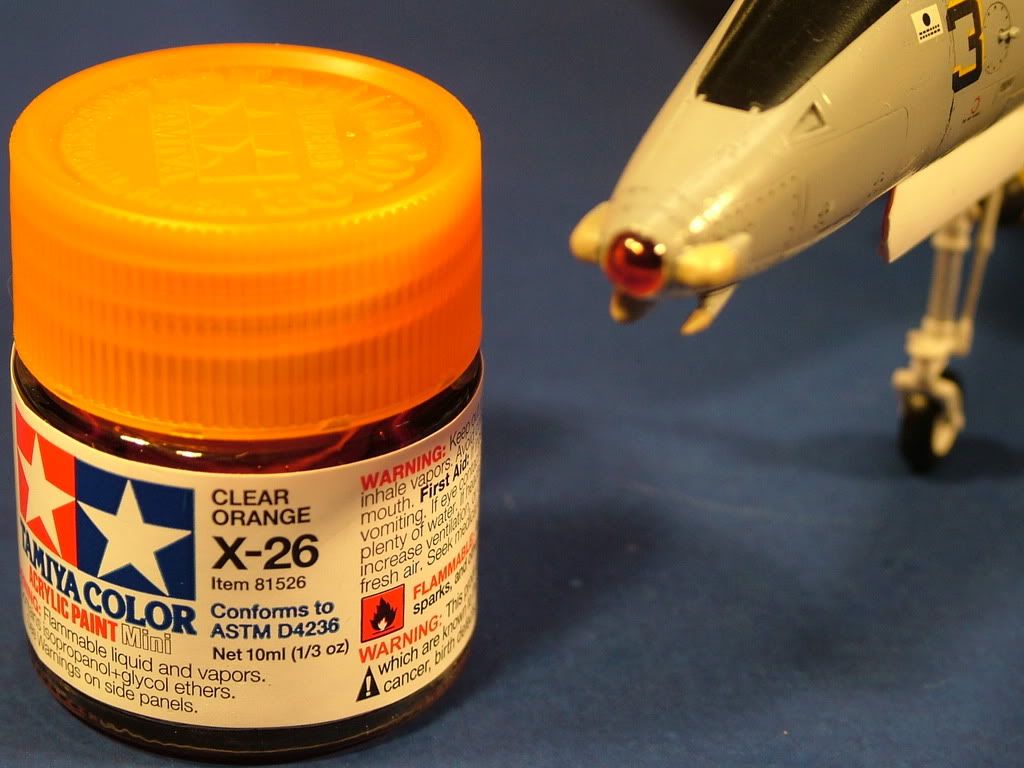
Navigation lights:
I decided against using the TER racks and fill her up with Snakeyes. Final load out can be seen in the final reveal section.
Final build observations / hints and solutions:
- The Aires cockpit is truly not needed in this offering
- Leave off the refueling probe installation until the last moment
- Be careful around the Slats Actuators they break easily
Final Reveal:
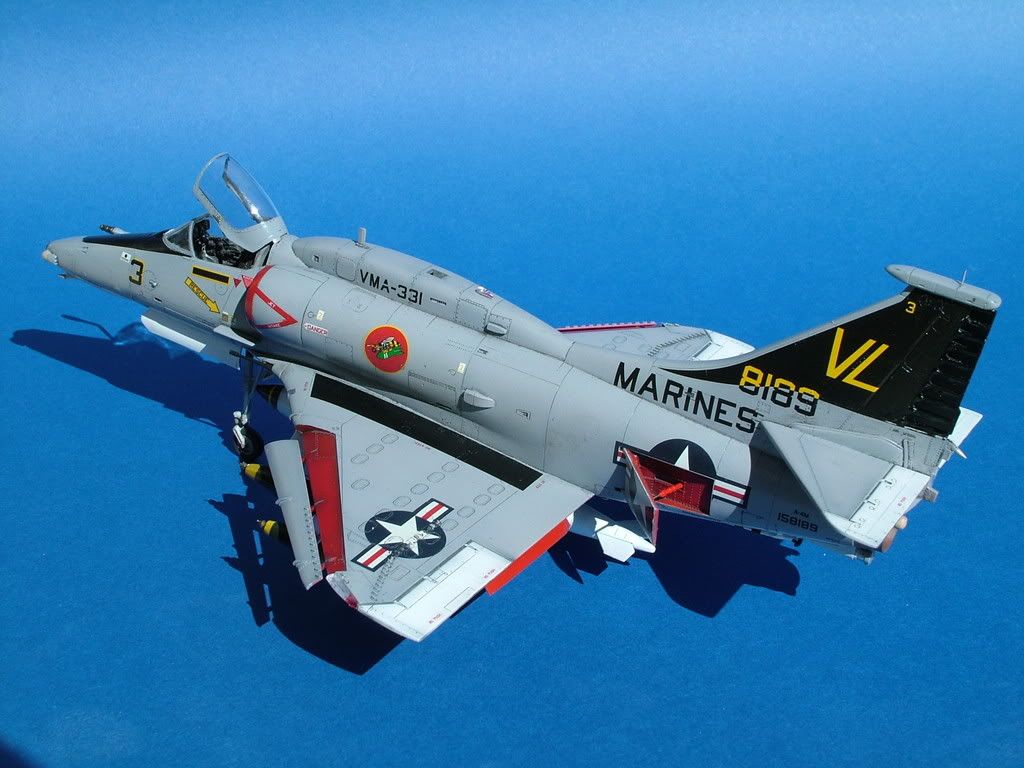
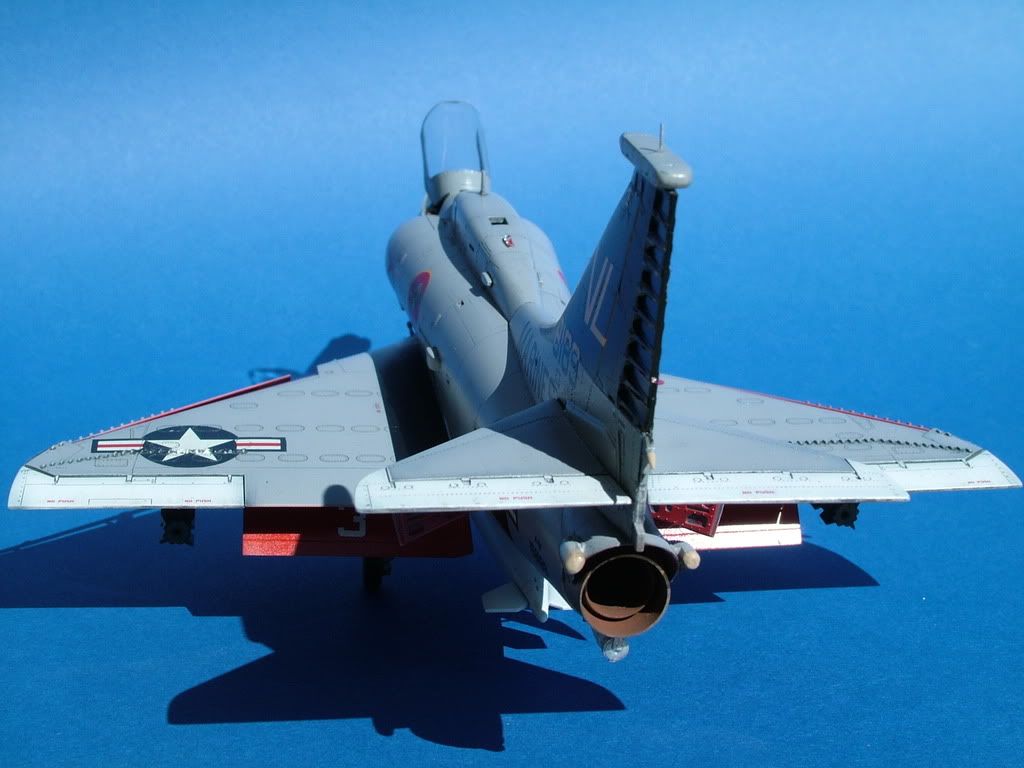
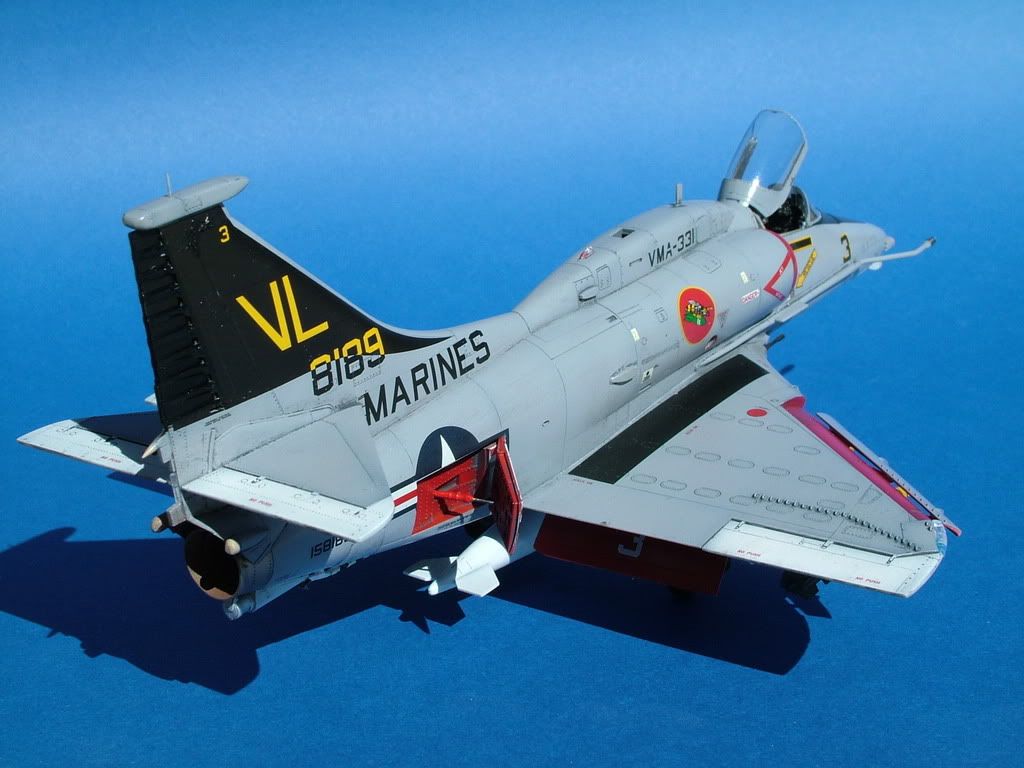


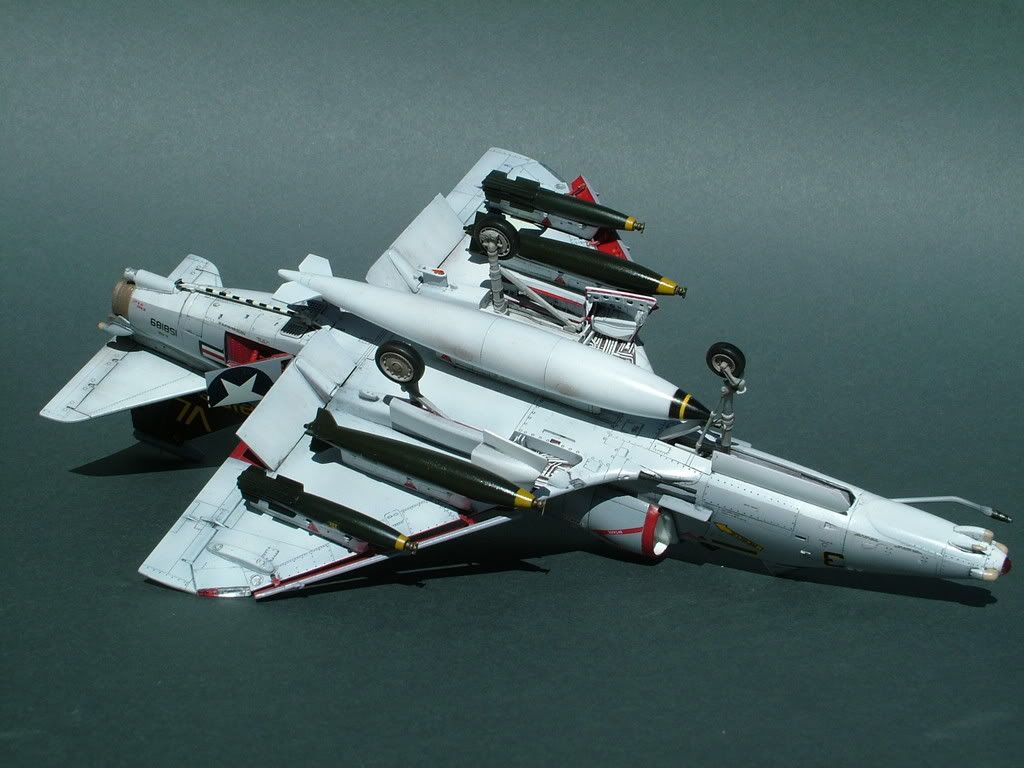
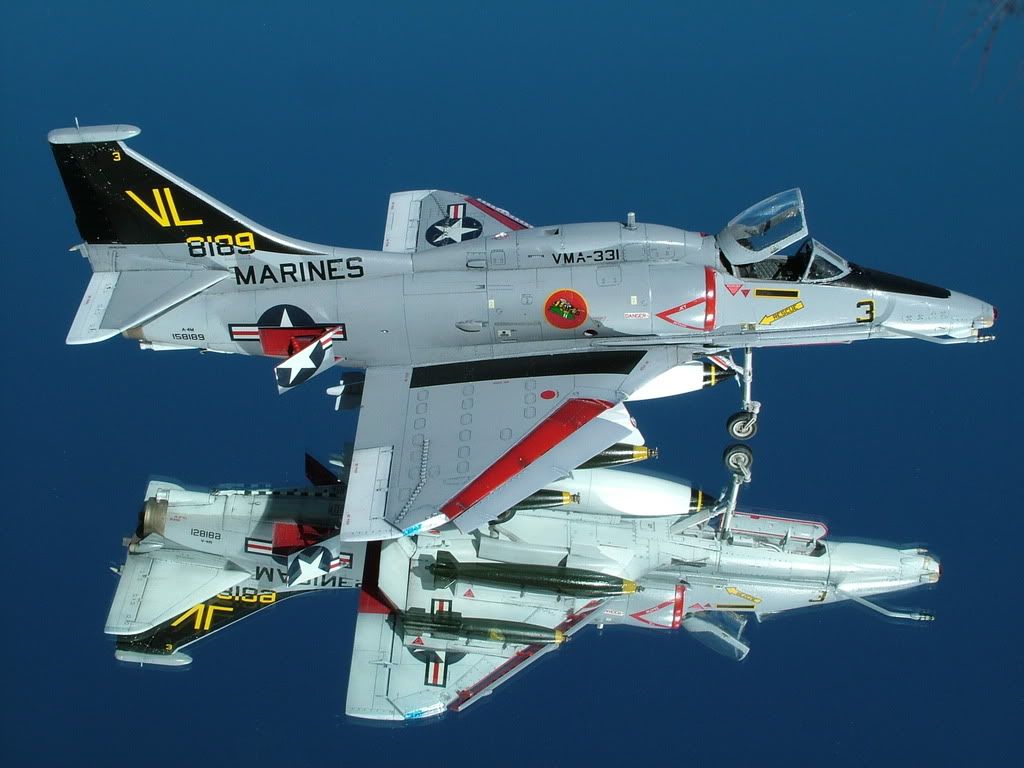

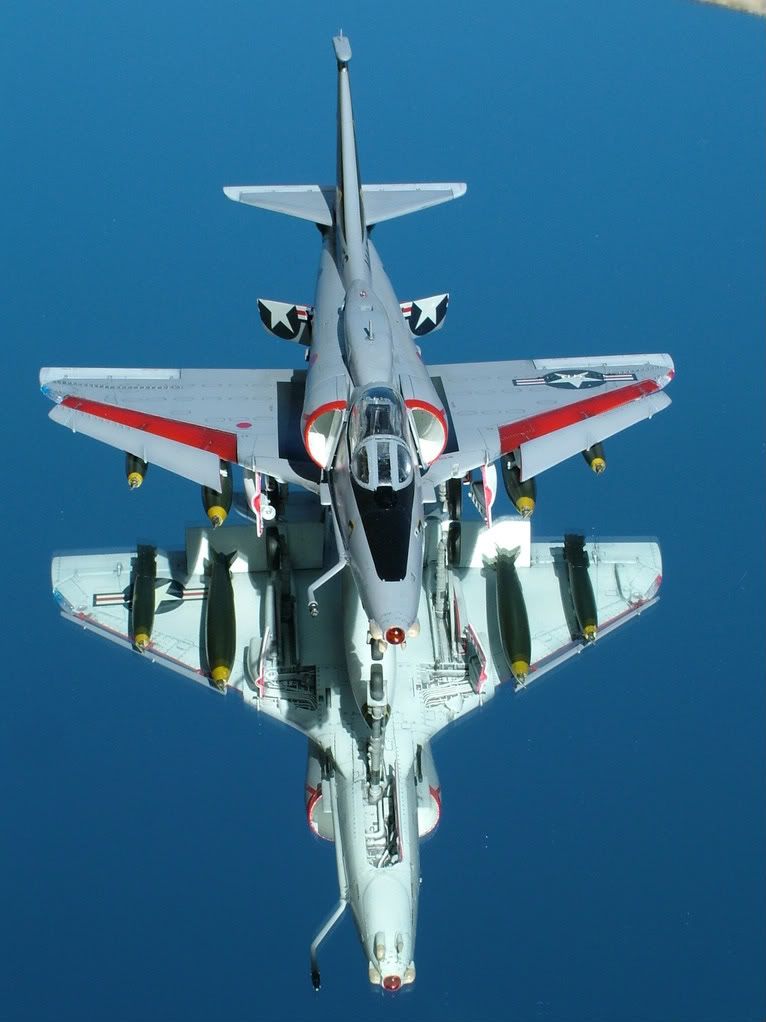
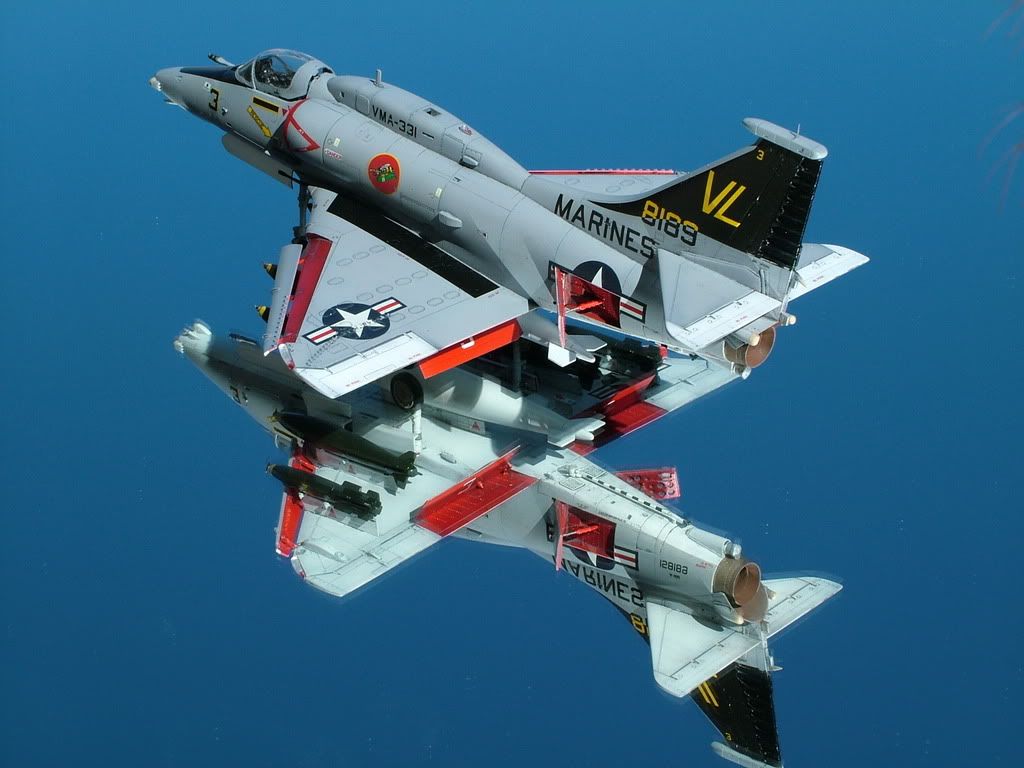
This was truly a very enjoyable build!
Hans Pennink