


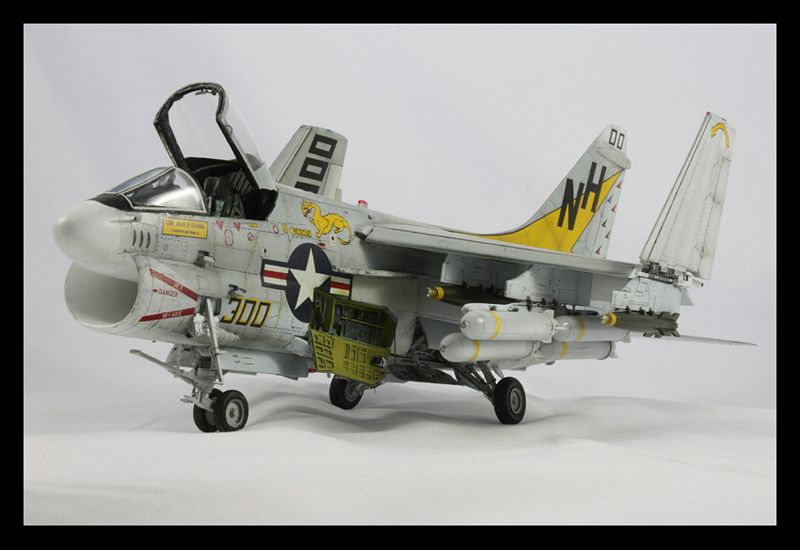
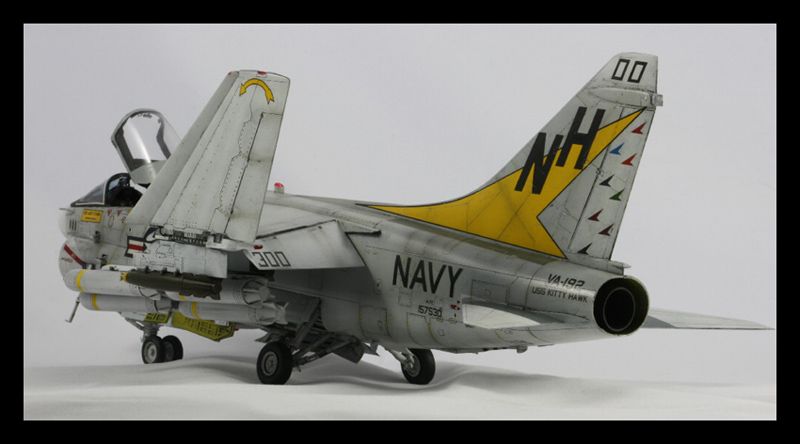
Grayham Mahoney's A-7 Corsair II
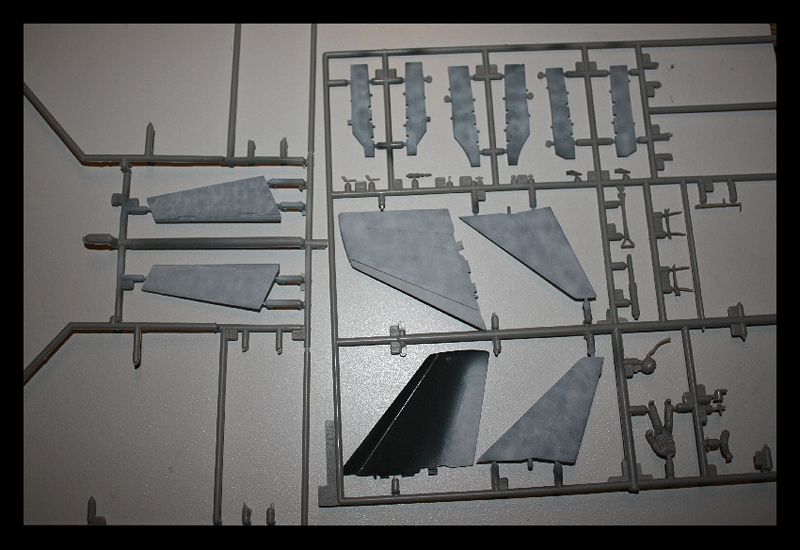
Kit - Hasegawa #09689 'VA-192 Golden Dragons'
Decals - Kit Decals
Extra's - Eduard PE set 49255
Mk20 Rockeyes from Hobbyboss A-10A
Mk82 Snakeyes from Hobbyboss Mirage IIIC - Arming wires from scratch, heat resistant finish almost too subtle for the camera to pick up, will have to do it harsher next time.
Paints - Gunze and Tamiya acrylics throughout.
Post shading using Gunze Smoke
Weathering using Promodeller washes and Tamiya weathering masters.
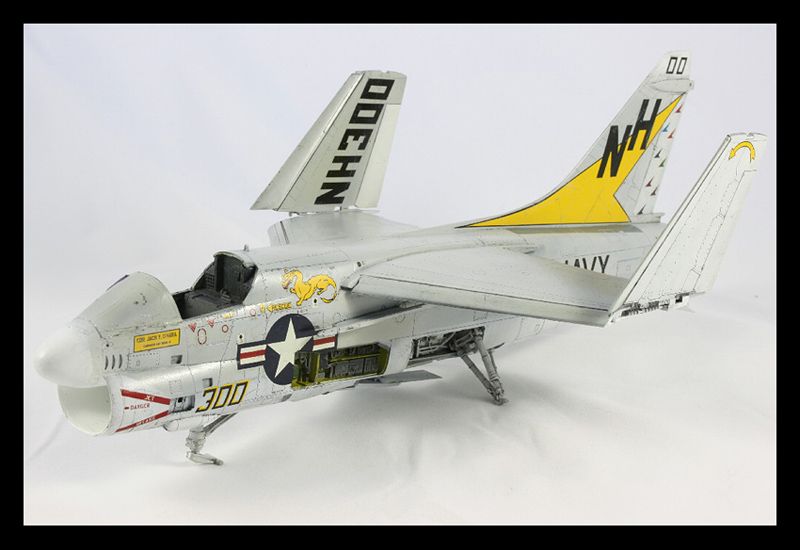
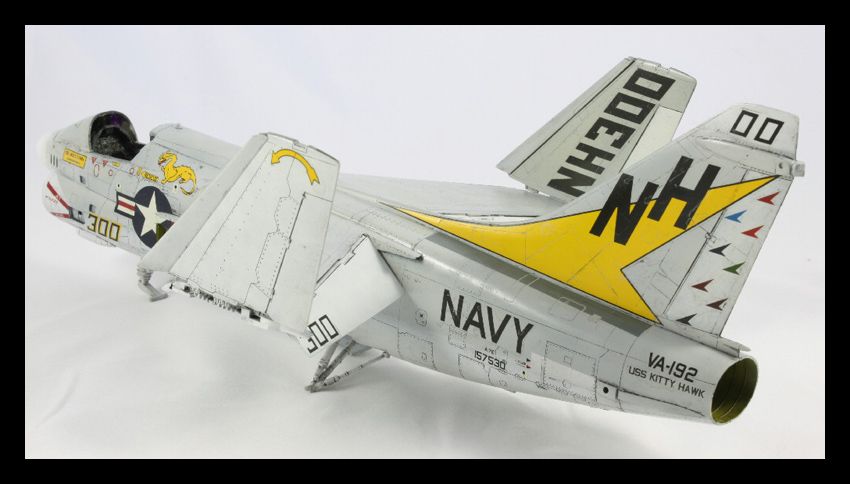
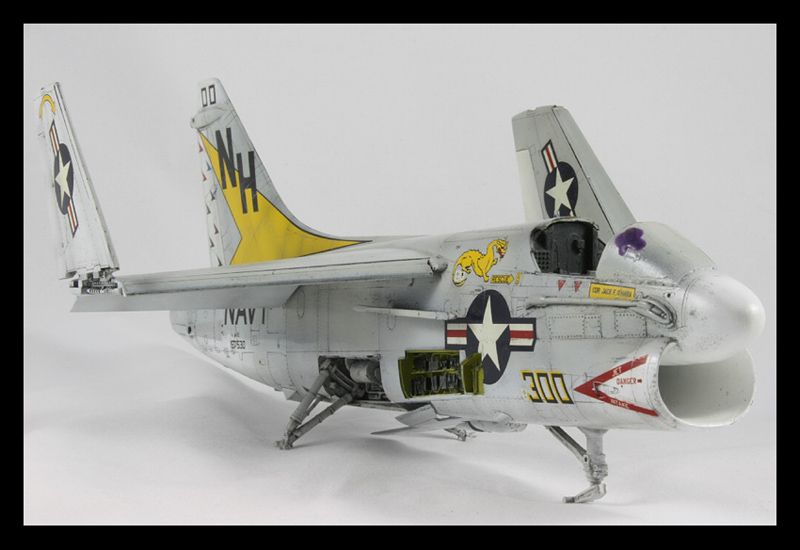
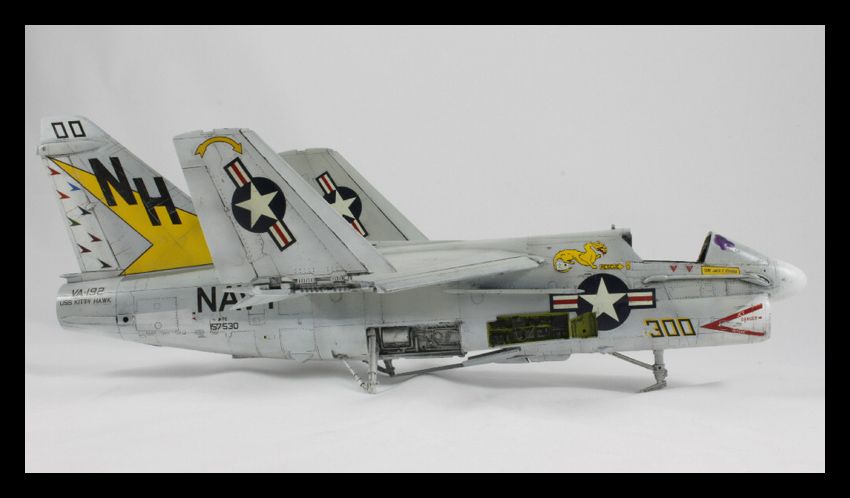
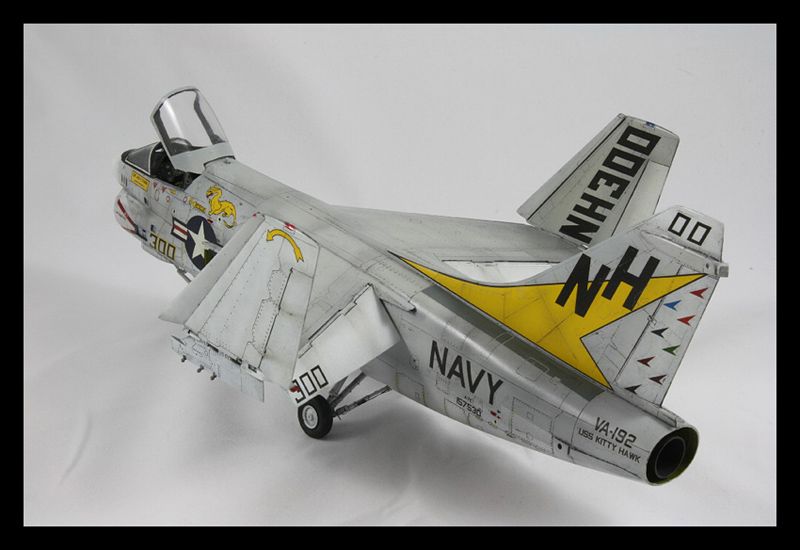
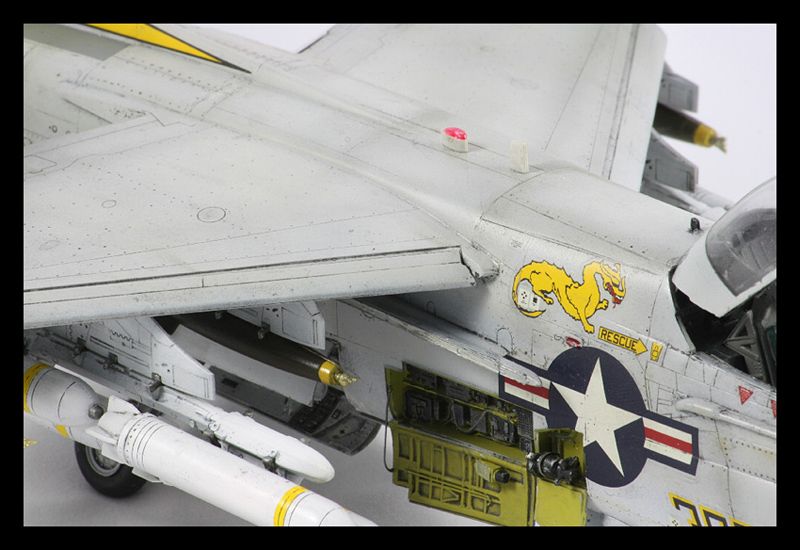
Weathered to look as it would at the end of a long and active tour in the Tonkin Gulf, armed ready to provide Close Air Support over South Vietnam.
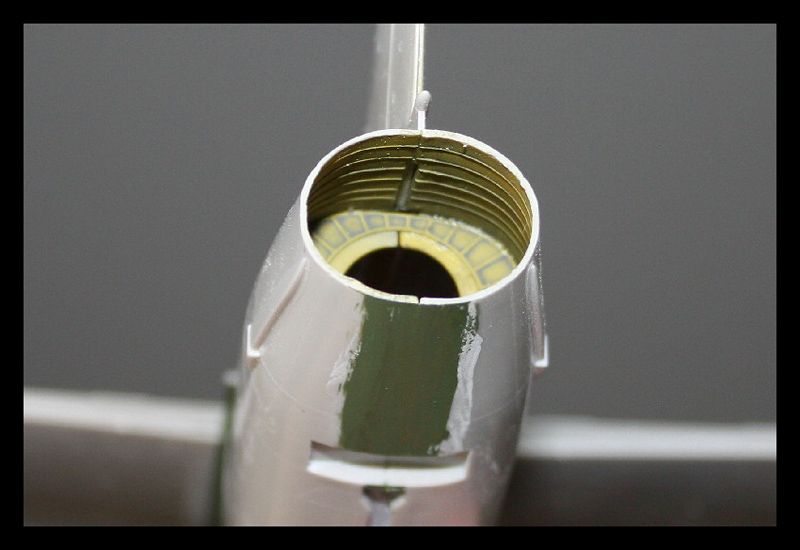
First up was spending some time on the intake so that it would require less sanding and filling once put together.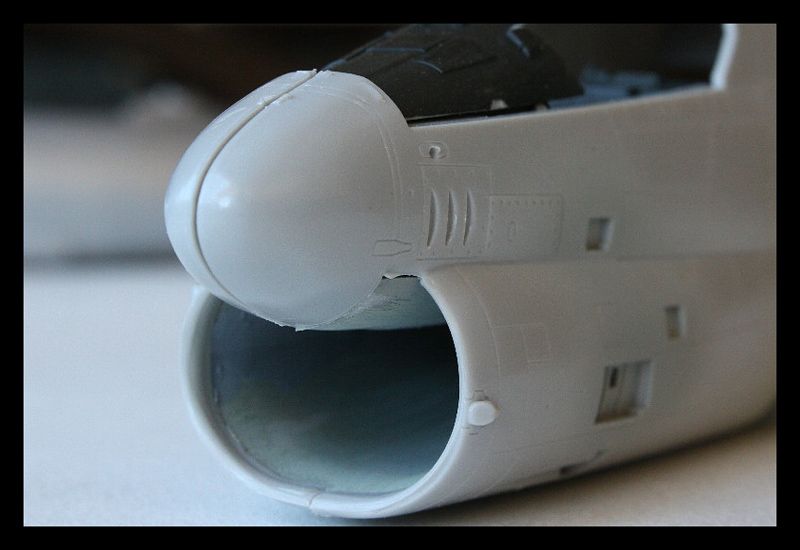
The fuselage halves are just 'clicked' together at this point. It looks like some filling will be required where the intake joins the fuselage, but after a couple of coats of Mr Surfacer the joins in the intakes themselves look like they will behave.
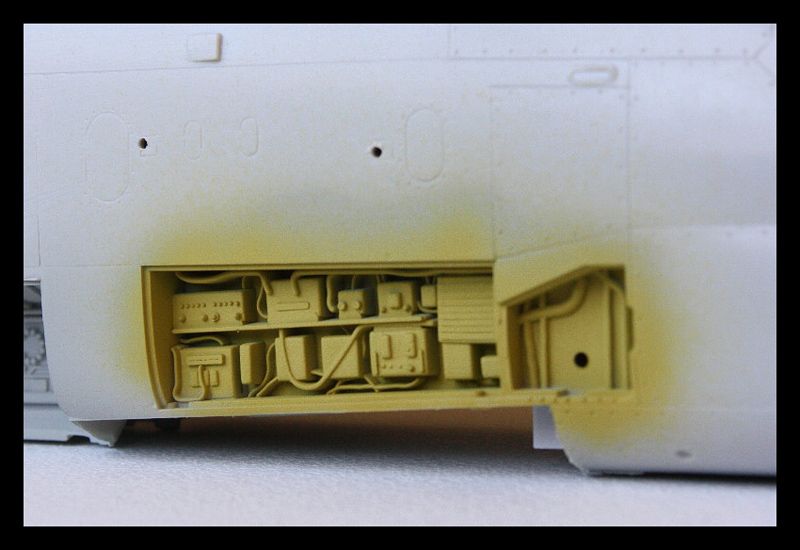
The avionics bays and the interior of the tail pipe surround have received a coat of yellow green, my own mix of Tamiya XF-4 yellow green and Gunze H340 Field Green prior to detailing.

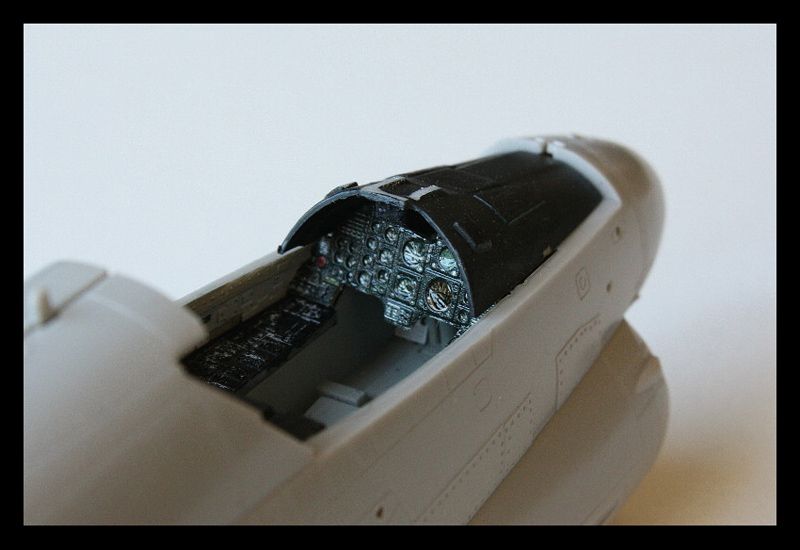
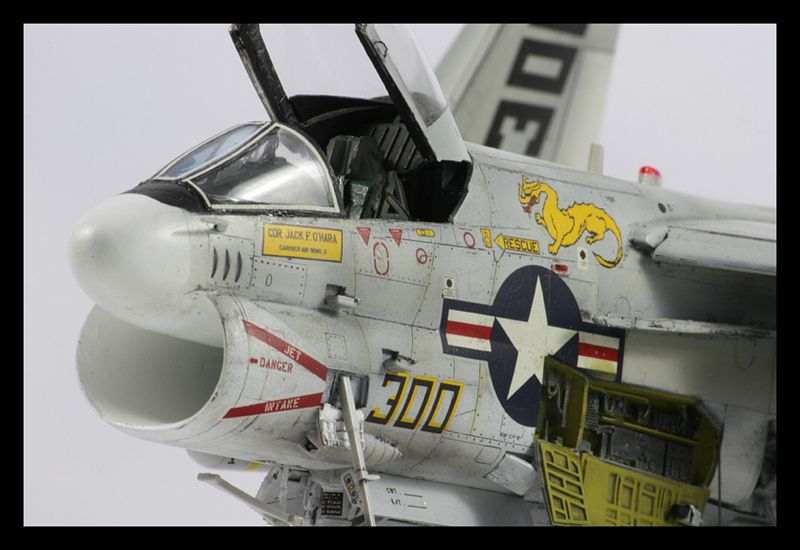
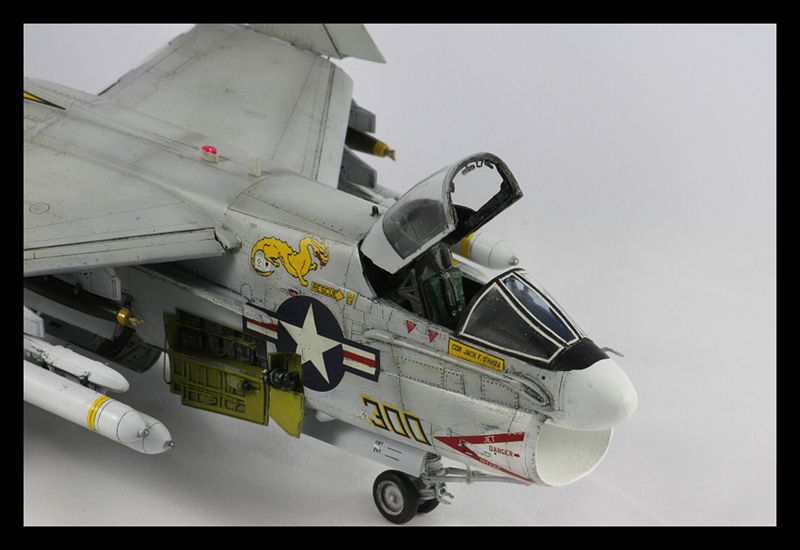
The cockpit was painted in Gunze H324 Light Grey, Tamiya NATO Black and Tamiya Flat Black, the side consoles are from the kit and painted then washed whilst the instrument panel is the Eduard Pre-painted Photo Etch using Gator Grip to sandwich the front and rear halves together. This also gives the effect of glass in the dials however I will just need to add a few drops of Klear to level them off.
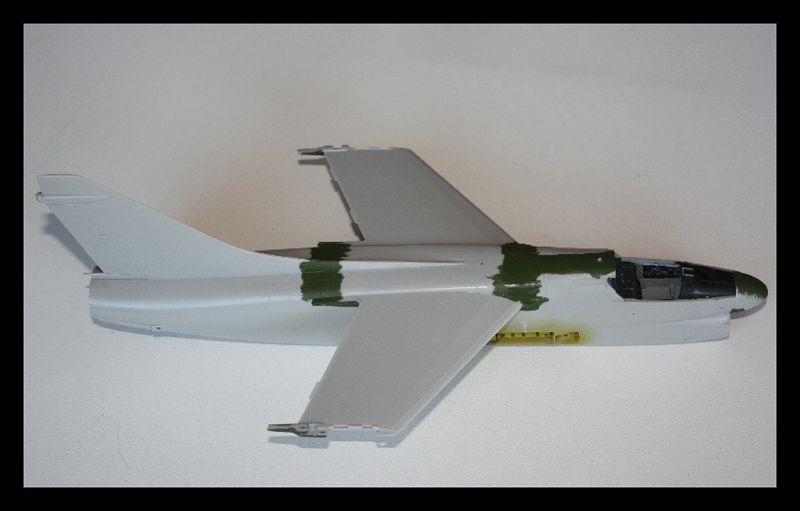
Fuselage halves are now together, with some green acrylic on the seams ready to see how they look.
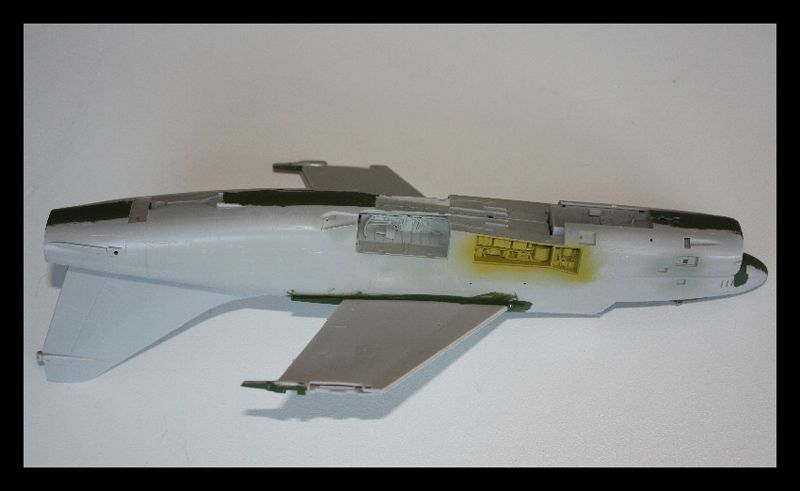
There is a nice piece of PE that forms the rear fuselage bulkhead. Once the tailpipe is in it will be practically invisible, so here it is, complete with a wash.
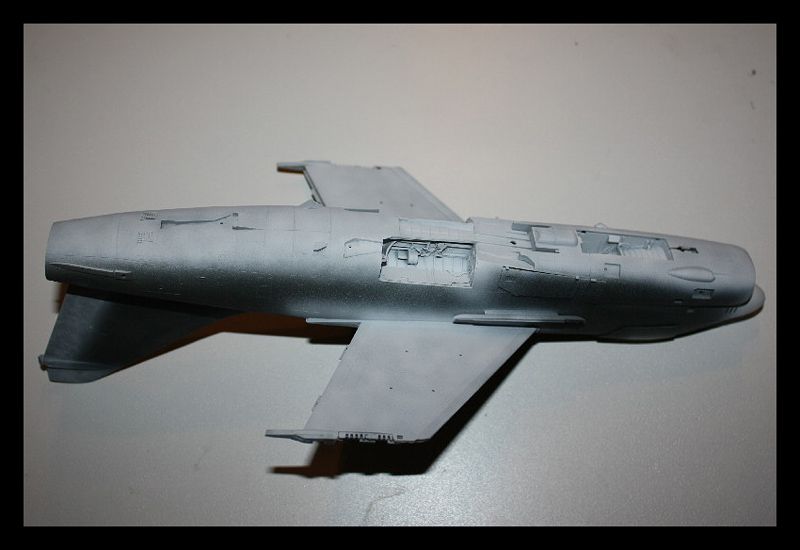
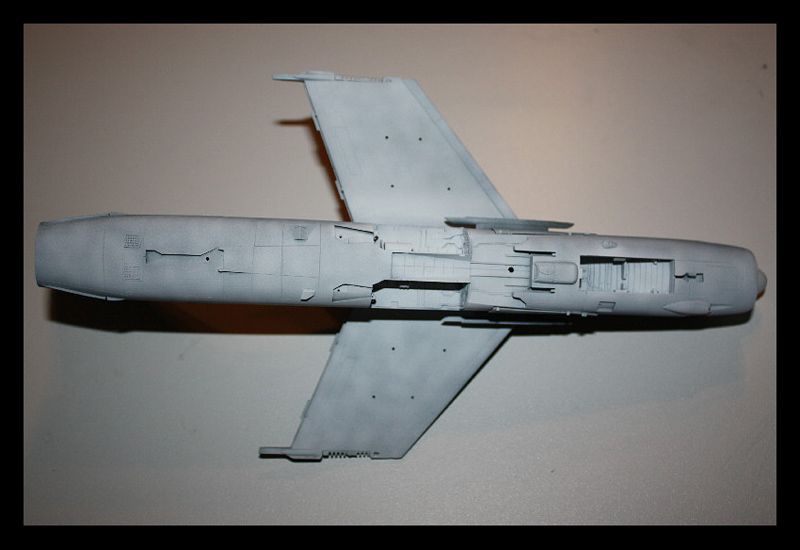
I have been doing the 'little' things like more weathering to the cockpit and painting the electronics bays, detailing the landing gear bays with the PE etc.
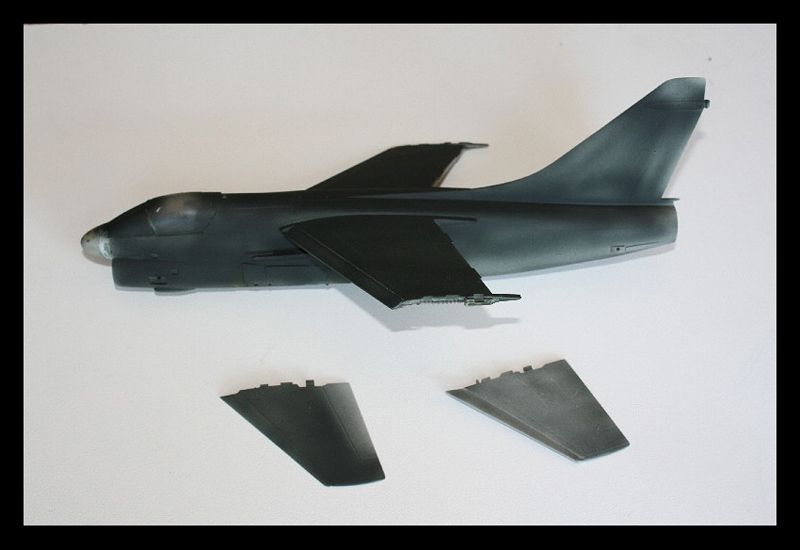
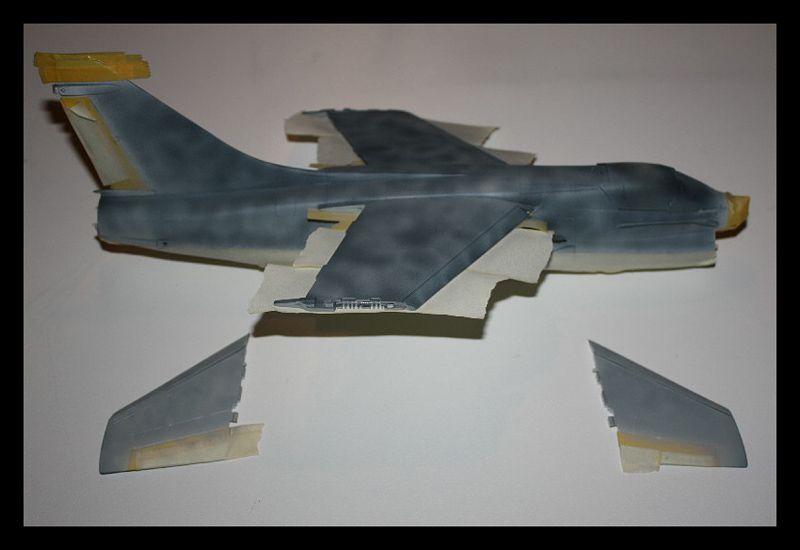
For this build I have decided to try the technique of using a dark undercoat instead of just preshading the panel lines. I want this plane to appear as it would using a period of heavy combat use having been at sea for a while.
Also, as this is the Light Gull Grey/White era, the paints weathered in a defferent manor to the modern TPS schemes as seen on F-14's and F/A-18's, so the 'patchy' appearance was not the result I am after.
I used Tamiya Nato Black as the undercoat. However, concious that I would have to cover it with white on the undersides and upper control surfaces, I only laid a light coat down in these areas.
I then used a neat mix of Tamiya Flat White in the Airbrush and sprayed in an irregular pattern - even practising squiggle patterns. Next I used a mix of about 50/50 paint to thinnners and started misting over the base coat.
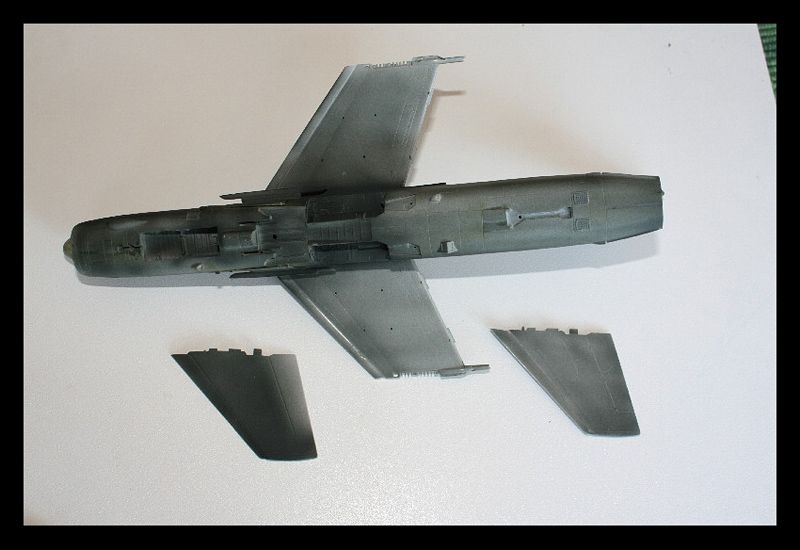

Base white coat - neat Tamiya Flat White
By the time the next white coat goes on I will have the desired base finish I am after. I will then mask off the white areas, and repeat the process using the Light Gull Grey for the upper surfaces. Further weathering will then be carried out using washes and post shading.
Okay, same approach for the upper surfaces.
First coat of Gunze H315 Light Gull Grey.

Now using an even lighter grey, in this case Gunze H338
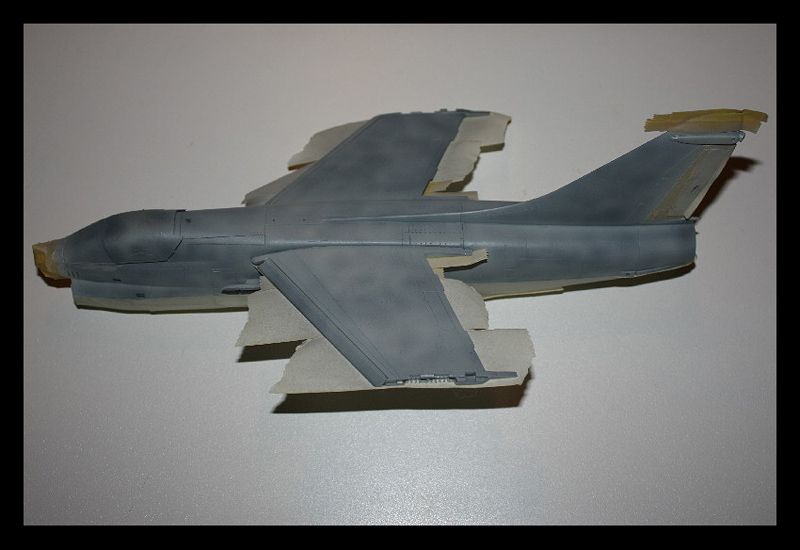

And finally a misting over with Gunze H325 Light Gull Grey (only as I ran out of H315!!)
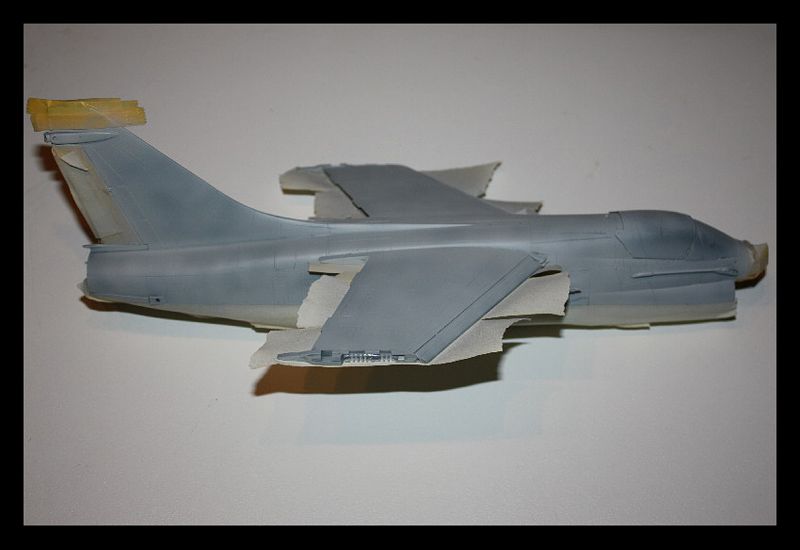
All I have to do now is a few touch ups that I am sure will be there once the masking tape is removed and then it will be ready for Future and decalling.
Further weathering will be done after the decals are on - after all the painted marking waether at the same rate as the base coat. This will be done using the washes, post shading and further panel touch ups.
And now for the first of the decals. I am using the kit decals and I am very impressed the way they have hunkered down into the panel lines, should look great with the wash and some post shading.

I have managed to get a few more on tonight, and have also played a bit more with the light tent and exposure settings on the photos... (hopefully improving the photographic as well as modelling skills).
Putting on the jet intake warning revealed I had got it wrong as far as the demarcation like between the grey and the white goes, oh well nothing a bit of touching up wont resolve!! ( It's not as if I still didnt have more weathering to do!!)
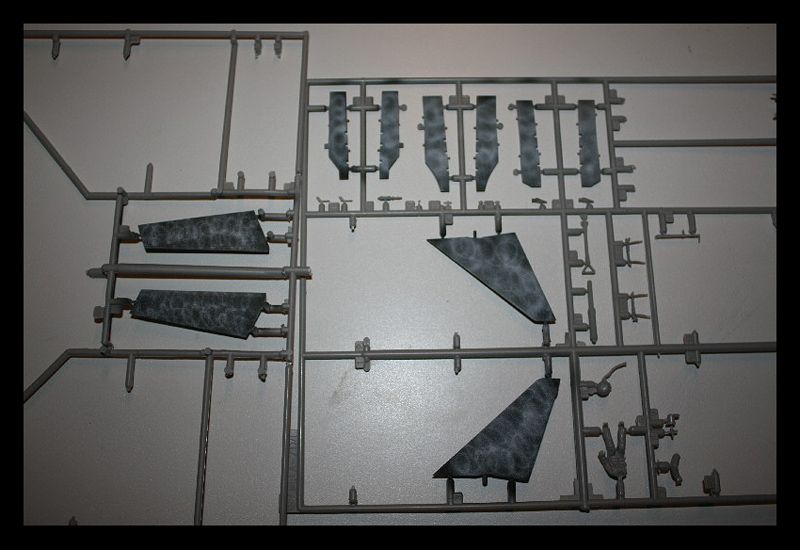
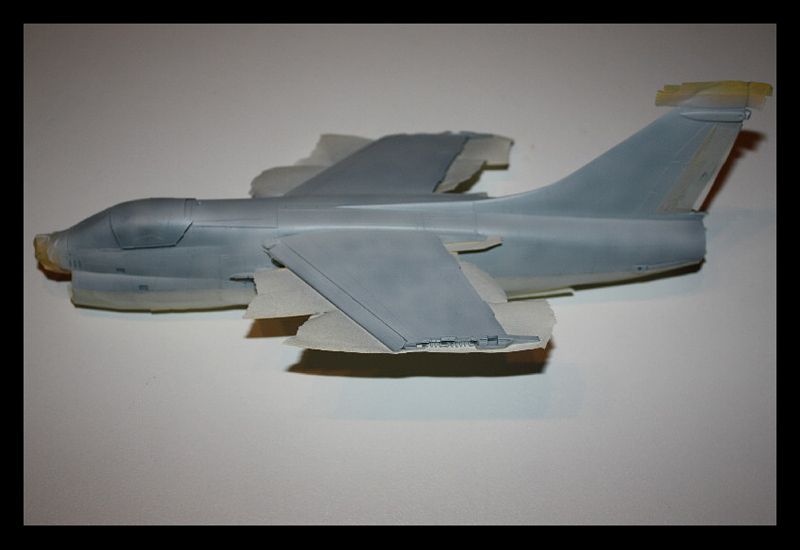
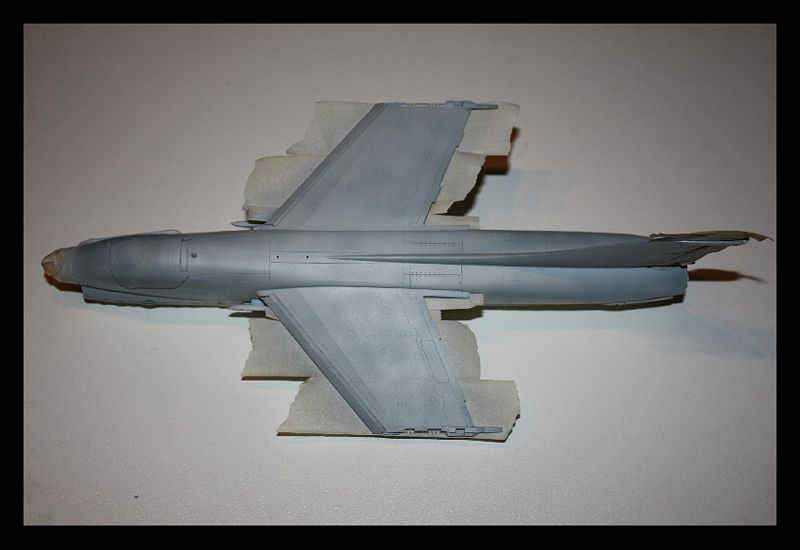
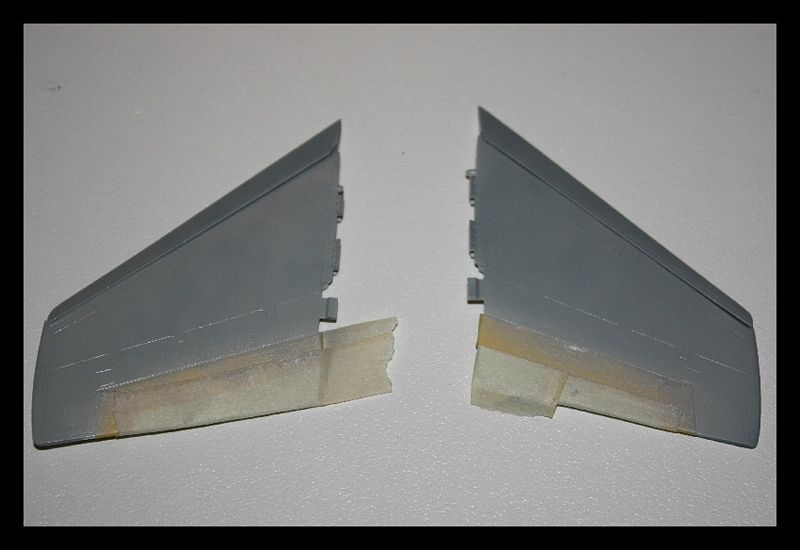
I have also just push fit the outer wings to see what they will look like in the folded possie, and I like, especially with more yellow on the tips!!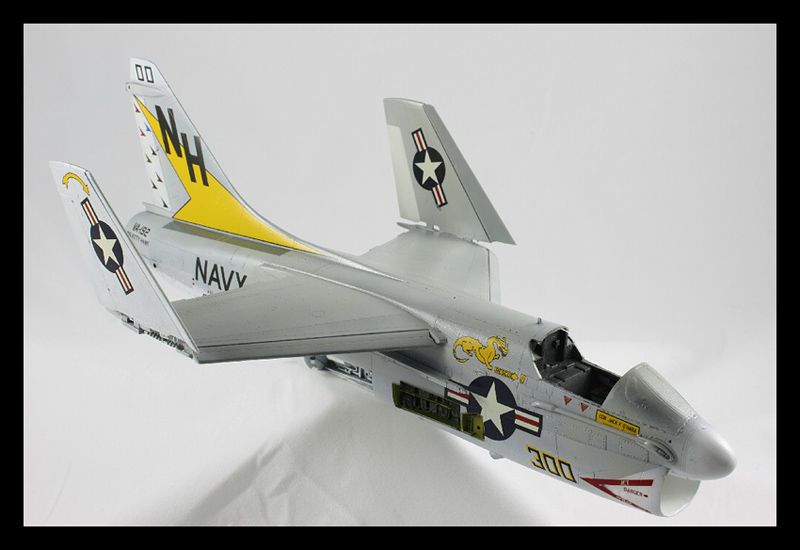

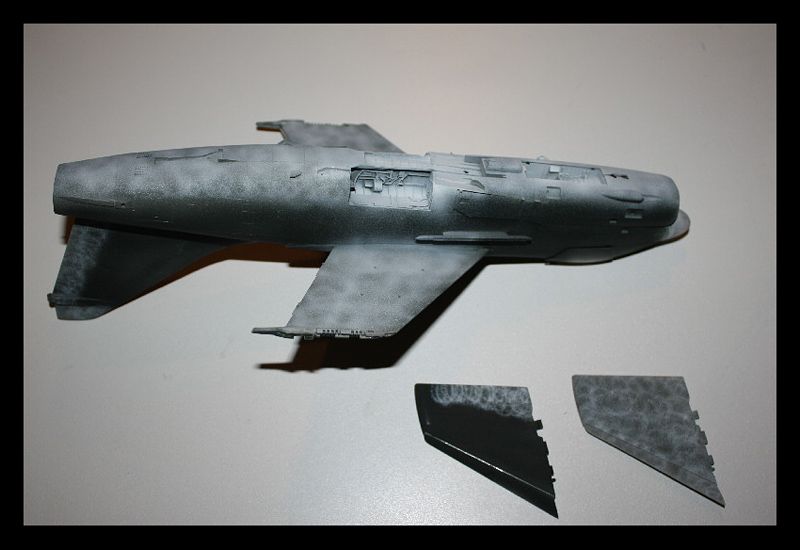
So, now it is time to get this puppy dirtied up.
First some of the dark wash, and also a layer of the light wash too!!

And a 'deck level' shot!

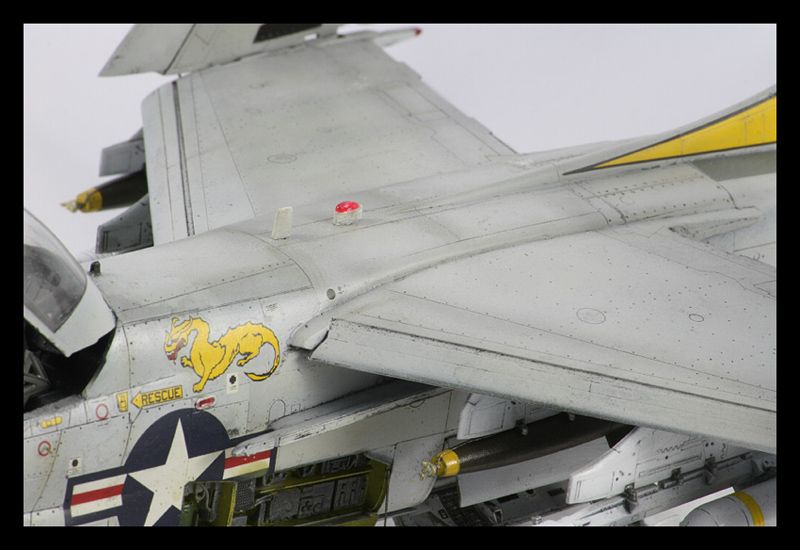
Following the washes, some post shading using Gunze acrylic Smoke Grey, thinned with Tamiya X-20A. 


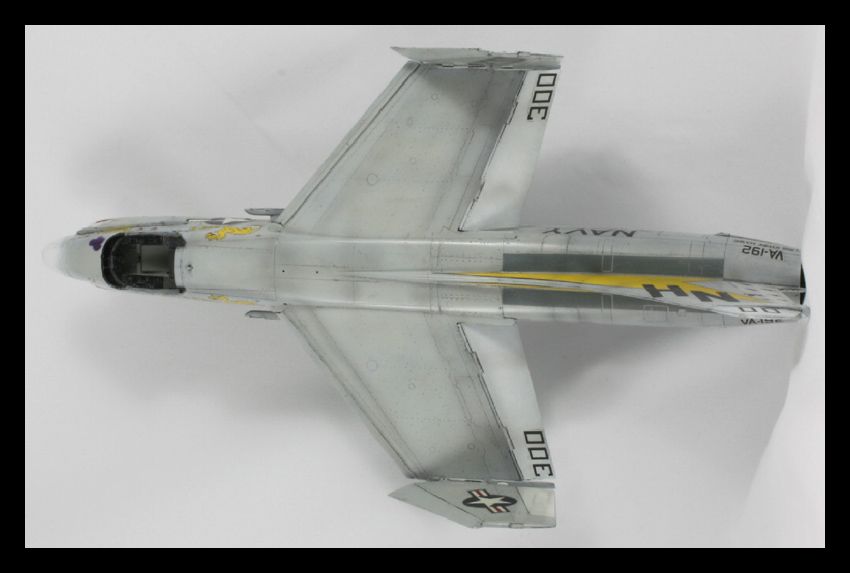
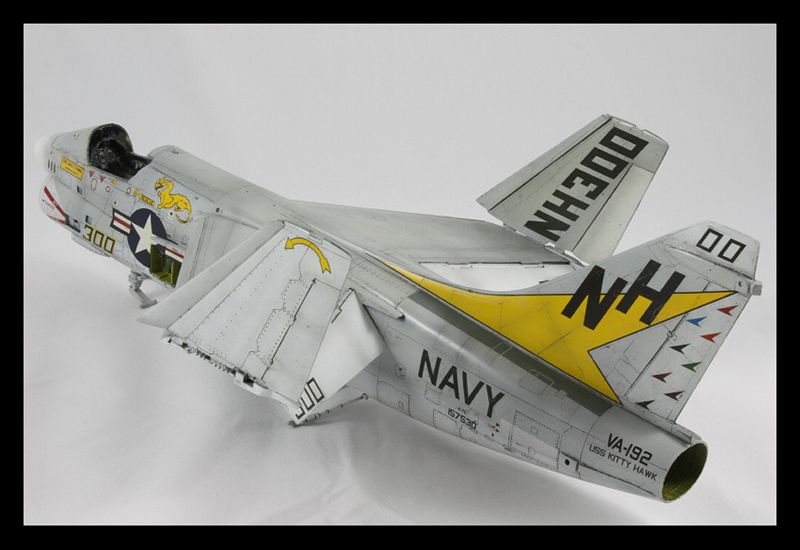
My aim is to achieve the look of a plane that is nearing the end of a tour in the Tonkin Gulf. I think I may just be on the way to achieving that.
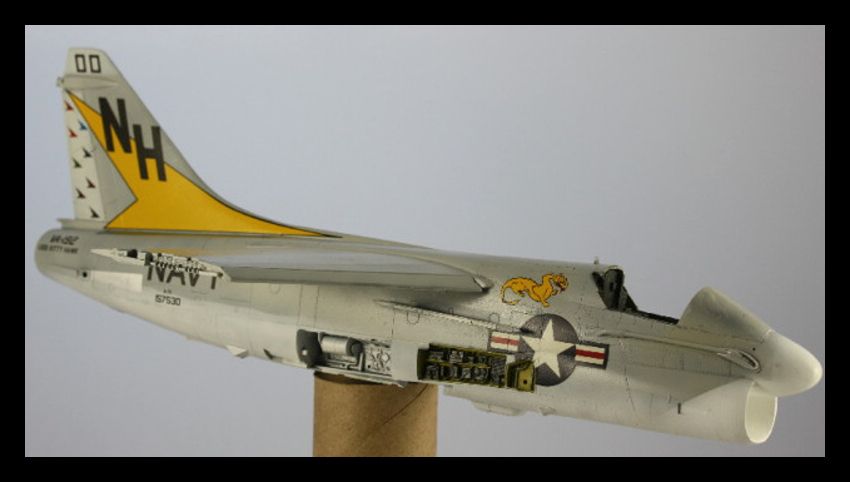
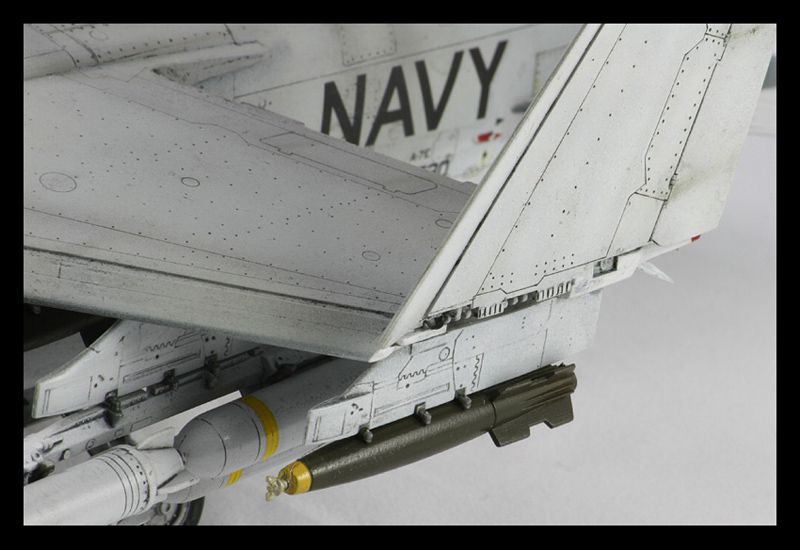
Getting close to completion now. Final clear coat is on, wingtip lights completed using Testors clear cement and then Gunze clear red and clear blue, centre windshield tinted and sealant strips added. Wheels are on and photoetch brake lines, tie downs and knuckles added to main gear legs, wing pylons are in place.
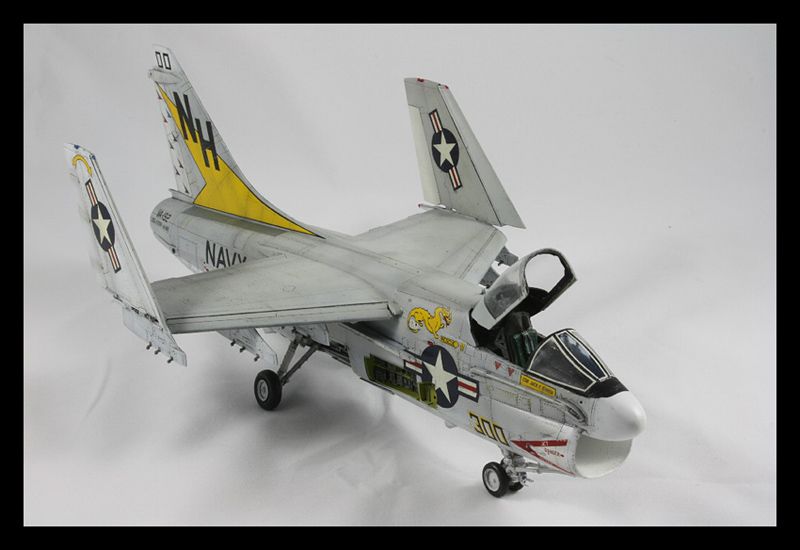

The seat is in, the gear doors and most of the Avionics bay doors are on, the anti collision lights are on along with most of the antenna, the MER's are on and ready to be armed.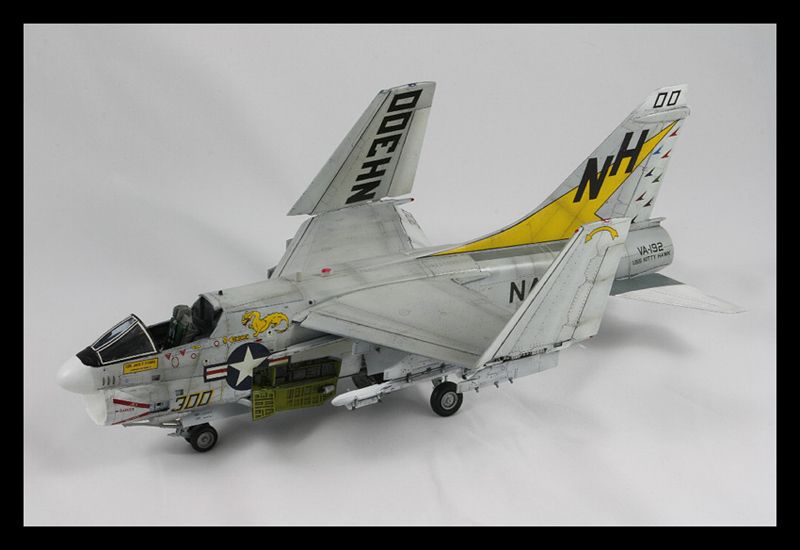
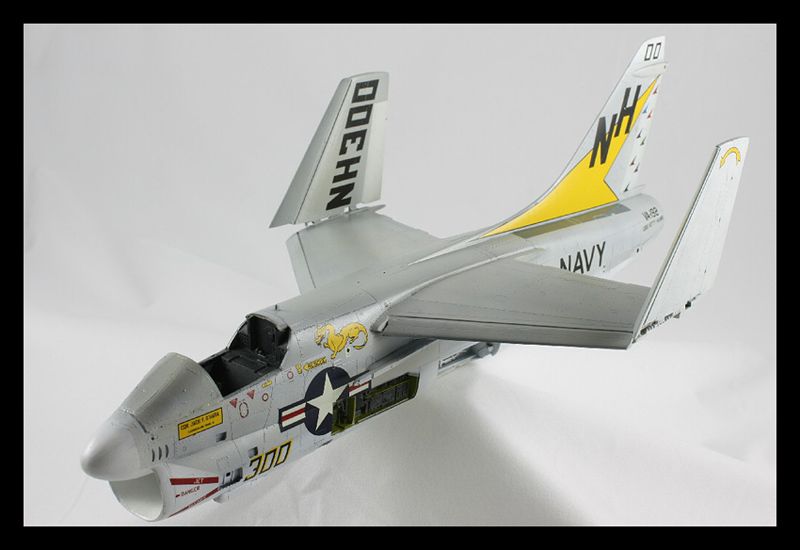
Still to go, Canopy to be fixed in place, boarding ladder and steps, final P/E and pitot tubes etc, and then just hang the ordnance and that will be that!!
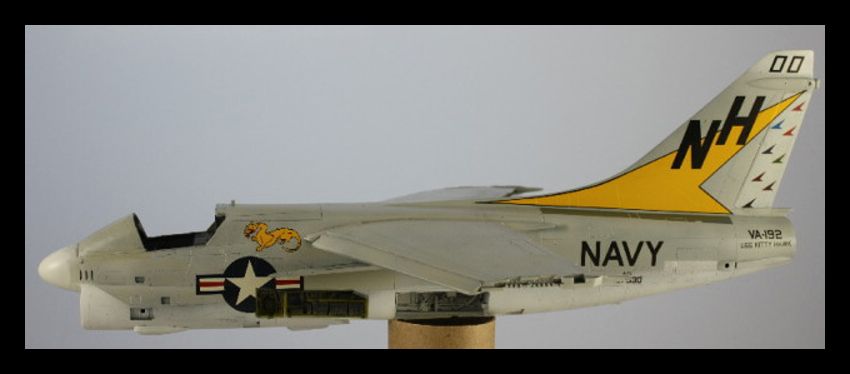
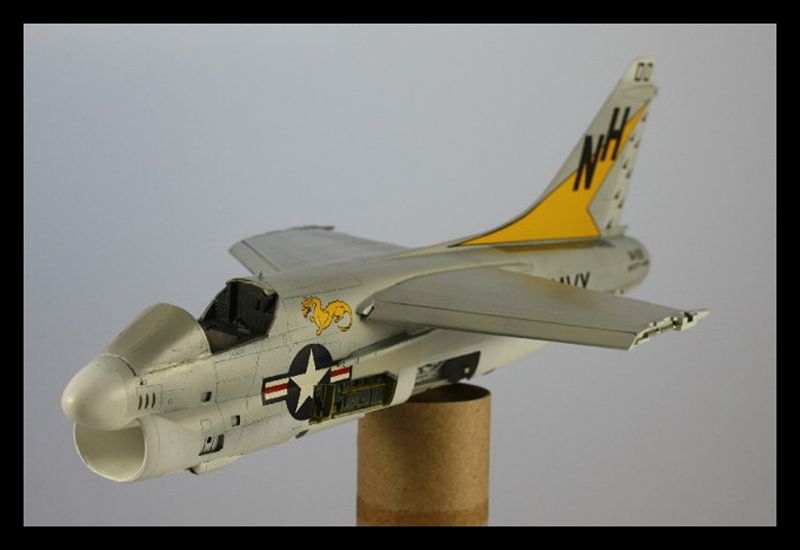
Finished!


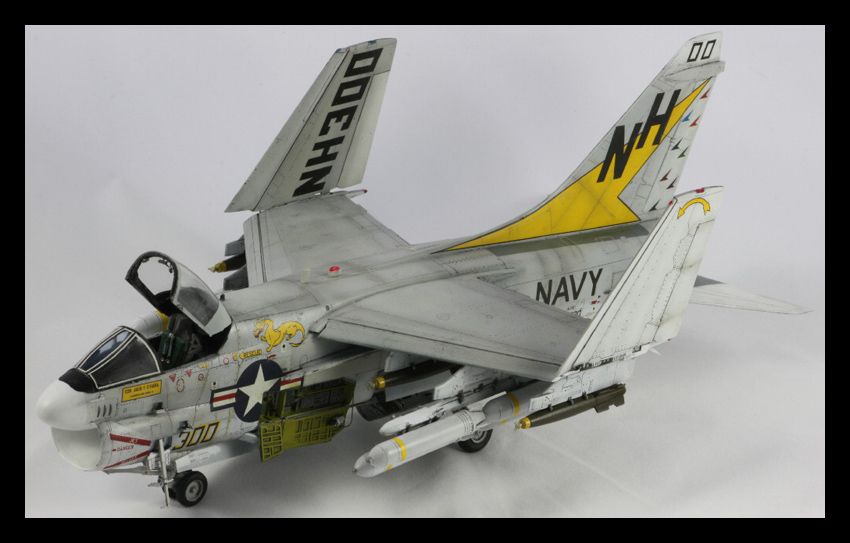


Ready to rumble!!
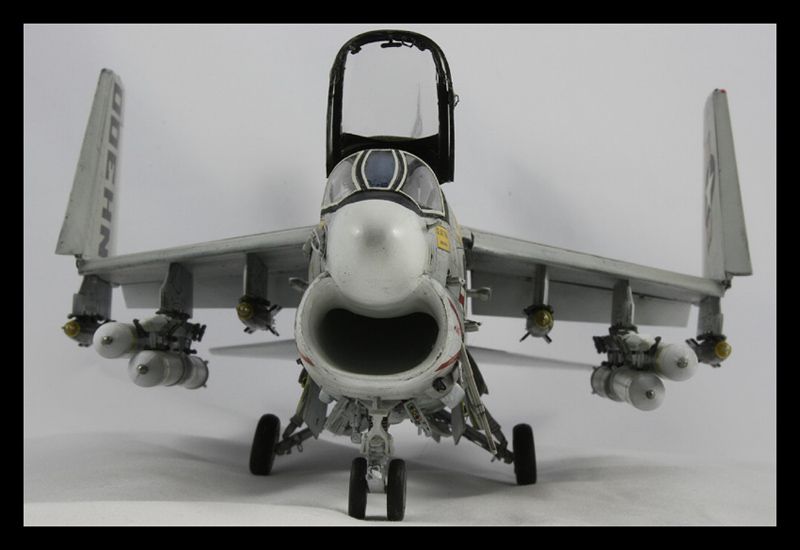
A very enjoyable build, probably one of the most detailed kits I have ever completed with the PE set, and I am very happy with the result.
Thanks
Graham 