


1:48 Italeri Douglas DB-7 Boston III - Sprit Of Sport
By Graham Mahoney
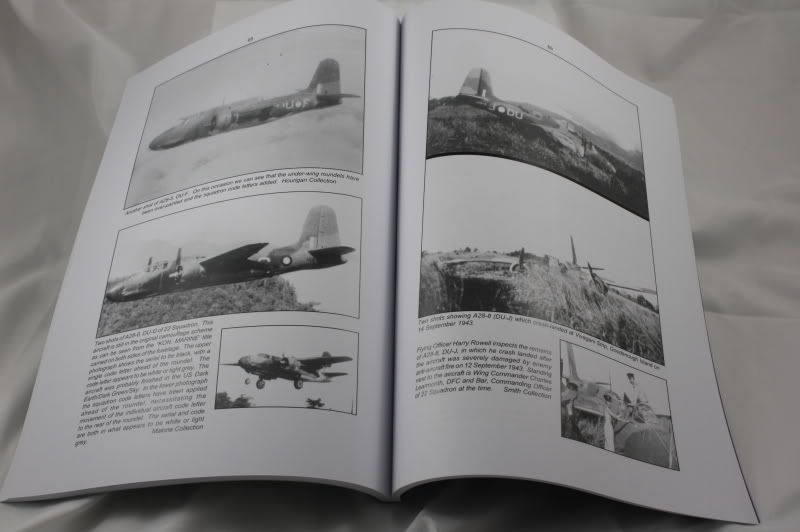
Operated by 22 Sqn RAAF, Douglas DB-7B Boston III A28-15 'Spirit of Sport' was lost on operations on 14th September 1943 off New Britain.
The Box
22 Sqn operated these planes out of Port Moresby and then Goodenough Island, both a long way from any maintenance depots. As such these planes became heavily weathered and generally all round very grubby. To emulate this I have used a variety of washes, pigments, chipping and oil based filters.
- Kit:- Italeri DB-7 Boston III
- Scale:- 1:48
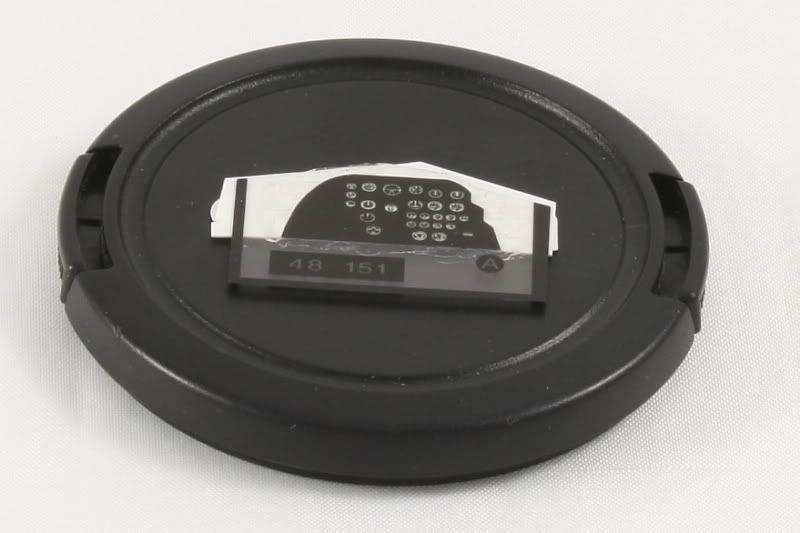
- Extra's:- Decals Aussie Decals A48015, Eduard PhotoEtch 48151, True Details Wheels and Liferaft 48059, Verlinden Cyclone 2600 Radial Engine and Fronts 1183, Red Roo Models Tropical Boston Cowls and exhaust stacks RRR48129
- Paint:- The Aircraft was painted using Dupont 'Matches' for RAF colours as they were originally for the RAF, then transferred to the Dutch and diverted to the RAAF as Dutch East Indies fell before the boats carrying them got there!. For Dupont Sky 71-021 undersurface i used Gunze H311 FS 36622 Light Grey, for the Dupont Dark Earth (Sandy Earth) 71-009, i used Gunze H310 FS30219 Brown. For Dupont Dark Green 71-013 i used a 50:50 mix of Gunze H309 FS34079 Dark Green and H302 FS34092 Medium/Foliage Green. For the lighter 'local' green used around the nose, Lifecolor UA008 FS34092 was used.
- Scratch building:- Bomb Bay, Bomb Bay door actuators, raer gunners station, main undercarriage bays including oil coolers, ventral gun position, additional deatil to uncowled engine, lower engine cowl flaps (closed open side, partlyopen the other). Additional switches, controls and placards in cockpit, wingtip formation and navigation lights, latches an stays for pilot hatch, wheel hubs, armoured windscreen, open sided cockpit window.
- Reference:- "Frend Bilong Australia True" Gary Byk
The Box

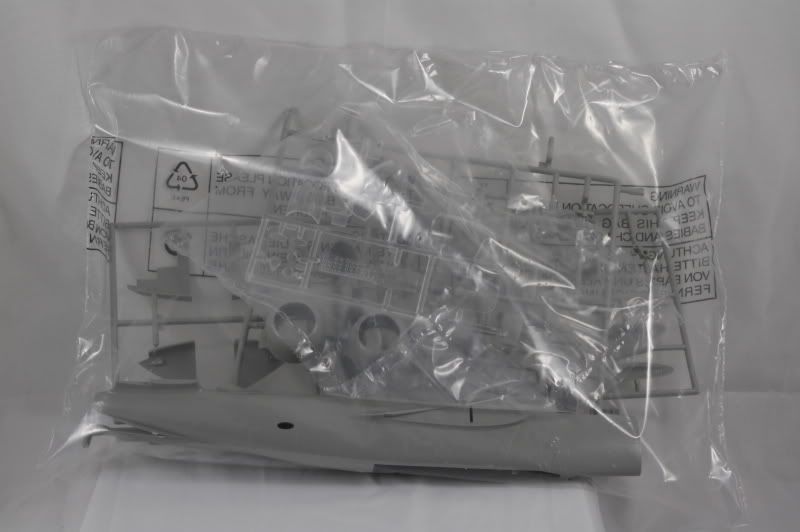
The Sprues

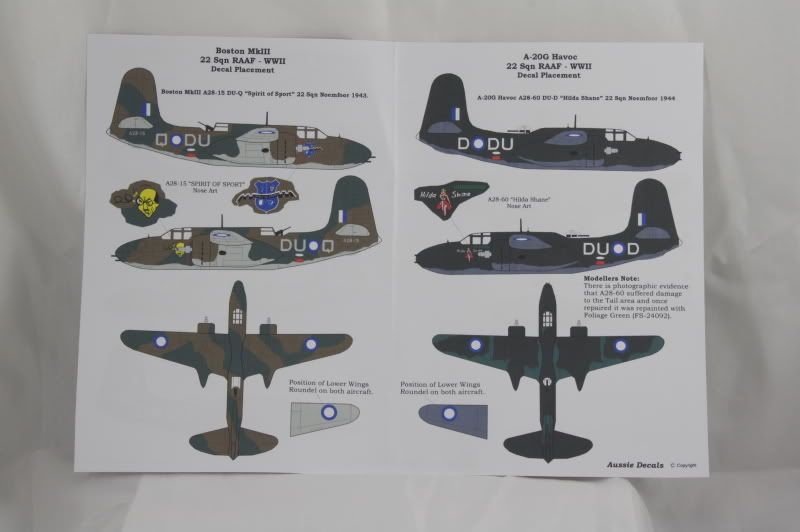
The Decal Instructions.
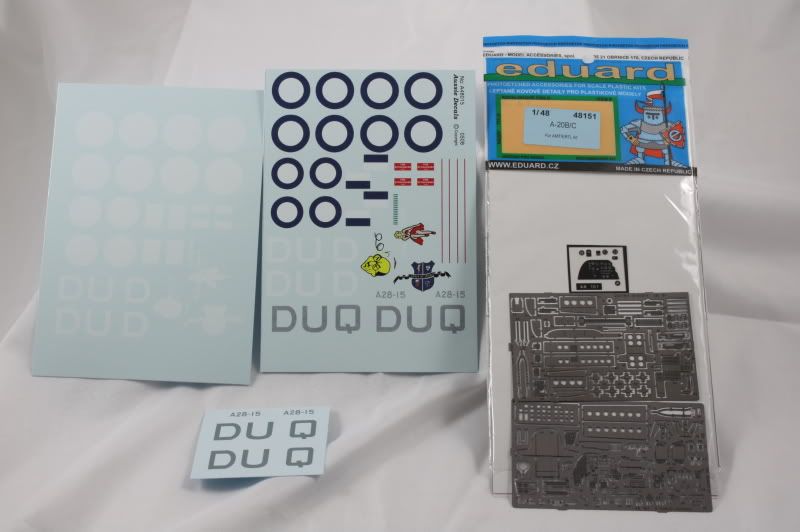
The Decals themselves and Eduard PE.
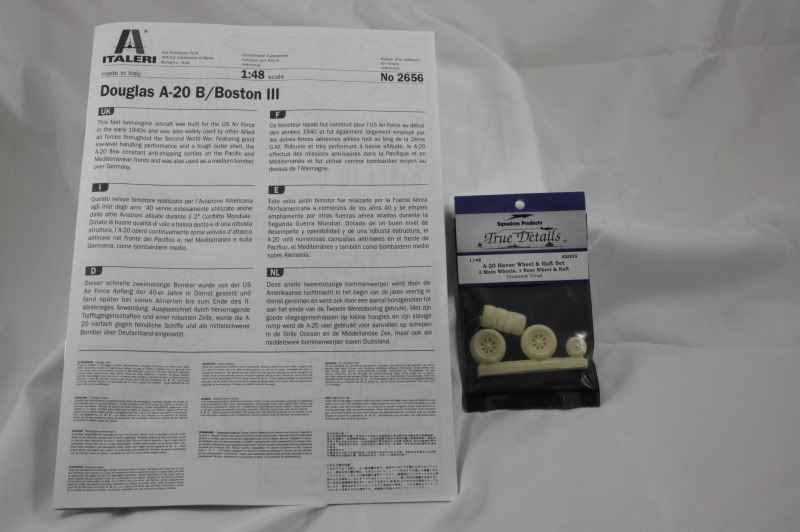
The kit instructions and the True Details wheels and life raft.
Verlinden Engine details and Red Roo Cowls and exhausts.

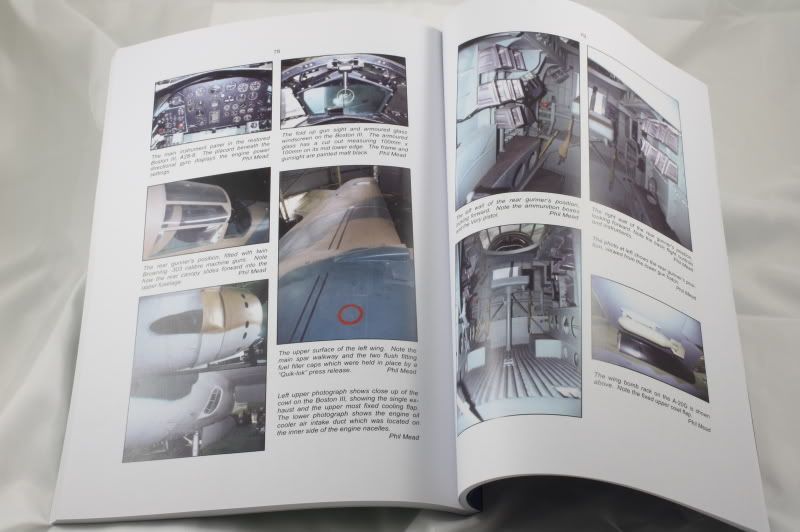
Reference Book - Also, I have access to the plane on the cover, a restored DB-7B, as it is the RAF Museum at Point Cook which is within a 90 minute drive from home

Ok, time to get the ball rolling on this one. Lots of little fiddly bits happening at the moment.
Eduard suggest discording the kit part for the Instrument panel completely, so the first thing to do is glue piece of white plasticard behind the acetate instruments so the whites of the dial shows through. Gator Glue was used.
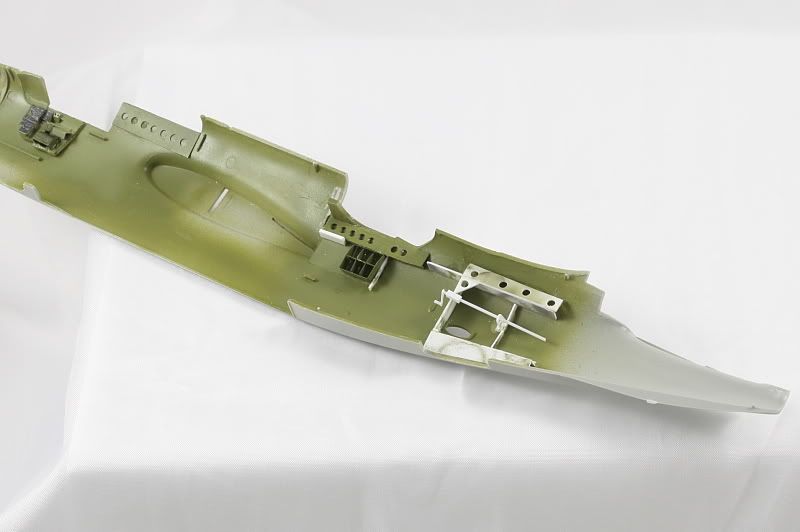
Started adding some of the Eduard detailing inside the fuselage halves. Blanked off the remnants of the wing root in the rear gunners office, and also added plasitcard sheet at right angles below the photo etch to get the correct position and add to the 3D effect. As the gunners canopy will be open and this is a big hole then there will be a bit of extra work going on here.
The AMT/Italeri/Revell A-20's all have the locating pins for the landing gear set too far back in the engine nacelles so the original ones have been filled and new ones drilled.

A little bit of the PE on the pilot's right console and what have we here?? Yes we are going to have a scratch built bomb bay.

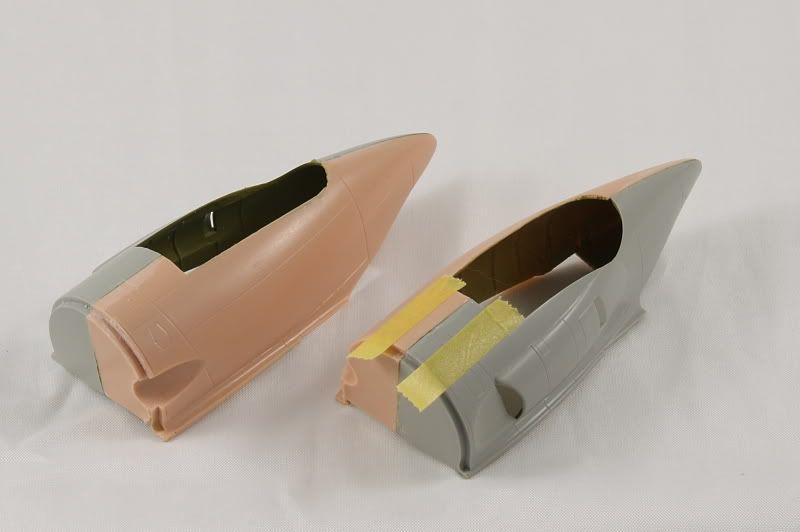
Now in most case people have suggested that the nose halves are glued to the fuselage half before joining the fuselage halves ( or if they have not done that they have stated that they would do it this way the next time ). It looks like just a slight sand will be required on one half.
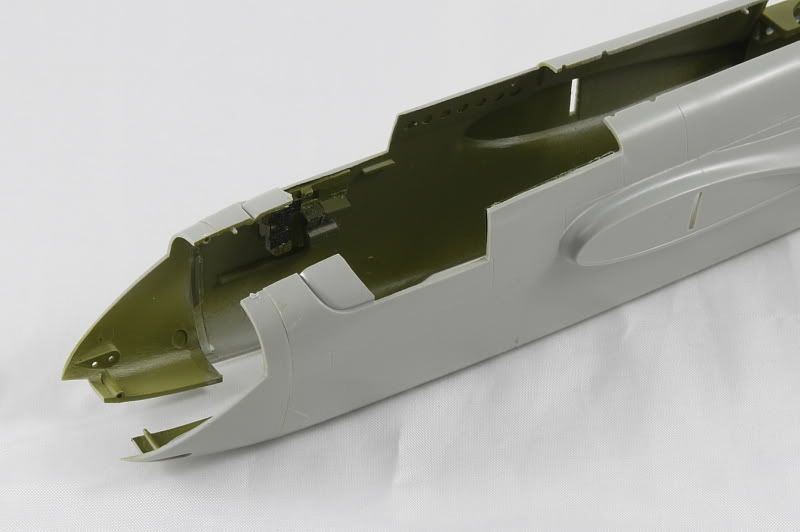
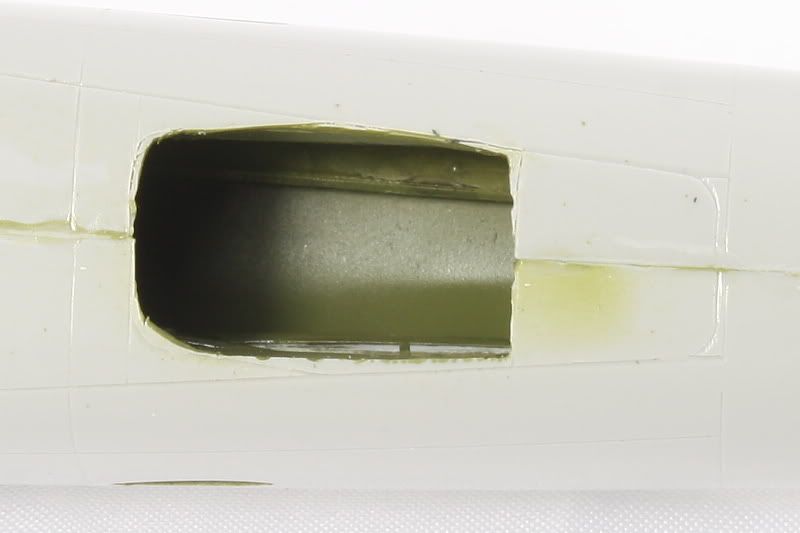
Not content with scratching a bomb bay I have also decided to open up the ventral gun position, so it is on with the masking tape and out with the drill.

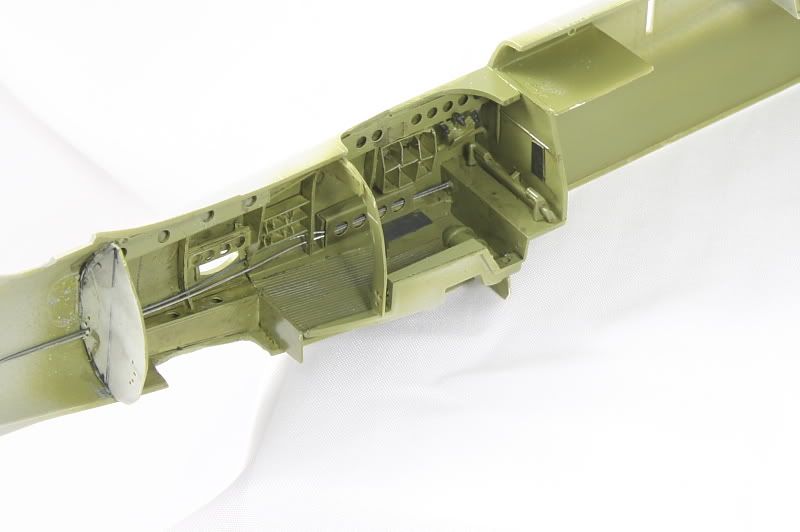
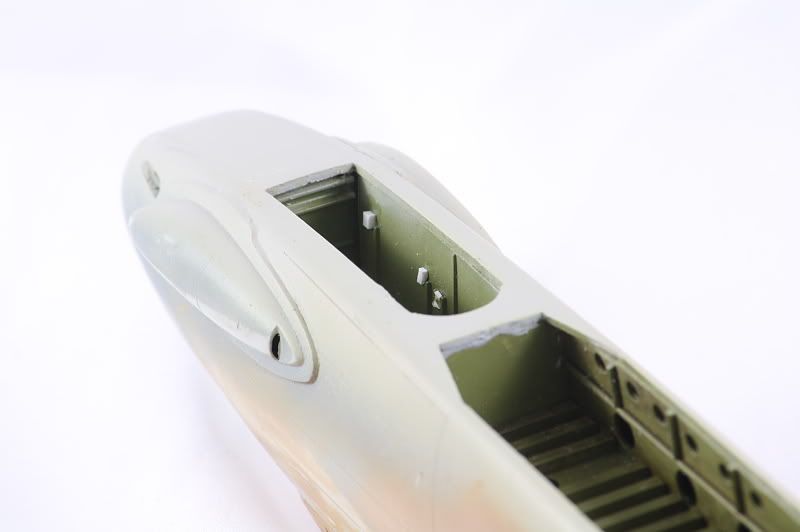
A start has been made on building up the framework around the ventral gun 'tunnel'. and note also the extension to the coaming in front of the dorsal gun position; ready to accept some miscellaneous equipment boxes that the carried there.
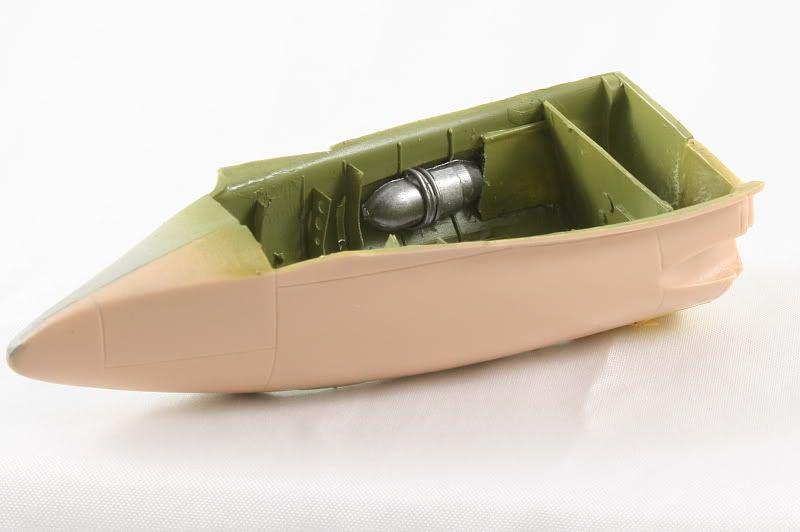
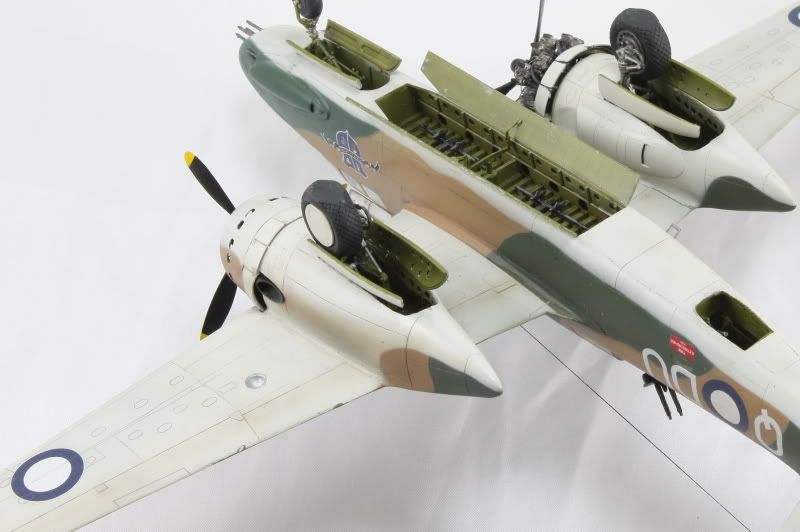
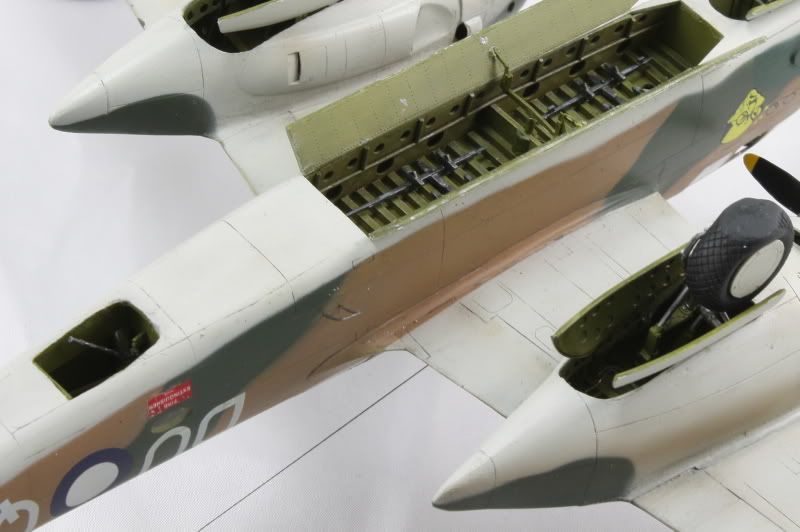
The bomb bay has been built and fits snugly in place; just to add more detail as well as the front and rear bulkheads.
So, a bit more scratching,

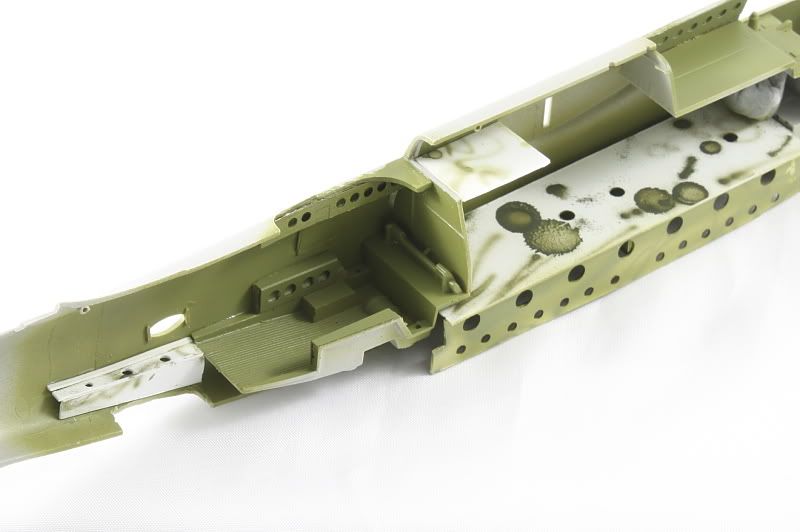
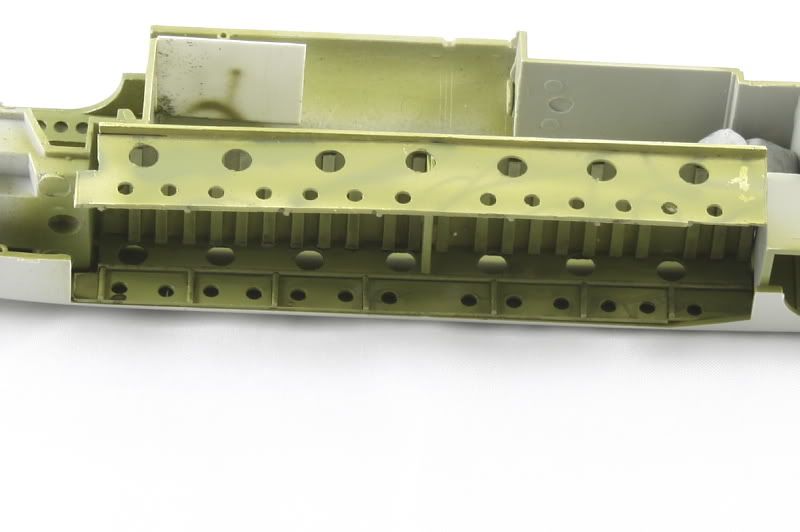
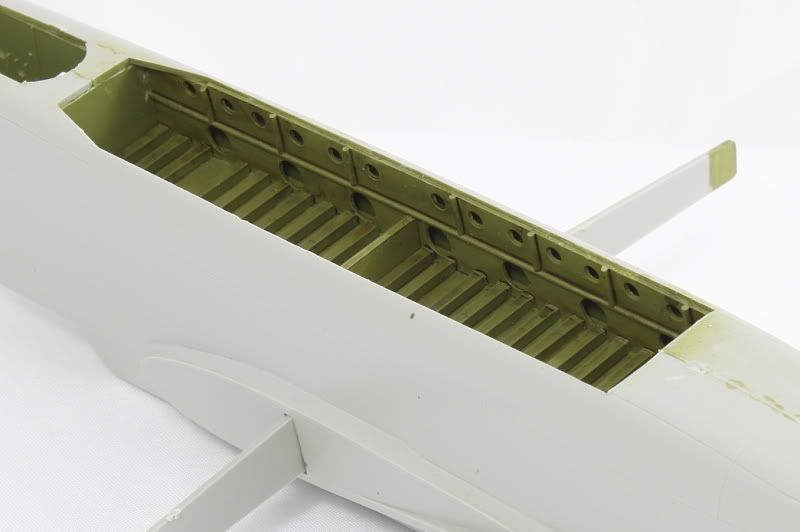
Adding the pigeon holes for the ammo boxes for the dorsal guns, half way through the same for the ventral gun, as well as the throttle quadrant.....yes these were dual control so could be flown from the rear cockpit. The RAAF pilots often let the gunners have a fly of the planes on the way back from sorties....though landing would have been nigh on impossible given the lack of forward vision and zero sideways vision through the wings!!!

On the other side I added the ammo pigeon holes from the eduard pe set - the ones above were my own effort, as well as the shaft and handle that went towards the rear bulkhead - not 100% sure but I think it was to open the ventral hatch.
I have also glued the Red Roo resin engine nacelle halves to the kit parts, a pretty decent fit ( unlike certain other resin that has been featured of late!! ) and not much cleaning up required, just a bit of filler and some sanding. I have used masking tape to make sure I do not loose any more detail than I need to.
More of the same, and my first 'challange' with the Aftermarket stuff....
Applied a wash to the gunners station as well as some drybrushing and starting to pick out the detailing, also added a couple of control lines along the base of the floor - yet to be tightened up.
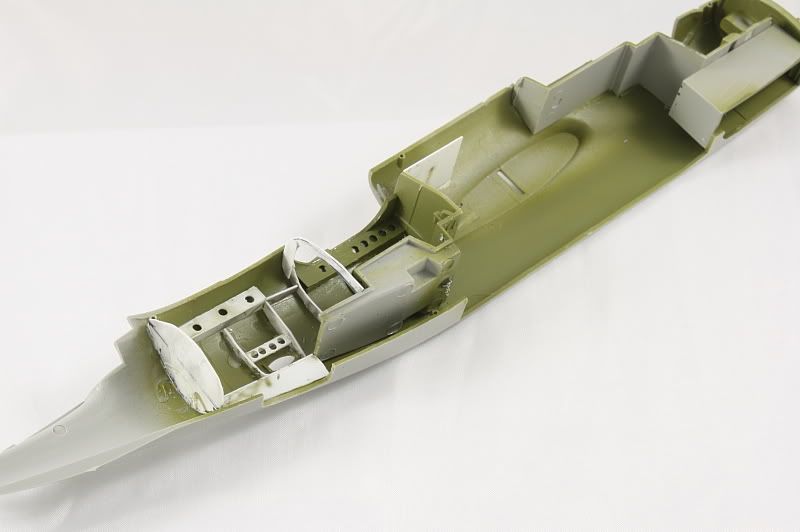
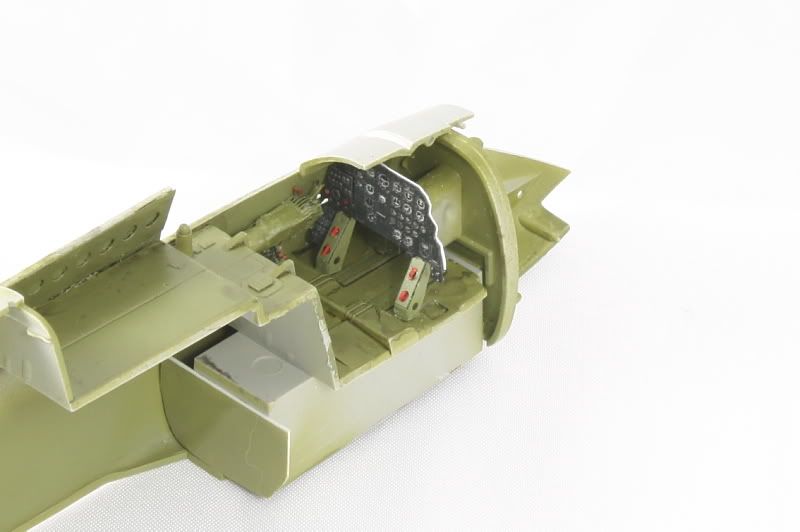
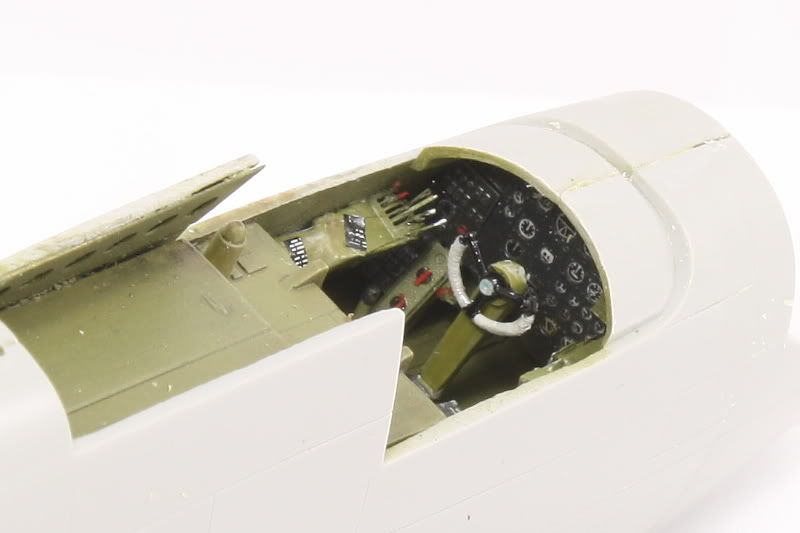
Moving along to the cockpit, scratched the red switches on the bulkhead panels below the instrument panels. The ten levers for the throttles, pitch, mixture, carbie heating and superchargers added to the two quadrants came out the PE set. Revised the shape of the console aft of the throttle quadrant, the kit and Eduard both have this square, photos show it rounded.

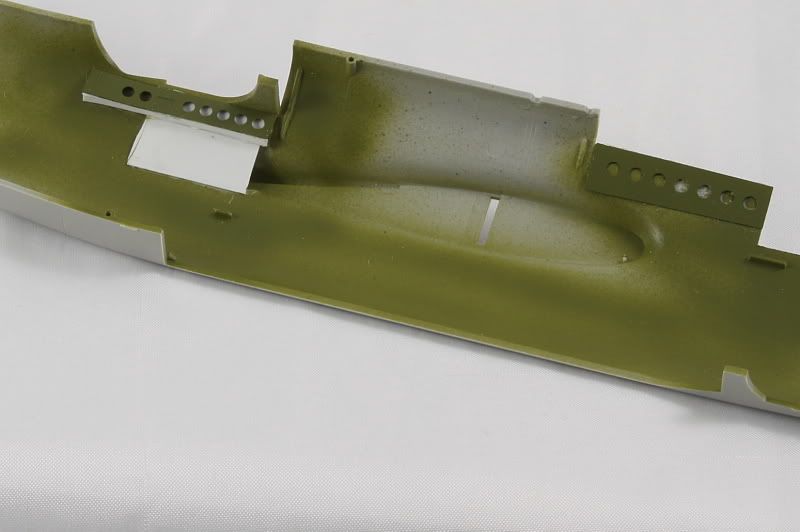
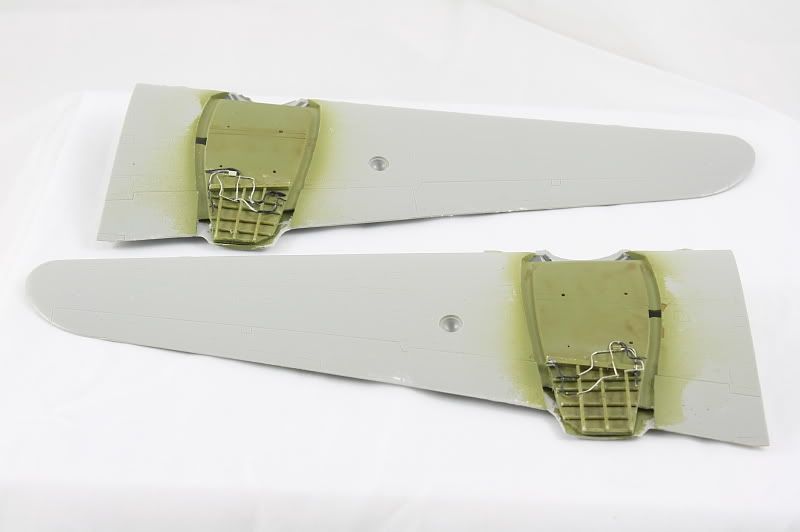
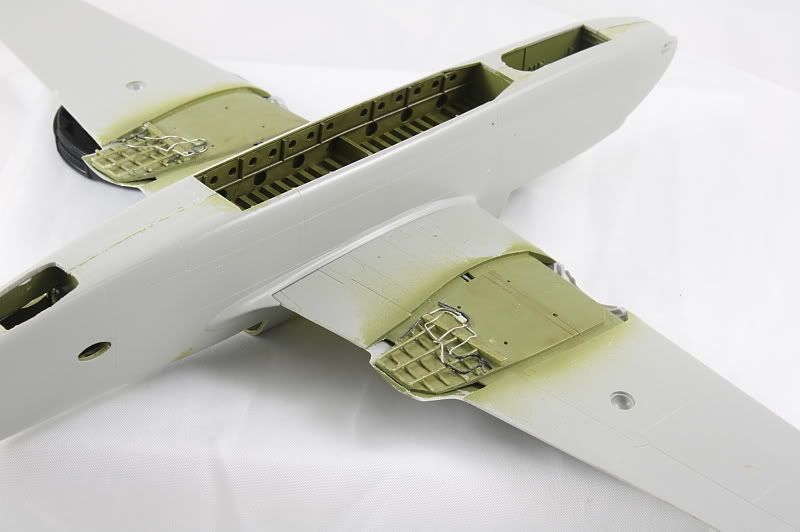
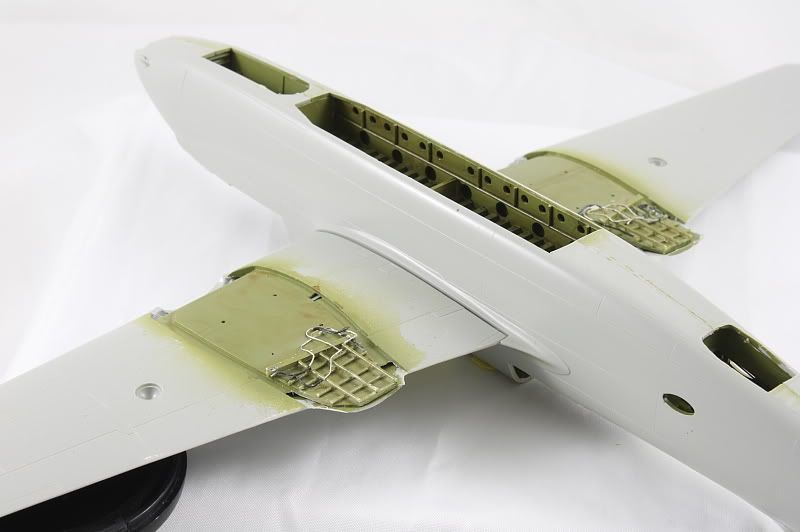
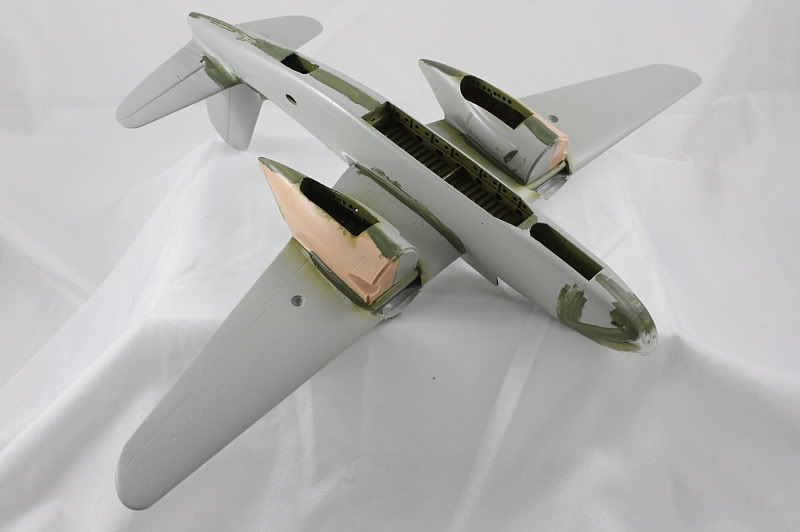
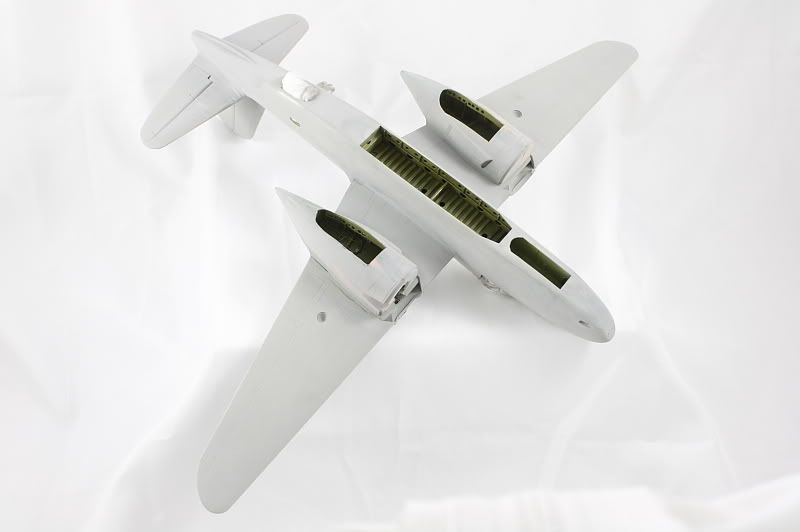
I added details to the main gear bays are completely naked....made from plastic card and rod...next up will be some hydraulic lines and the oil coolers which sit in the nacelles on the inboard sides.

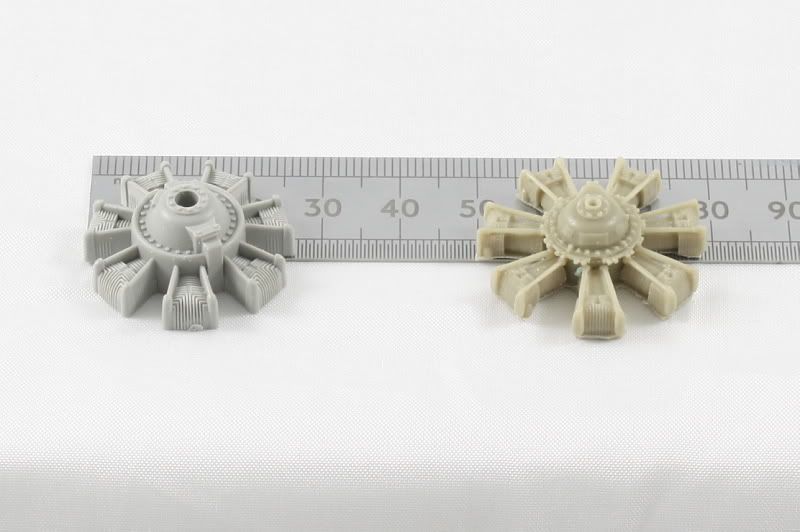
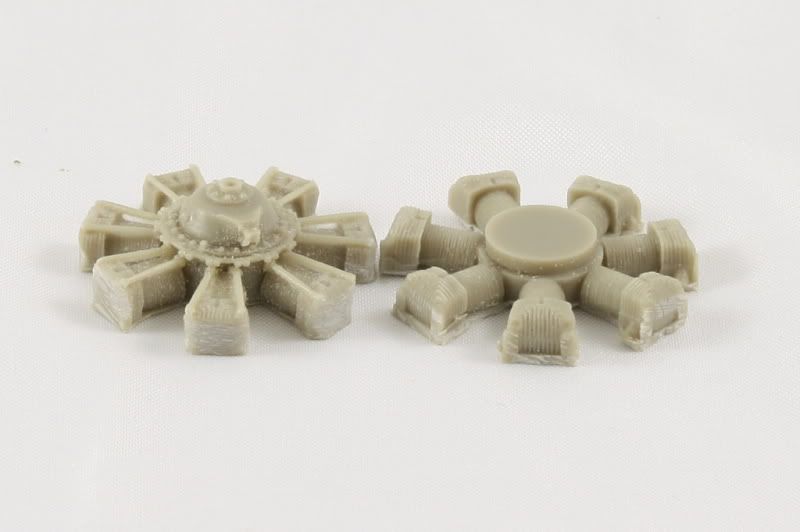
And now to my first 'issue' with the Aftermarket. How these Verlinden Cyclones are meant to fit inside the cowlings is beyond me. The kit engines are nice snug fit inside bother the kit and the Red Roo cowling, so something is going to have to give.... In Verlinden's defence though these engines are not designed with this specific kit in mind....or any specific kit for that matter.
Here we have some hydraulic lines added to the roof of the main gear wells.
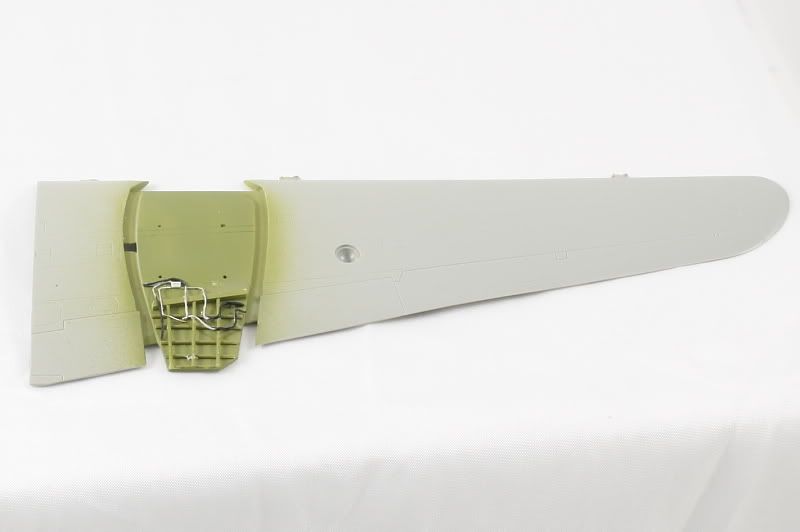
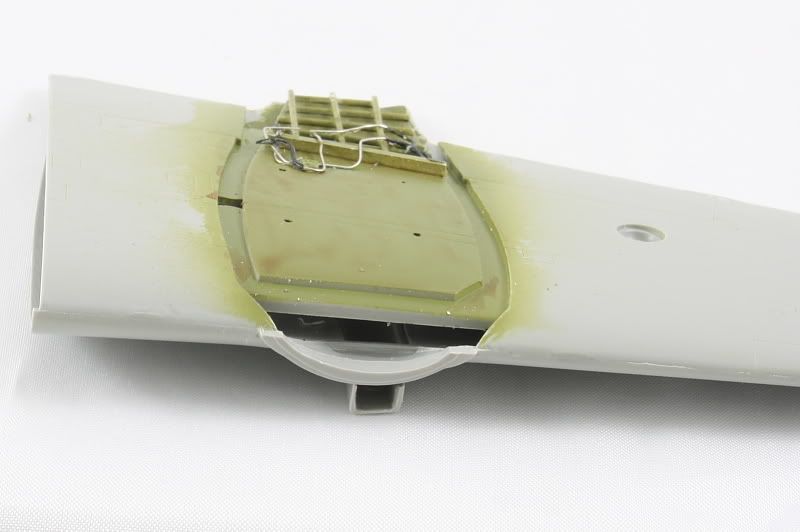
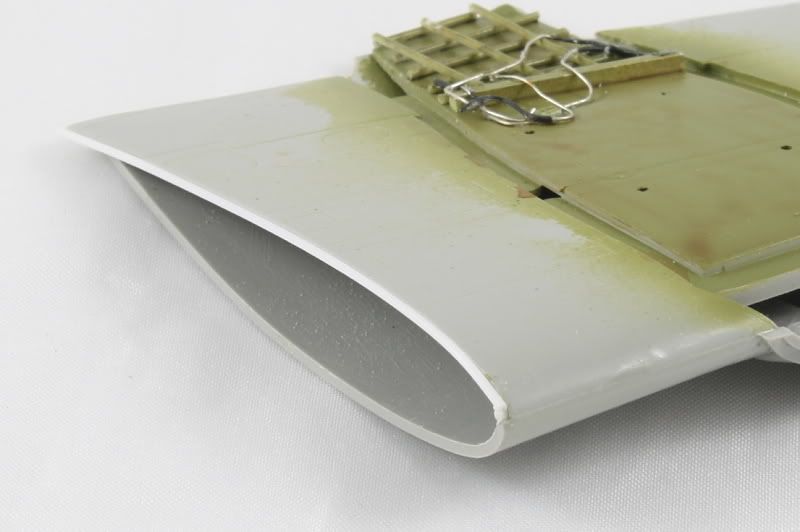
Now the oil cooler inlets supplied with the kit are just holes into the nacelles, whereas on the real thing there is a split inlet arrangement with some supporting ribs... just like this. Also inserted a mesh grill, not visible in photo. The gaps between the runners and the skin have been filled and repainted.
Oil coolers themselves were made up from spare bits and added.
Back into the cockpit the levers on the seat bulkhead were added for the engine cowl flaps, wing flaps and landing gear.

Also added were the additional gun charging controls, these were on little mounts attached to the consoles with the regular gun charging controls - all 8 red switches made from scratch.

And voila, control column in place - even tried to represent the blue/white logo on the centre hub, gun switch added to the right hand corner and cockpit checklists added to instrument panel - hidden by control wheel and side console.
So the fuselage halves are together now, just the usual clean up required for the seams, nothing untoward.
The bomb bay in situ - almost for got to put the wing spare in ( actually did forget so had to separate top joins and reglue....luckily I caught that one early and they were still wet!!)
A little tidying up around the lower rear gunner's hatch that was gut out - might have missed that if it were not for the photo. I did add the roof to the cabin so you do not see the join line of the fuselage halves.
The upper and lower halves of the wings glues together , along with the tail surfaces after all trailing edges were thinned considerably. Superglue beads have been run along the trailing edges where the little 'v's have appeared to aid in final sanding to an edge.

Now we have the fuselage together time to move on to the wings and tail planes, tackle a couple of challenges on the way, and to get this thing looking like a Boston!!
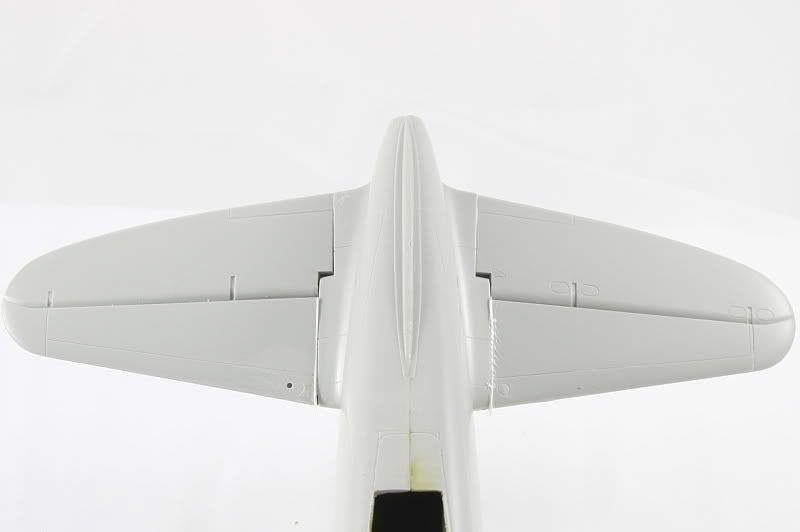
Dryfitting the wings to the fuselage showed no issues on the top surfaces, and underneath was fine on one side.
However the first challenge appeared as an interesting gap on the other side....
It turned out that lower wing was shorted than the upper wing....
But nothing a shim of 30 thou plastic rod could not solve.
The engine nacelles fitted perfectly into the recesses underneath the wings, even the aftermarket resin ones.....

But the same could not be said of the joints above the wings......however these were quickly dispensed of with a application of super glue and talcum powder mix.

A small shim was added under each horizontal tailplane.
In order to get the 10 degree dihedral that was exhibited by the Boston's tailplanes...the kit robs you of a couple of degrees otherwise.

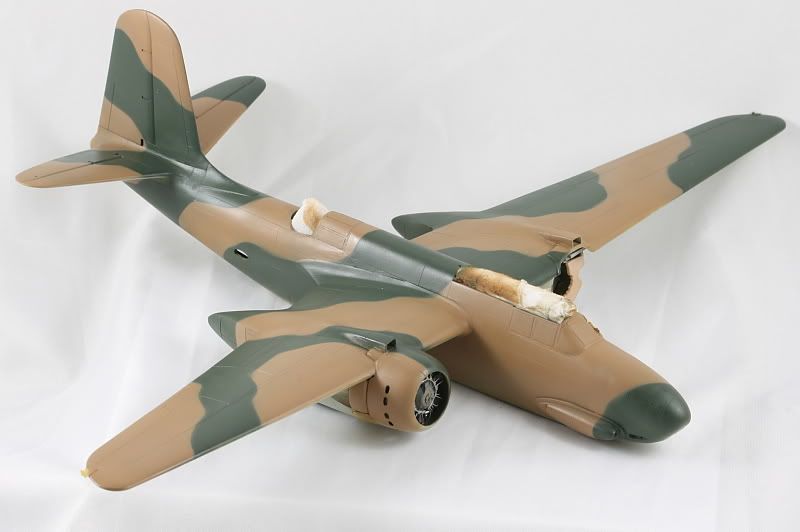
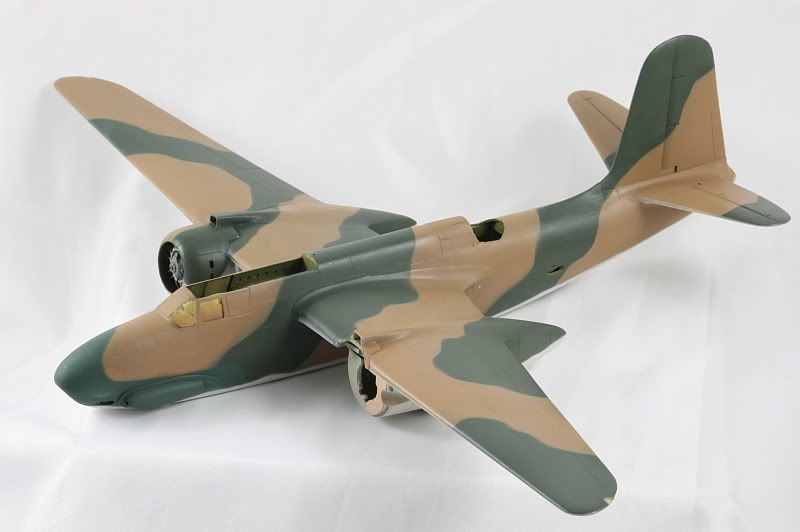
The vertical tail surface went on with no fuss and so now we are stating to look like a Boston...Yay!!
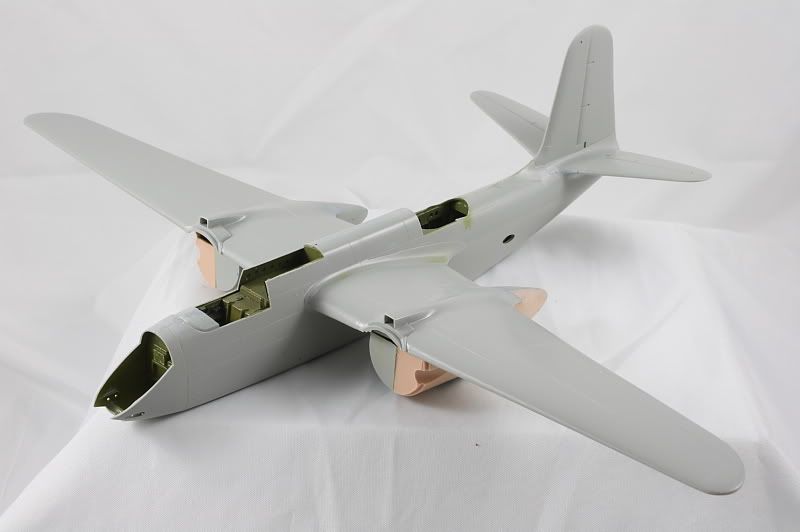
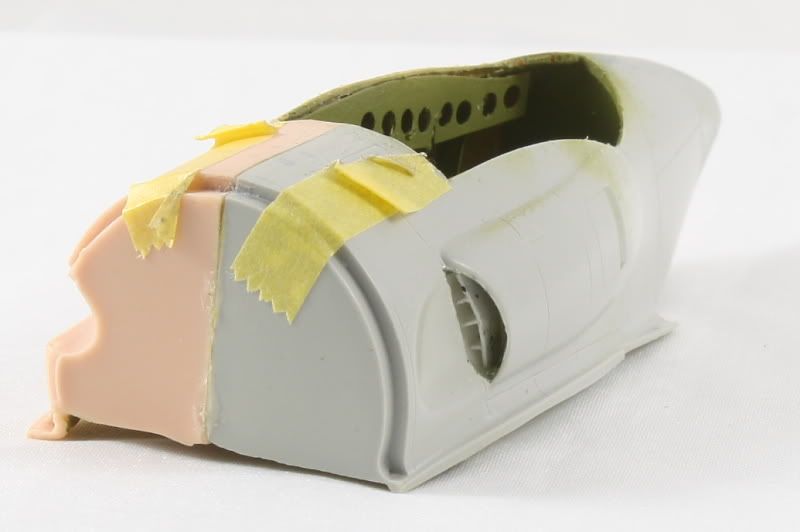
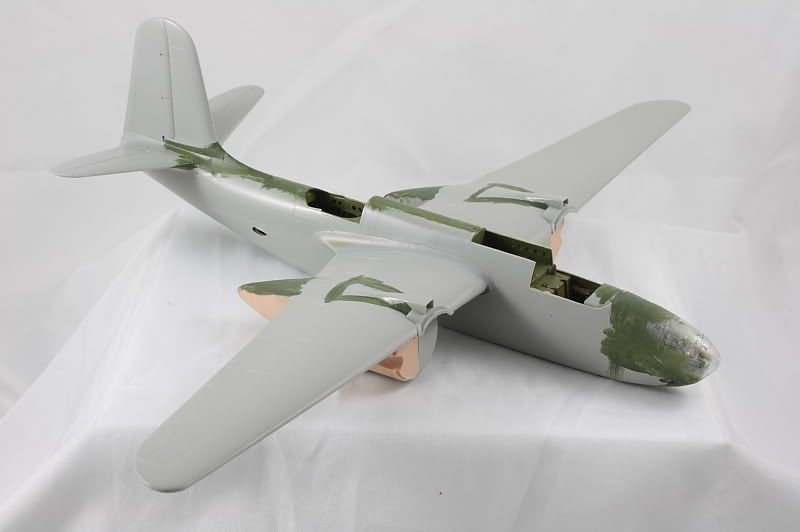
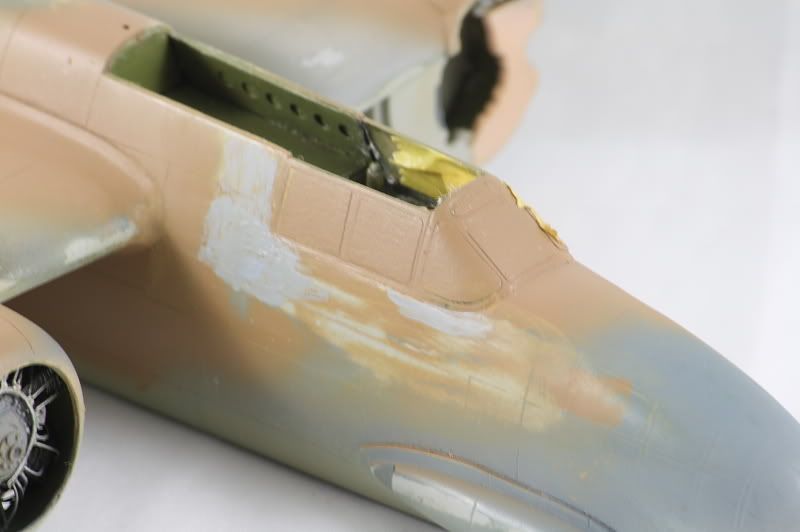
The nose is now on, with three large fishing weights Gator glued in place. Luckily I am not doing transparent nose jobbie so I did not have to worry about hiding the nose weight. A little filler and some green paint to sight how well the seams are going.
Now, I mentioned before about the difference in diameter between the kit engines an the between the Verlinden aftermarket ones. Well it turns out the Verlinden ones re pretty much on the money scale size wise. The problem is the plastic - or resin - sidewalls of the cowlings are far from scale thickness!!!
So, a combination of thinning down the resin cowlings to well, almost paper thin in places and shaving off the outer edges of the cylinders achieved the desired result.


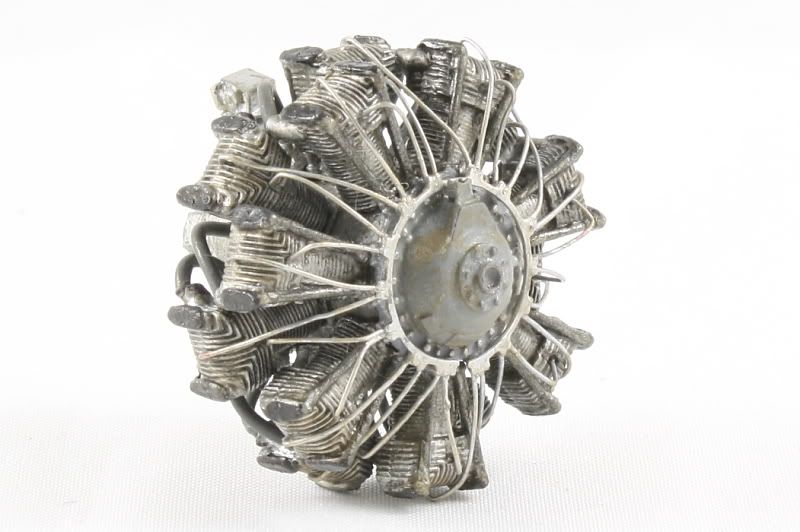
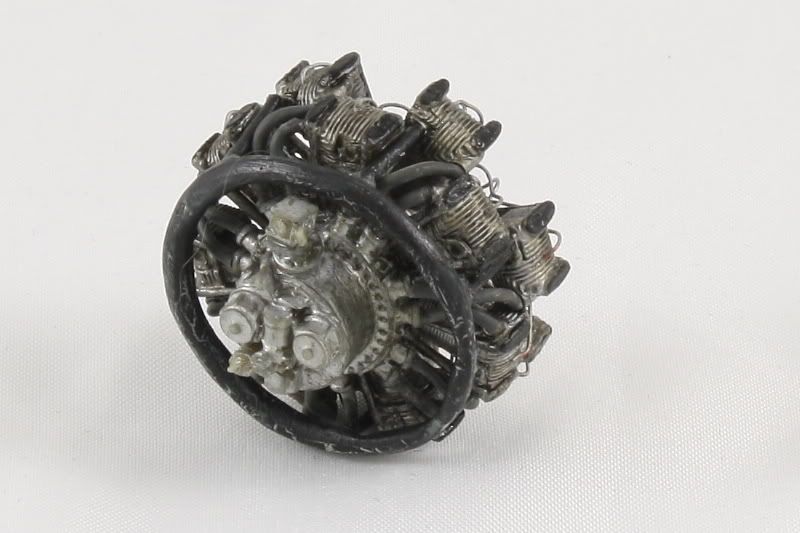
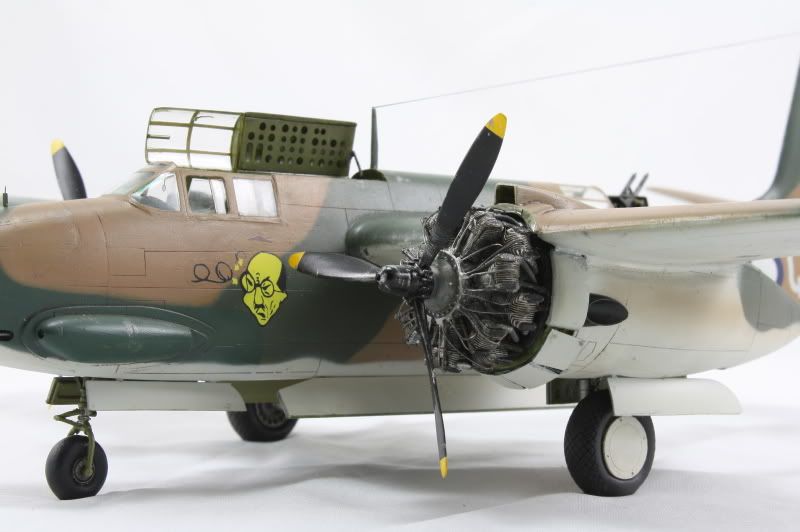
Now it is time to start building the other engine, and this will be a complete engine that will be displayed with he cowling removed.
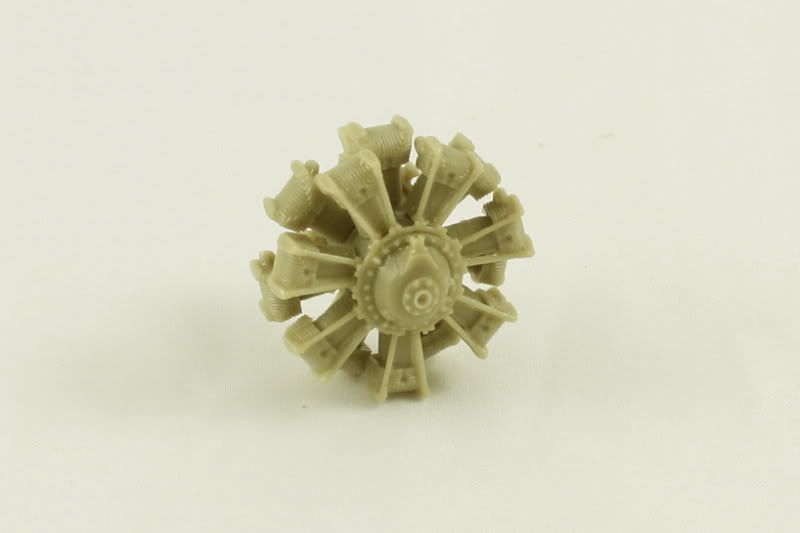
Front row of cylinders in place.....well actually the back row in place the wrong way round and in the wrong place.
Nothing that a bath in acetone based nail polish remover could not solve to undo the superglue...and now both rows of cylinders in place.
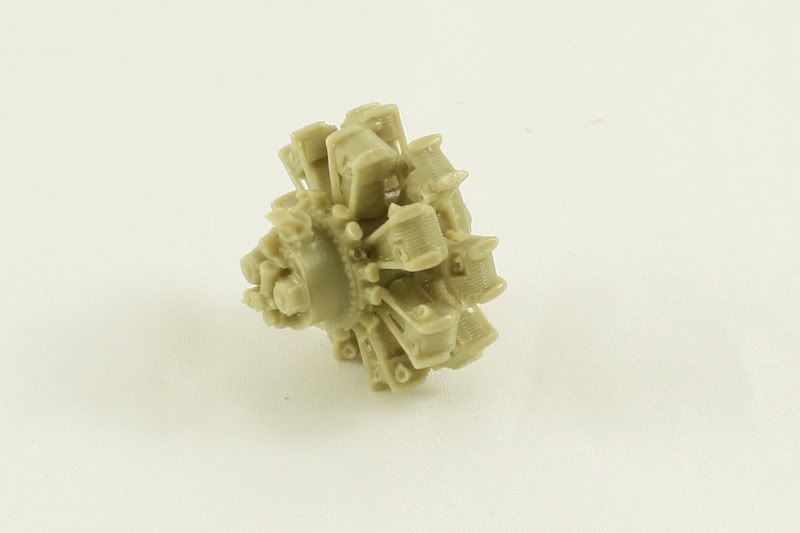
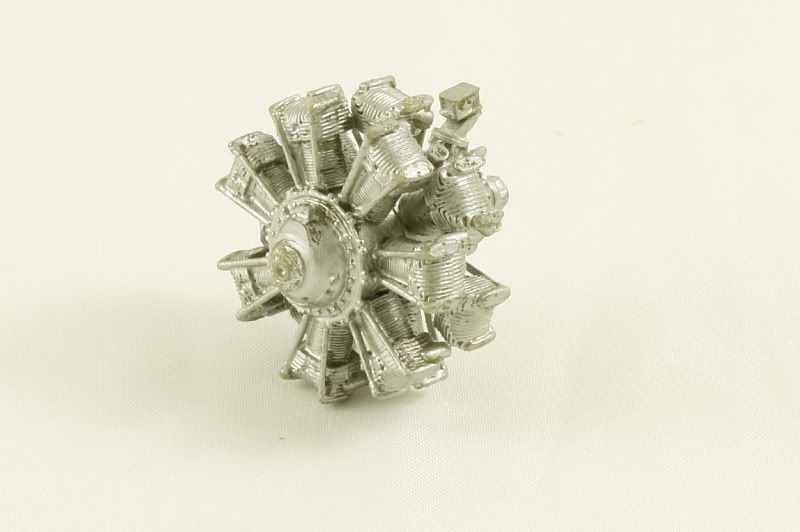
A base coat of Citadel Mithril Silver.
A wash of Citadel Wash.
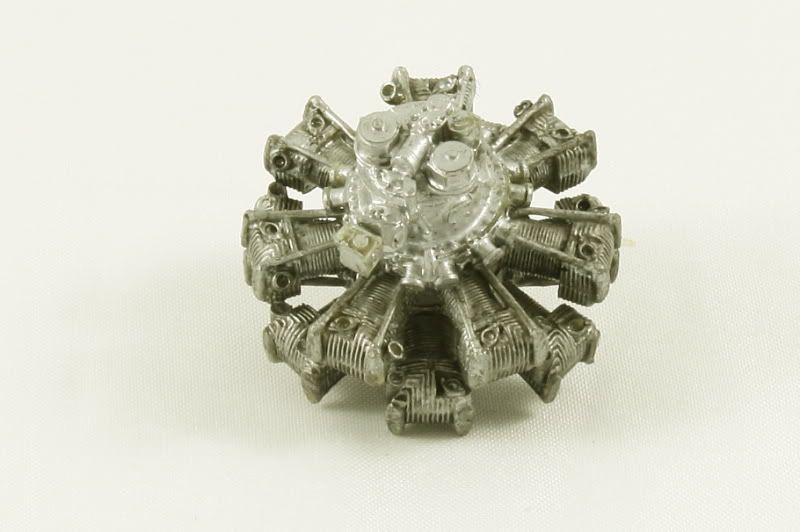
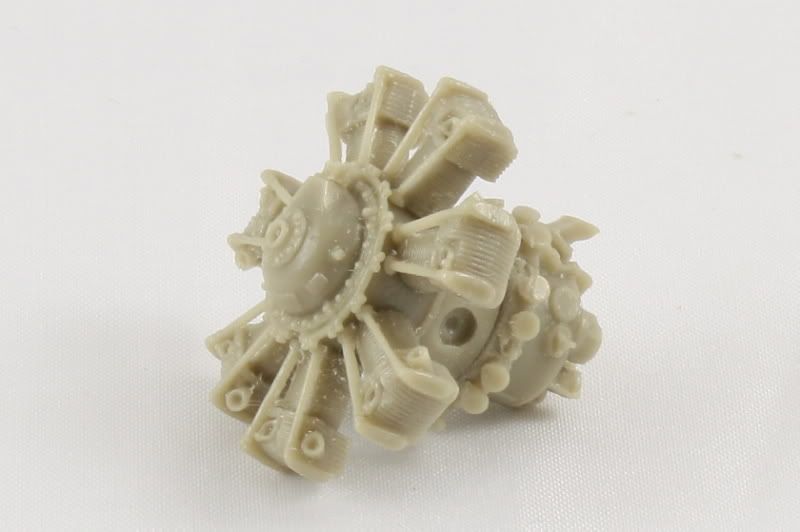
The con rods picked out in Gunze H18 Steel,these are nice as they are molded with a gap to the cylinders, exquisite resin mouldings these are.
And now the inlet manifolds in place.

Next fun challenge will be the exhausts as the Aussie planes had a single exhaust so must have had a circular ring collector, unlike most of the other Boston/Havocs that just have a stub exhaust for each cylinder that exits directly through the cowling.
Oh boy, now this one is starting to put up a bit of a fight.
Oh boy, now this one is starting to put up a bit of a fight.
Time to work on the PE wiring harnesses for the engines. First cut out, then prime and apply Tamiya X-31 Titanium Gold.
Then lay on the engine and work into position before using superglue to attach.

The problem lies with the open engine...the one in the cowl is fine as the wires do not have to run to the rear cylinder back as this will not be visible. However, for the complete engine; the one with the cowl off; the supplied wiring harness is not long enough to reach the rear bank of cylinders.

So for now I am taking a short break from the engines...still doing stuff like fairing in the nose glass etc and totally removing seam lines etc etc ec until I determine which way to approach this.
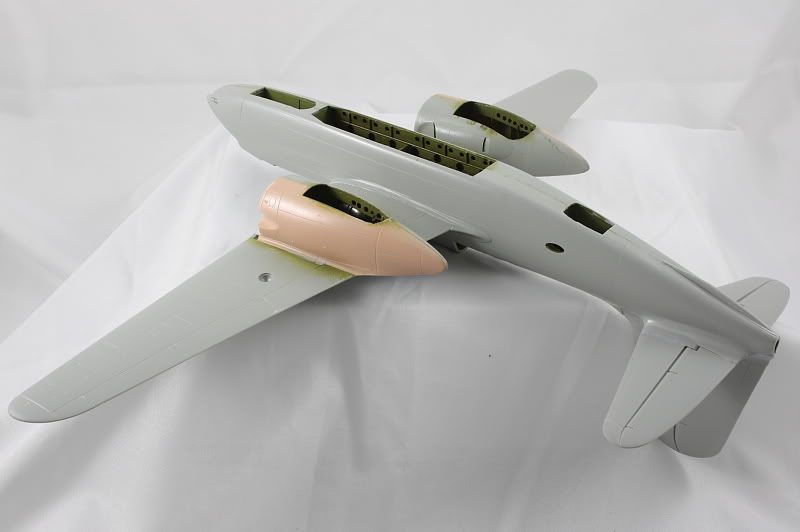
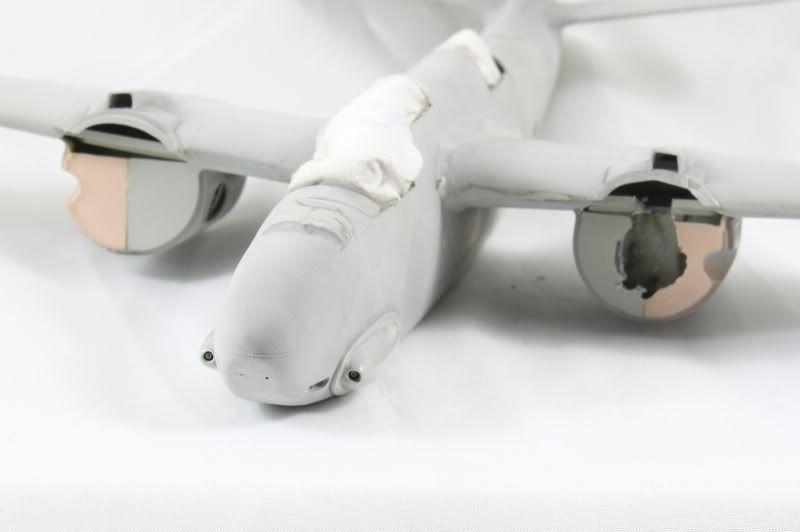
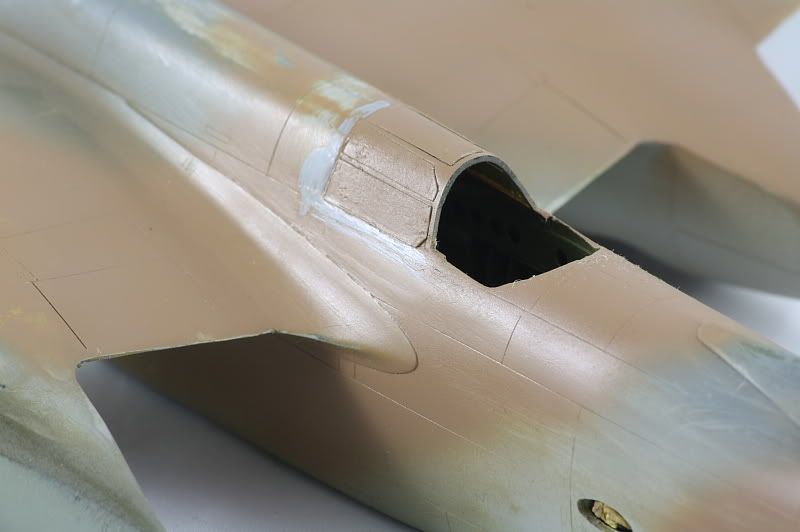
Whilst deciding how to tackle the wiring harnesses for the engine I hit the body with some primer ( light grey acrylic) and then did some more filling and sanding and then primed again to make sure all was in order especially around the wing roots.

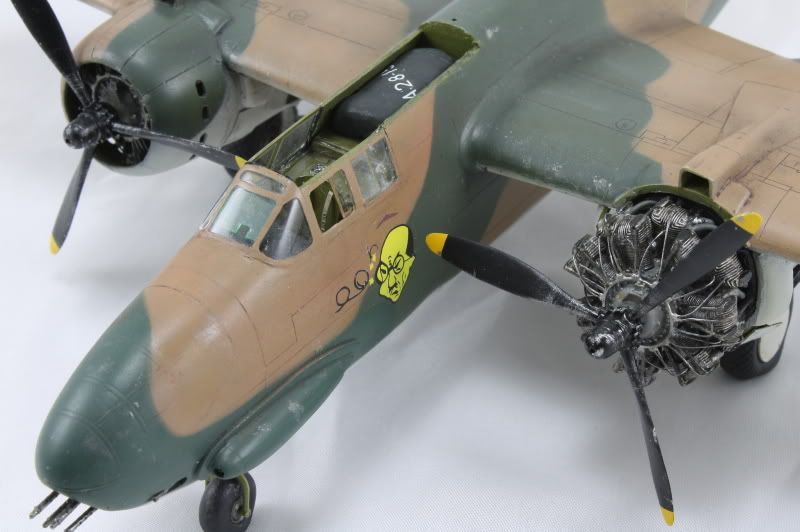
Now it was time to attach the nose gun pods. I drilled out the 'blank' that was on the front of the kit part and then inserted an Aires 0.303 Gun barrel in place before attaching the gun pods to the fuselage.
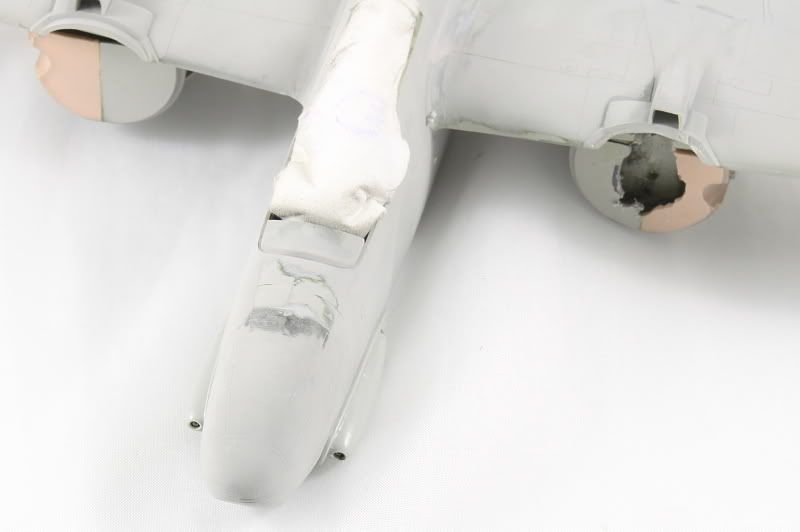
They look rather good I think - and only 6 more guns to go in that nose!!.
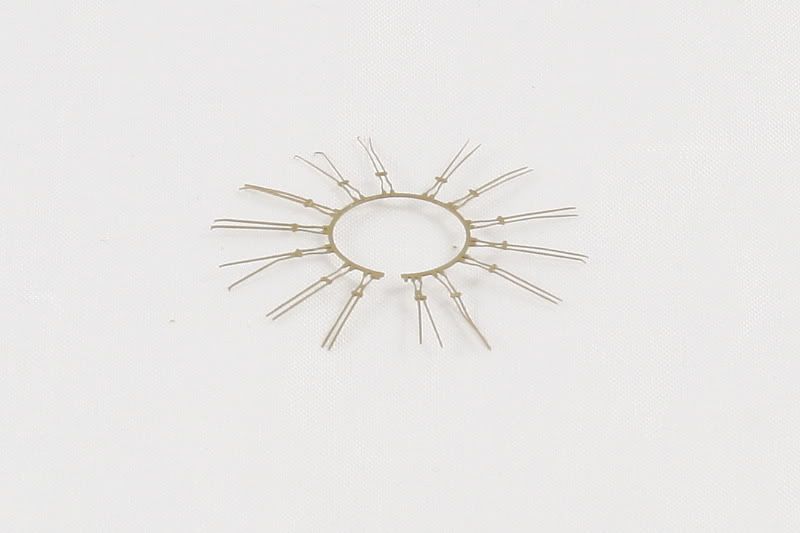
Now on to the wiring harnesses.
I picked up some Red Roo (I like to support my local supplier/manufacturer when I can) 31G (0.29mm) Detailing Wire and started to make my own wiring harnesses.
First off I cut the wires of the PE sheet and then attached alternate pairs of ignition cables. Ultra thin super glue was used for this.

Then I attached the remaining sets.
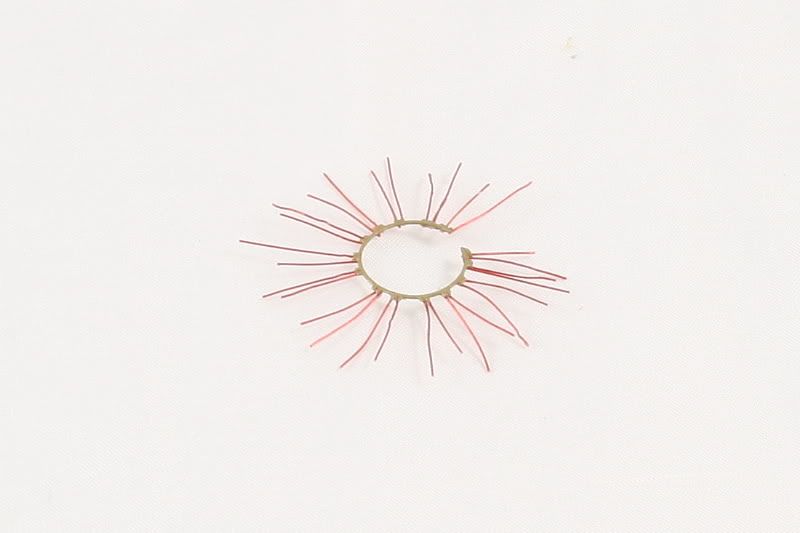
Before priming with grey and then painting with Citadel Chainmail - I decided on a silver this time rather than a gold as further research and wartime photos seem to indicate that the gold coloured cables were used on restored engines and during the war they were silver/grey.
And here we are all painted and mounted on the engines ready to be cut to length and glued into the spark plug holes.
Next was to glue the wired engine front into the nacelle and then attach said nacelle to wing of plane.

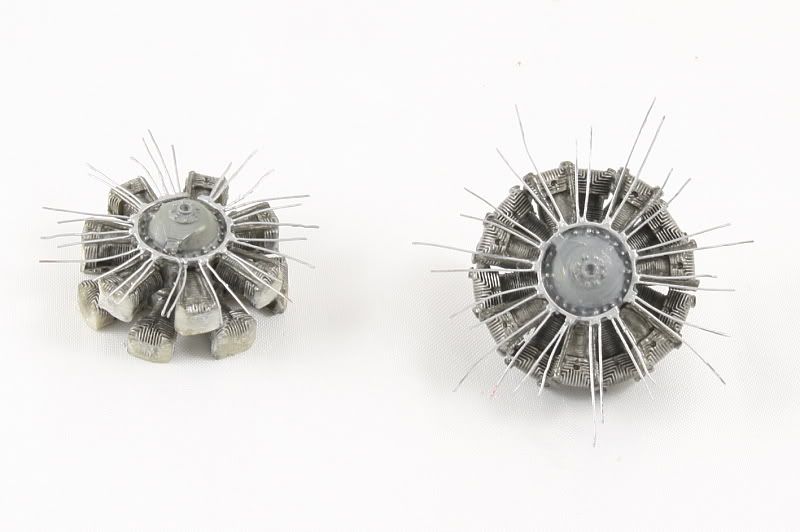
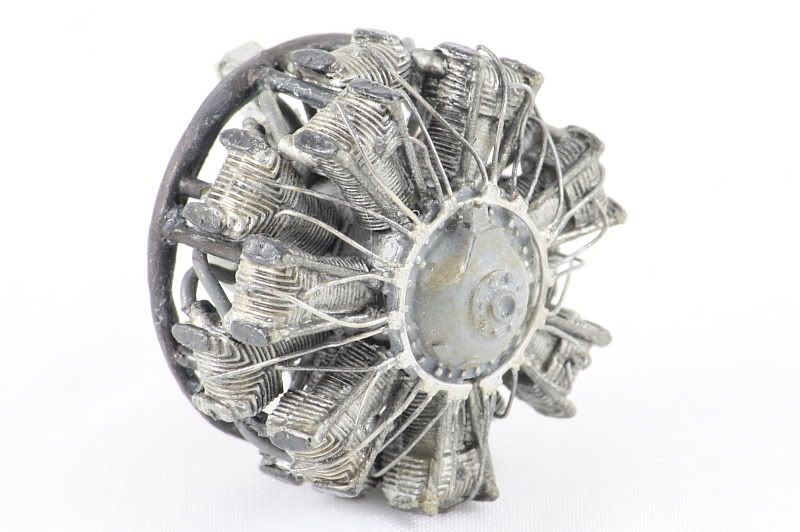
Ok, so now we have completed the 'cowled' engine it is time to continue on with the open engine.
Ignition harness installed for both rows of cylinders and both spark plugs per cylinder - that's another 28 leads!!

Now the next challenge...the exhaust.
RAAF DB-7's have a single exhaust set up with a collector ring taking the exhausts from each cylinder round to a single point. This is unlike the A-20G or B-25 where each cylinder just has a stub exhaust that has it's own exit point out of the cowling.
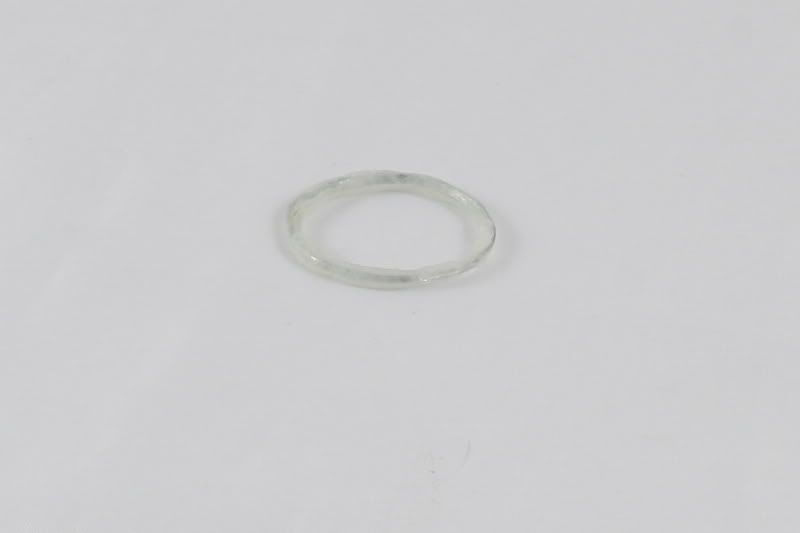
So to make the collector ring I found a paper clip and using a suitably sized bottle created a circle the correct diameter then superglued the ends together.

Thick gap filling super glue was built up around the paper clip to give it more girth.

And then it was sanded into shape. I need to have a smaller diameter diametrically opposite the exhaust outlet so that the girth increased as more cylinders added their gasses into the exhaust stream.
A coat of dark grey paint to see how it was going.
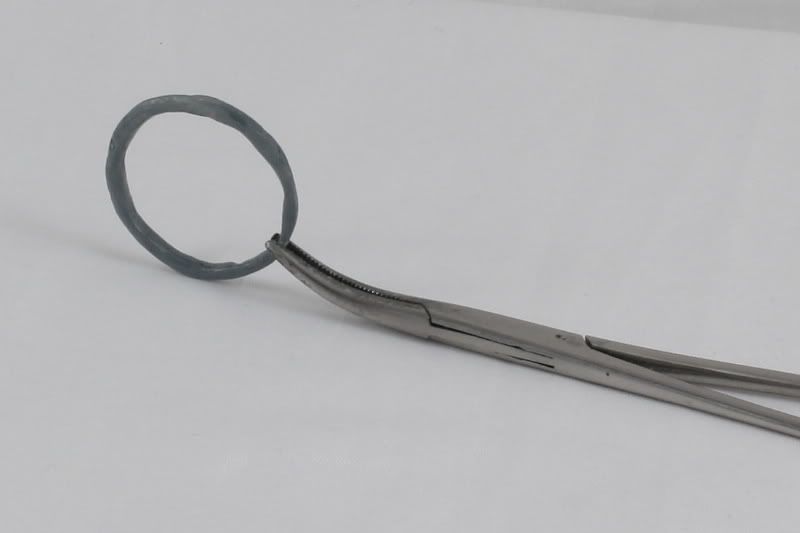
Then the 'apply super glue / sand' step repeated about three times until the desired shape was achieved the above.
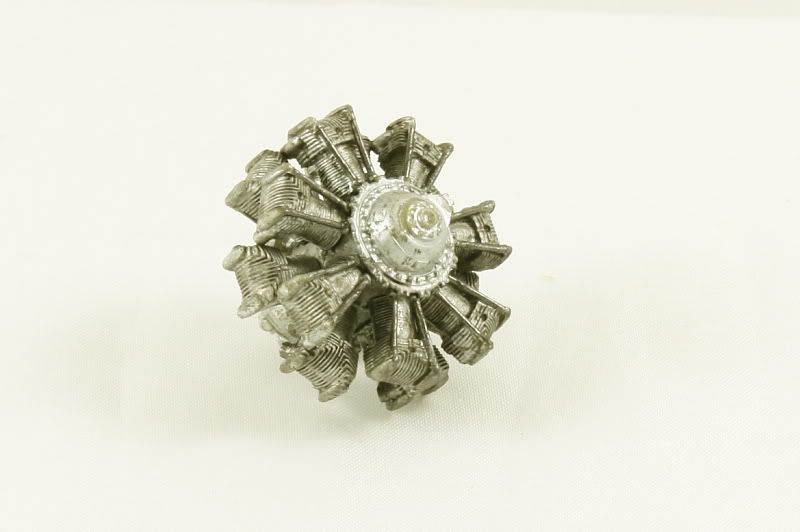
Then 7 x 7mm lengths of brass rod were cut and painted with Testors Burnt Metal. These form the headers for the front bank of cylinders and are superglued into place.
Then the collector ring is added and this is what we now have.
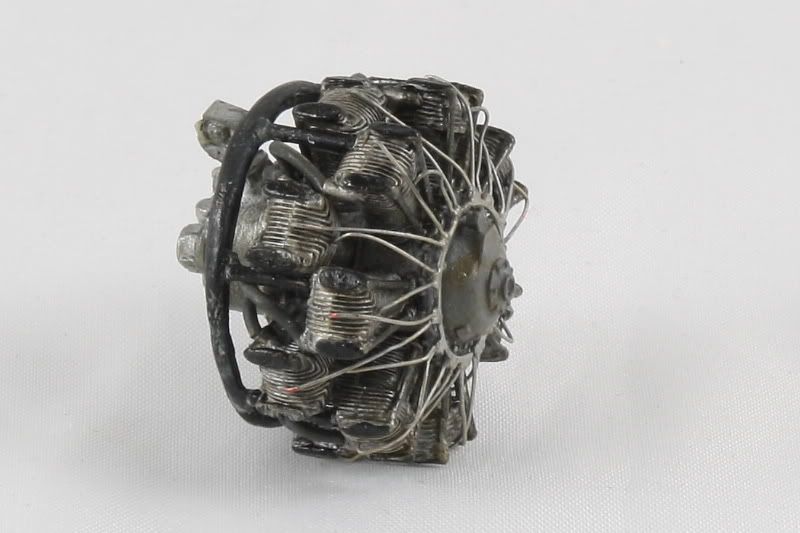
The next step is the headers for the rear row of cylinders, then touch up the painting and the engine will just about be done.
So. finally the last bank of exhausts in place and we are complete, now safely put away to one side.
So. finally the last bank of exhausts in place and we are complete, now safely put away to one side.

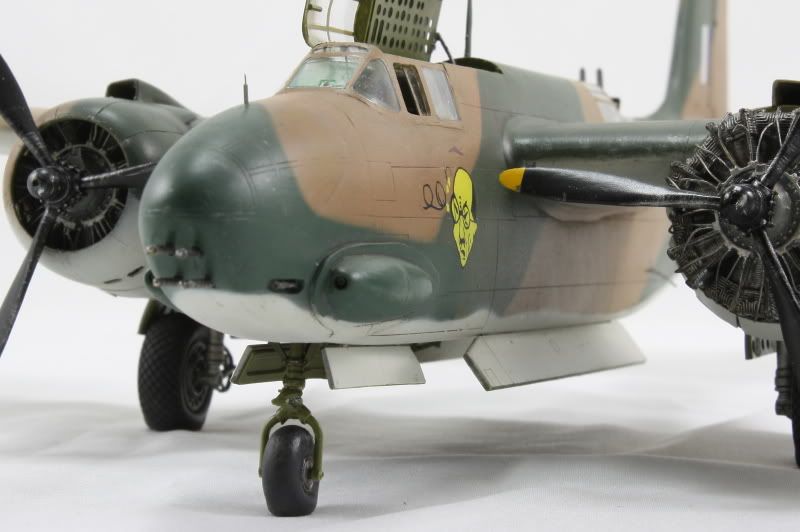
Work has progressed on the nose, drilling out the four holes in the front of the nose for the .5 cals....these must have rocked with all eight guns going at once!!!
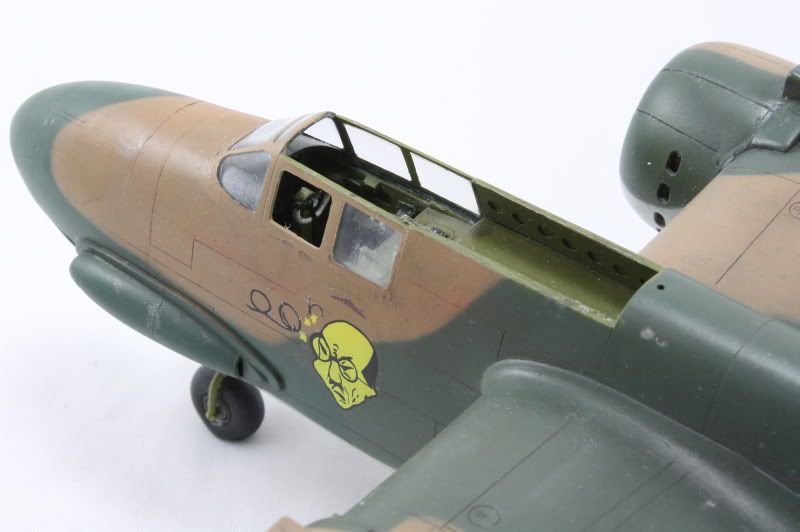
The canopy was installed, but not before cutting out one of the side windows as I wish to pose it in the slid back open position as often seen when these were on the ground.
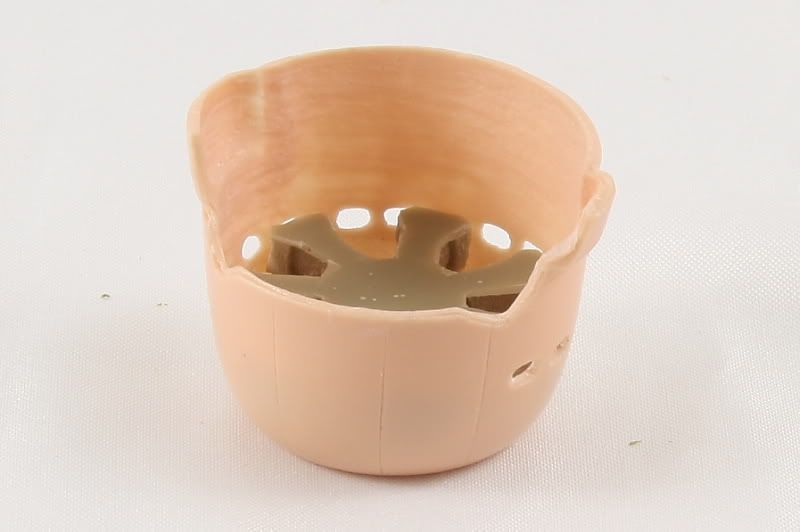
Also I was not happy with the lower cowl vents on the engine nacelle so I filed about 10 thou off around where the hinge and made my own out of 5 thou plastic card. Now I am happy with the way they 'hang', even though they are in the 'closed; position.
The bottom was painted a home brew of Dupont Sky Grey 71-021, and the top coat of Dupont Sandy Earth 71-009 was applied. Exct mixes will be revealed at the end when I am happy with them!! This showed up where the canopy join needed some attention, along with a few other areas which have been hit with some Mr Surfacer 1000. The rear canopy has not n]been fitted yet as I am still putting 'stuff' in there.


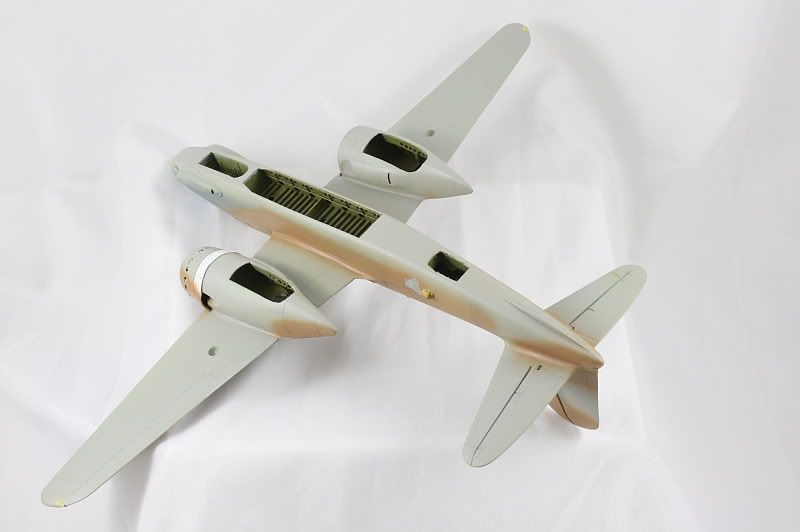
Moving on, that coat of colour confirmed a couple of areas where the canopies were misaligned so a few sessions of fill, sand, fill sand took place until all was nice and hunky dory.
In addition to the main landing gear being too farback, the nose gear is too short, so small blocks were inserted in the nose gear wells to correct this.
The wingtip formation lights were cut out , the interior surface painted interior green and then filled with gap filling super glue which was then sanded into shape and then polished.

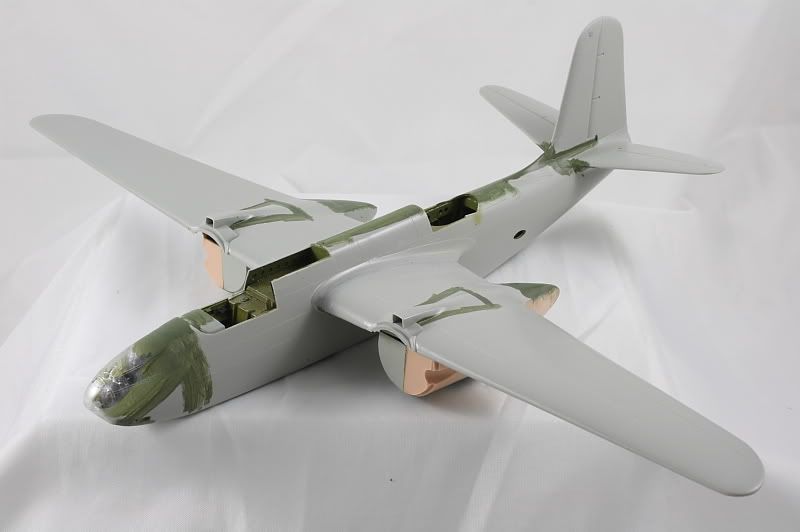
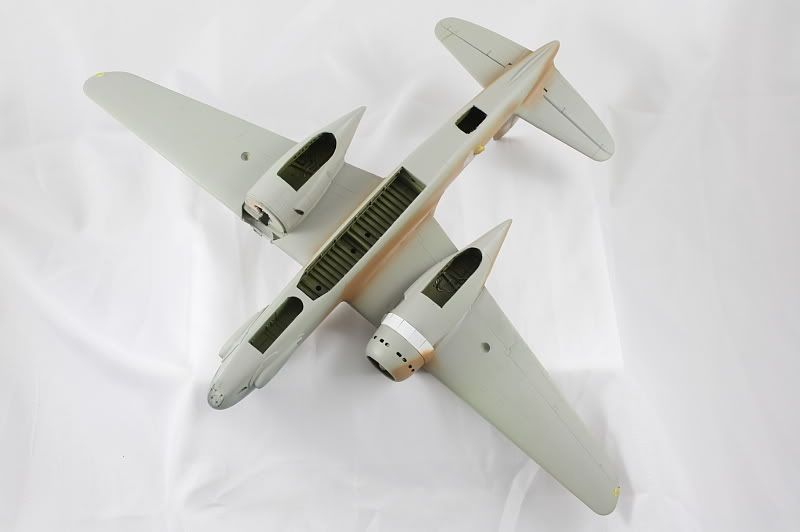
Now time for the Du Pont Green 71-013, again custom mixed, and 'white tack' sausages used to get a nice tight 'soft' camo effect.

A little touch up required, as well as the Foliage Green added locally by the RAAF, and the upper surface will be complete. I intend to show this aircraft fairly early in it's squadron life, so I am not going to go to town fading and weathering this time.
Moving on with the camo, the RAAF Foliage Green was added around the nose...this being the closest colour use locally to the original green and used when the glazing in the nose was replaced with aluminium sheet.

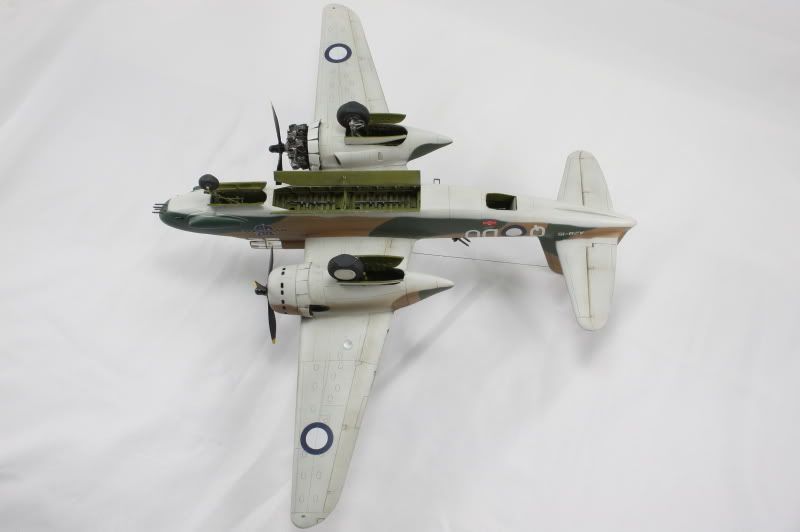
The undersides now covering in Dupont Sky Grey 71-021 - which in fact is nothing like RAF Sky, or RAAF Sky or and other Sky Grey.

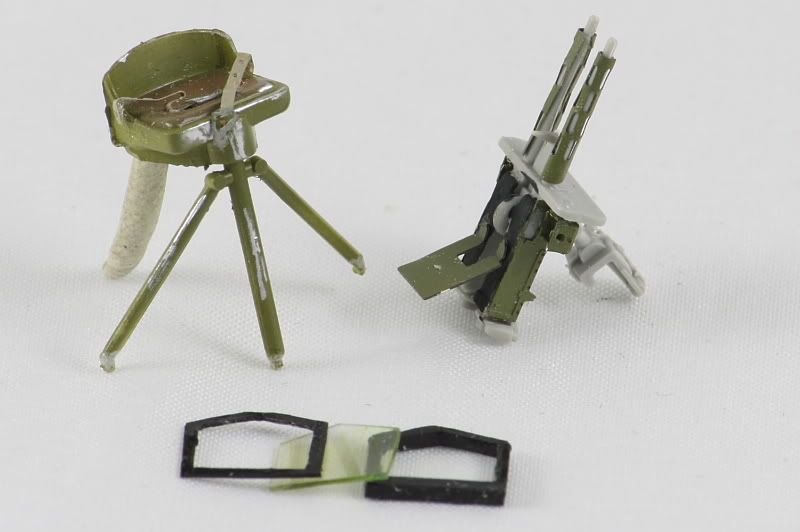
Moving on with a few of the detail, we have finished the rear gunners seat and made a start on the twin .303s for the gunner, detailing with the Eduard PE, and also scratch building the sandwich for the pilots armoured glass screen.
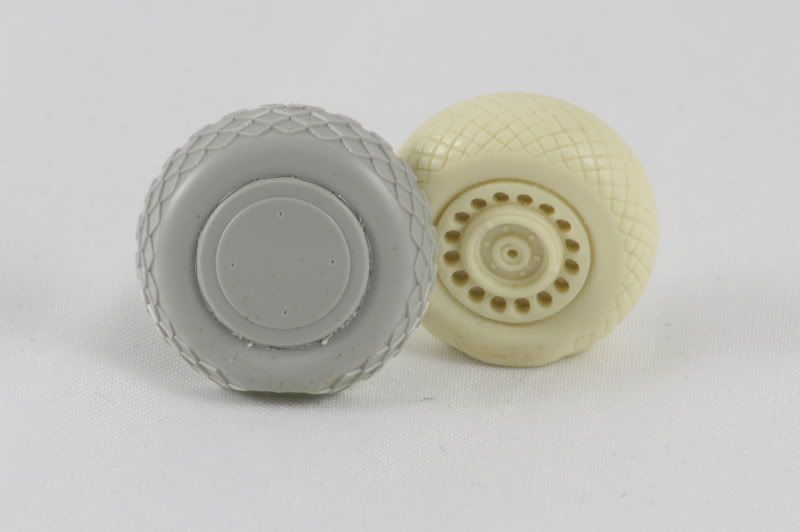
Now, I am using the True Details wheels as the kit ones have a horrid pattern that in no way resembles any tread pattern ever used. Should be an easy swap out, but no, the True Details wheels are the spoked ones whereas the Aussies planes had the hub caps - as per the original kit wheels. so next task is to make some hub caps!!
These are 'Aussie Decals' and they are really thin and slightly translucent; fortunately a set of white 'blanks' are provided to prevent the under surface colour coming through.
Unfortunately these a ALPS printed on a sheets of continuous decal paper so require twice as much careful cutting out!!

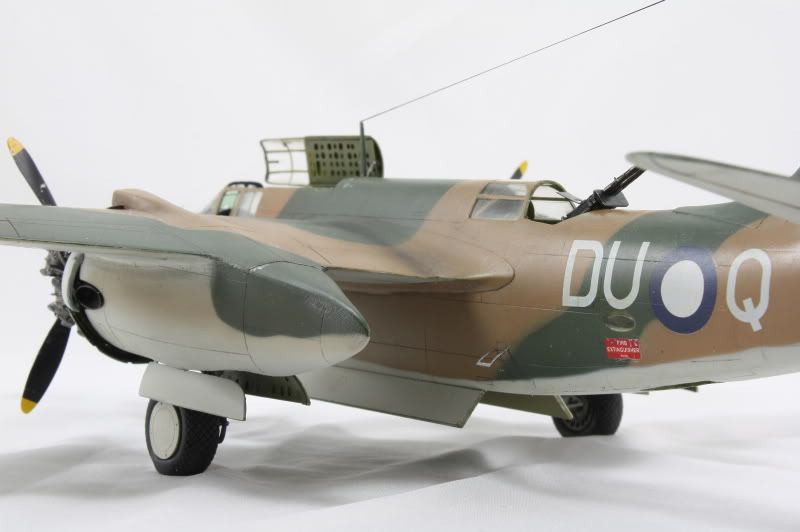
Once these had dried I will apply the nose art and then wait for a set of Eagle Strike decals to arrive from Hannants to give me the correct font for the "D UQ" Squadron codes (comparison to WWII photos of the real plane show the Aussie Decal ones are too square) as well as the correct colour for said squadron codes and the "A28-15" serial codes.
In the meantime I am also working on all the other little sub assemblies before they fitted.
Whilst waiting for the replacement decals to arrive with the correct font for the squadron code and serials I am somewhat limited in what I can do. however, I have applied wash, using a variety of FM dark dirt, brown and light dirt on the upper surfaces and similar with more of the light dirt on the lower surfaces. I used the wash in this manor so that there is an irregular colouration in the panel lines across the surfaces.
Whilst waiting for the replacement decals to arrive with the correct font for the squadron code and serials I am somewhat limited in what I can do. however, I have applied wash, using a variety of FM dark dirt, brown and light dirt on the upper surfaces and similar with more of the light dirt on the lower surfaces. I used the wash in this manor so that there is an irregular colouration in the panel lines across the surfaces.
Wash on - upper sufaces
Wash off.
Wash on - Lower surfaces.
Wash off.

And here is an assorted collection of sub assemblies that have been progressing ready for adding to the airframe when the time comes.

Things are finally falling into place now, and with the Ju-88 out of the way, I can now concentrate on getting this one finished.
The correct decals for the codes and serials arrived and went on very well. Some more weathering was carried out, griming up the walkways, adding some more chipping, exhaust stains ,and generally dirtying it to reflect a few months in the tropics.
Then a couple of coats of matt varnish and the masking for the clear parts was removed. The wheels have been added, so we now have the correct 'ride height'.
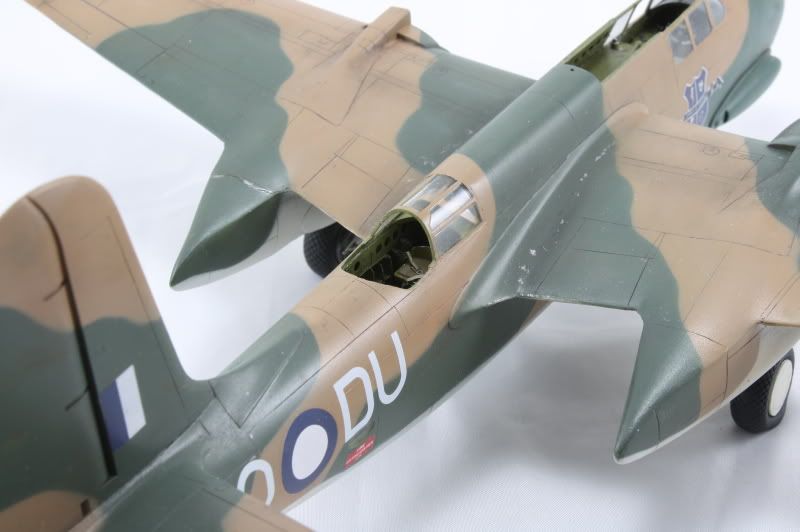
The cockpit glass, showing the open window.
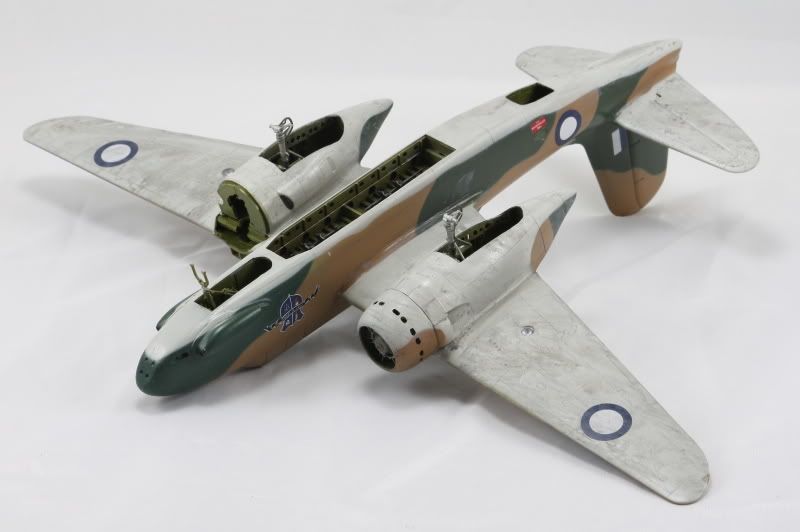
An engine, complete with propeller, and an airframe waiting to receive it.
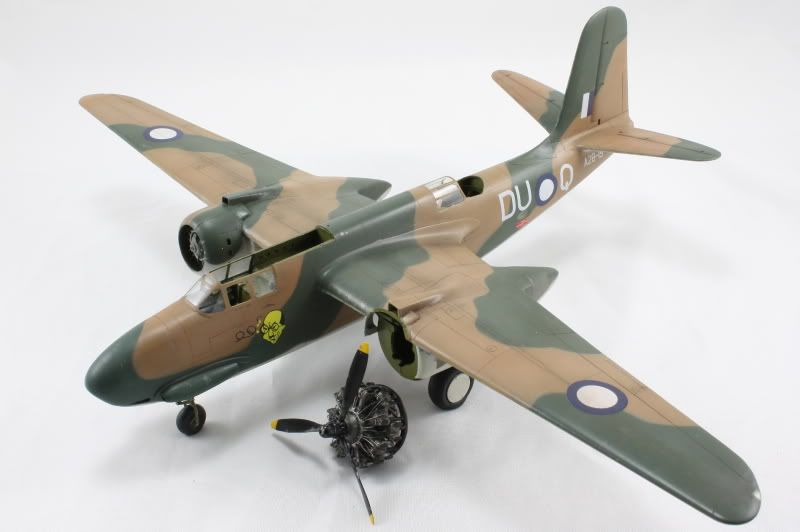
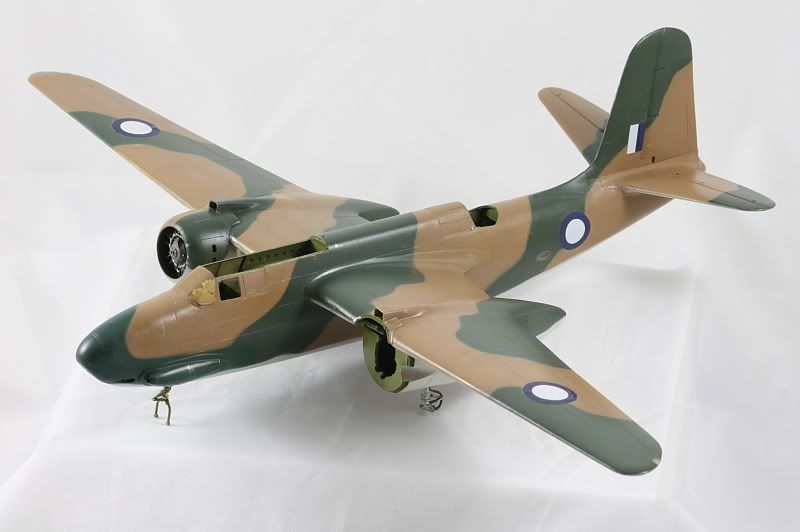
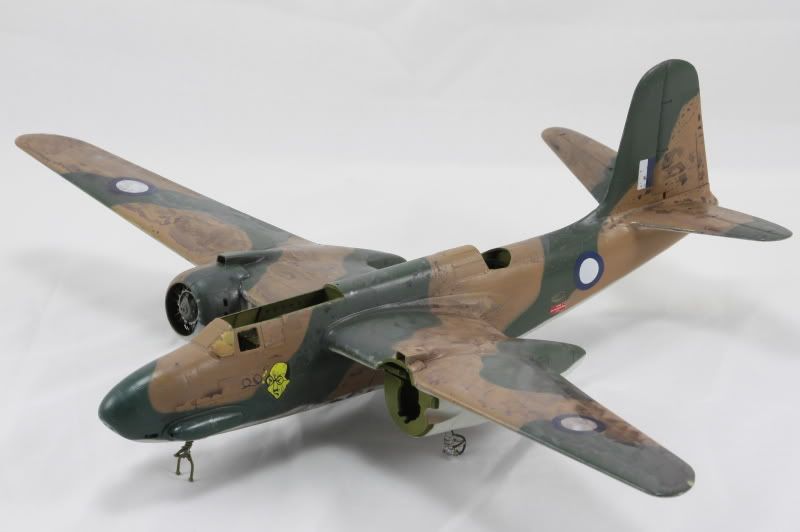
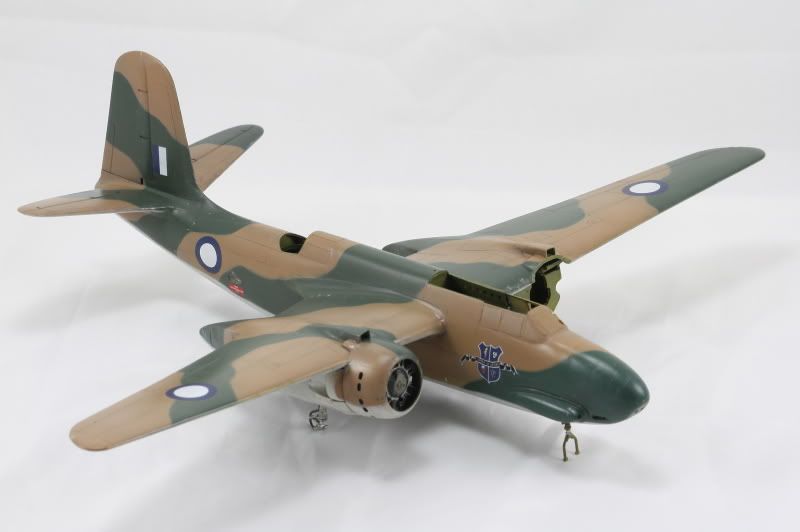
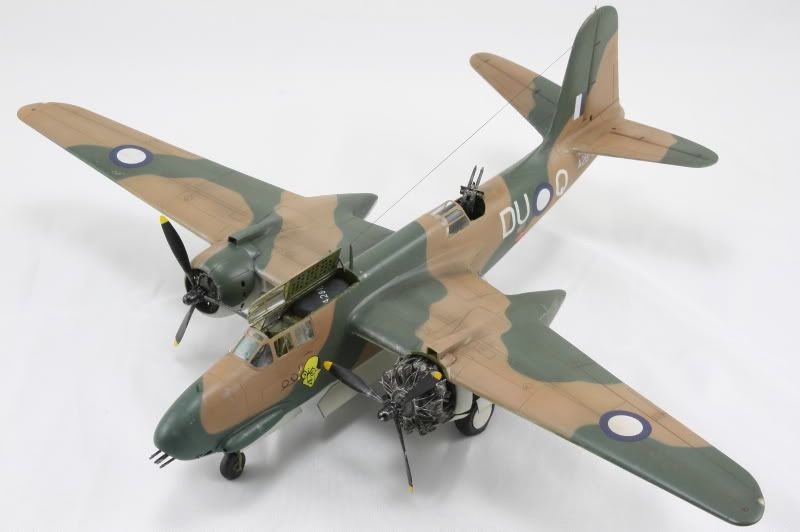
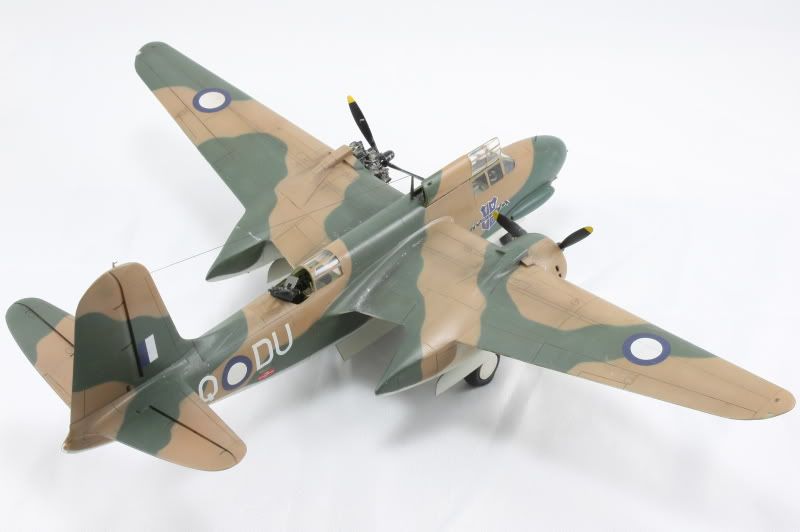
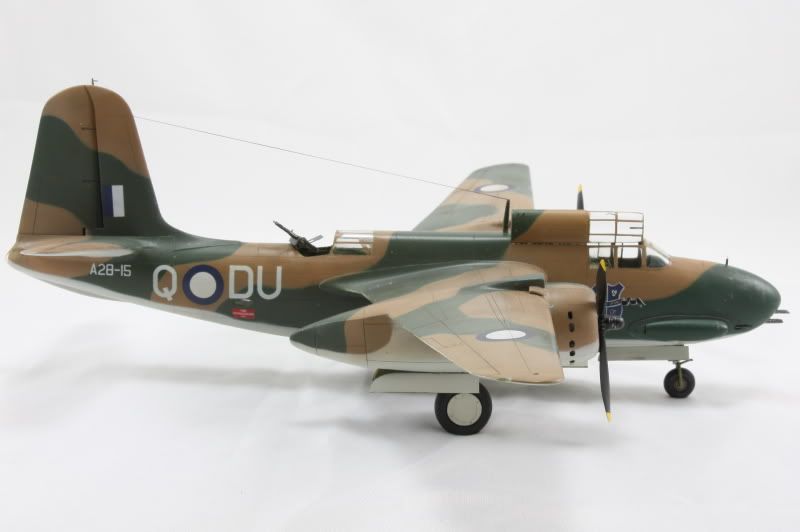
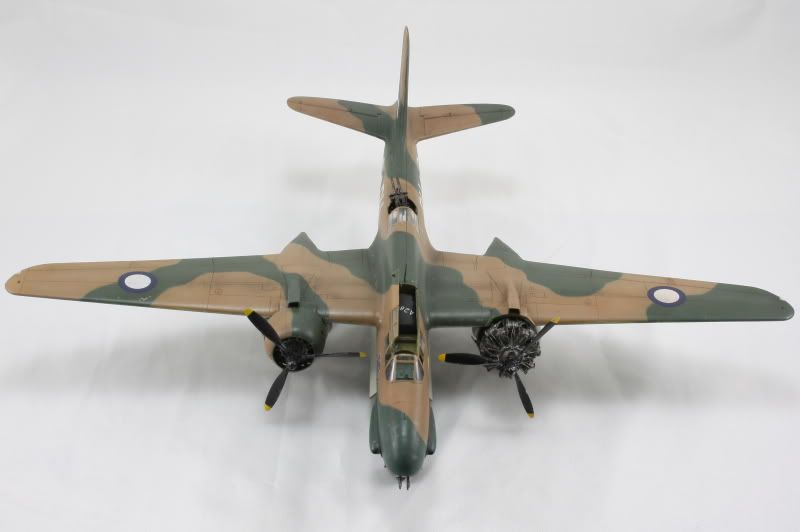
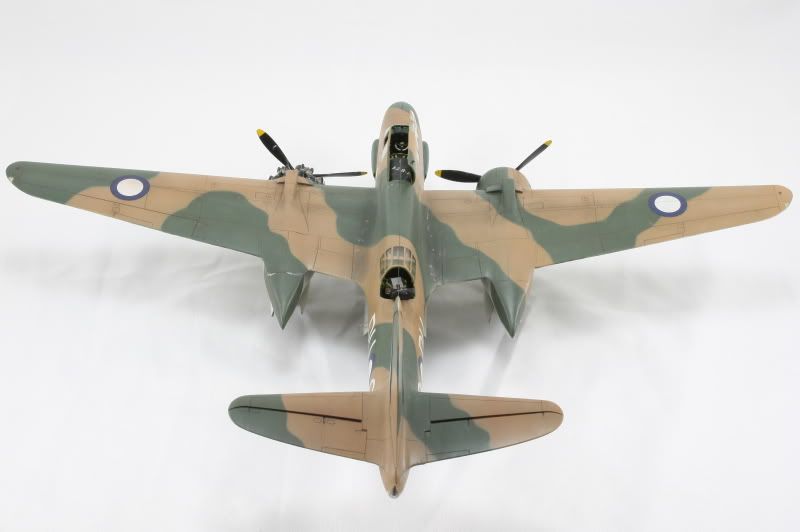
A28-15, DU-Q, Spirit of Sport....on the home straight now ready for final fit out.

Just the undercarriage and bomb bay doors, canopy, dorsal and ventral guns and a few aerials, antenna and lights and we'll be there...in the meantime a sneak teaser/preview of where I am up to now before I get those last bits on and go to the final reveal.
Suffice to say I had a few challenges to overcome on the way, most of which if not all are documented in the build thread.
But here she is, complete with a week to spare, my second entry in the Multi Engined WWII Group Build and my tribute to Flight Lieutentant William 'Bill' Ellis Newton VC who usually flew this plane before he was shot down in another Boston A28-3 on 18th March 1943. This plane was subsequently lost on 14th September 1943.


Graham 