Anthony Lorton's Il-2 Shturmovik
This was my submission for the GPW group build, the Accurate Miniatures 1:48 Il-2 Shturmovik, re-boxed by Italeri.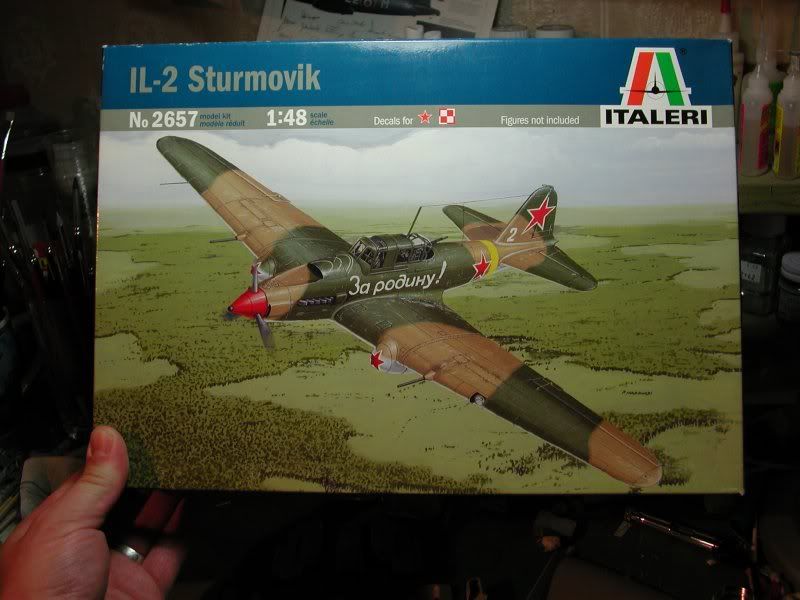
I didn't find this kit the easiest to build, but it was enjoyable none the less. Plus, I probably made it more difficult for myself by ignoring the instructions in places. The kit comes with some neat features such as a clear instrument panel, lots of interior detail, and weighted and regular wheels with separate hubs. Well worth the £17.99 I paid for it.
I scratch-built the pilot's harness and gunner's seat strap, and replaced the gun barrels with fine brass tubing. It's mostly painted with Vallejo Model Air acrylics and weathered with Mig Productions oil paints and pigments with the addition of a few scratches here and there with various pencils. The decals are the kit's originals and went on with little difficulty using micro set & sol to get them to bed down over the raised features. The only really tricky bits were the stars on the wheel nacelles and getting the undercarriage to fit.
Research was fairly minimal for this project, as I was keen not to get too bogged down it accuracy issues and instead wanted to focus on enjoying the building, painting and weathering process. I did use a few books, namely:
IL-2 Sturmovik in action #155 (Squadron / Signal Publications)
Ilyushin Il-2 Shturmovik (4+ Publication)
And I made repeated use of these superb walk-arounds ..
http://vvs.hobbyvista.com/Research/Ilyushin/Il-2/Walkround/Serbia/index.php
http://www.aircraftresourcecenter.com/AWA1/701-800/walk716_IL2m3_Rios/walk716.htm
There are decals provided for five different aircraft. I decided to model the box-top scheme, purely because I liked the look of it!
Hans (Lavochkin7) helpfully did some research for me, and found some nice profile artwork ..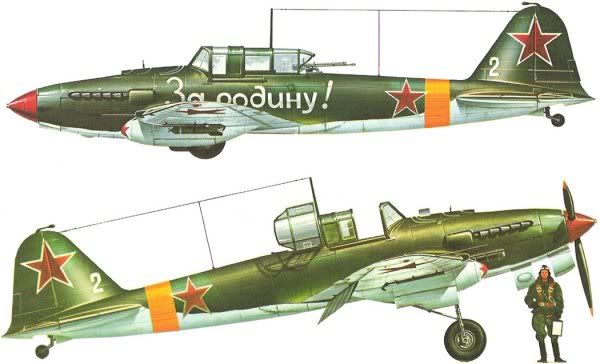
Paints and colours used:
Interior Tamiya XF-12 JN Grey
Tamiya XF-63 German Grey
Tamiya XF-64 Red Brown
Tamiya XF-19 Sky Grey
Vallejo Model Colour 70950 Black
Vallejo Model Colour 70886 Green Grey
Vallejo Model Colour 70888 Olive Grey
Vallejo Model Colour 70940 Saddle Brown
Vallejo Model Colour 70871 Leather Brown
Vallejo Model Colour 70910 Orange Red
Vallejo Model Colour 70976 Buff
Abteilung Oil Paint 160 Engine Grease
Abteilung Oil Paint 110 Black
Abteilung Oil Paint 080 Wash Brown
Games Workshop Boltgun Metal
Games Workshop Devlan Mud Wash
Games Workshop Badab Black Wash
Exterior Base colours ...
Vallejo Model Air 71024 Khaki Brown
Vallejo Model Air 71017 Russian Green
Vallejo Model Air 71008 Pale Blue
For shading ...
Vallejo Model Air 71029 Dark Earth
Vallejo Model Air 71023 Hemp
Vallejo Model Air 71029 Light Brown
Vallejo Model Air 71009 Duck Egg Green
Vallejo Model Air 71016 US Dark Green
Vallejo Model Air 71043 Olive Drab
Vallejo Model Air 71011 Tank Green
Vallejo Model Air 71056 Black Grey
Vallejo Model Air 71047 USA Grey
Details Tamiya XF-7 Red
Tamiya XF-69 NATO Black
Tamiya XF-68 NATO Brown
Tamiya XF-3 Flat Yellow
Tamiya XF-2 Flat White
Tamiya XF-10 Flat Brown
Tamiya XF-58 Olive Green
Tamiya X-18 Semi Gloss Black
Tamiya XF-27 Black Green
Mr. Metal Color 214 Dark Iron
Wheels Vallejo Model Air 71056 Black Grey
Weathering Mig Pigments P232 Dry Mud
Mig Pigments P234 Rubbel Dust
Mig Pigments P033 Dark Mud
Mig Pigments P039 Industrial City Dirt
Mig Pigments P034 Russian Earth
Abteilung Oil Paint 160 Engine Grease
Abteilung Oil Paint 110 Black
Abteilung Oil Paint 080 Wash Brown
Faber-Castell Polychromo pencil Silver
Faber-Castell Polychromo pencil Black
Faber-Castell Polychromo pencil Paynes Grey
Faber-Castell Polychromo pencil Chrome Green Opaque
Faber-Castell Polychromo pencil Burnt Umber
Faber-Castell Polychromo pencil Dark Sepia
Derwent Sketching pencil HB
You get quite a lot of plastic for your money in this kit ...
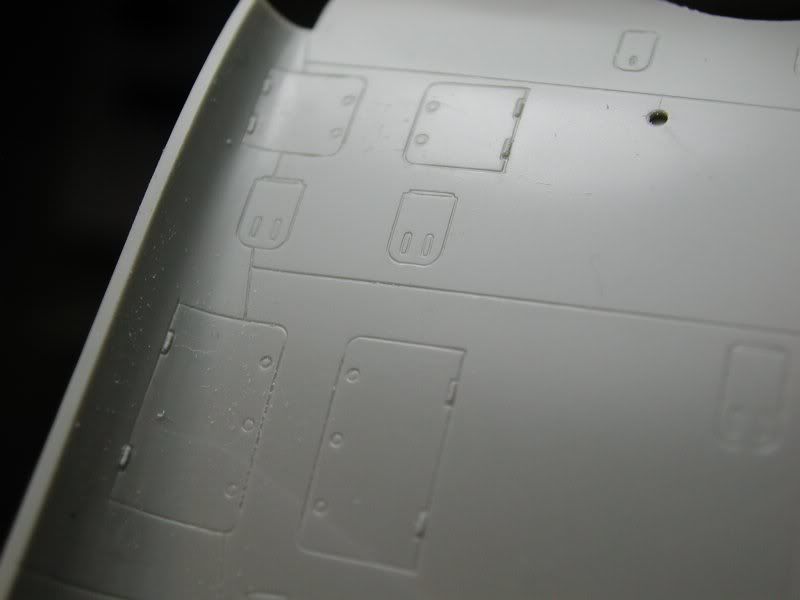
In the box, this is a lovely looking kit, typical of Accurate miniatures. There's lots of fine surface details and lots of annoying ejector pin marks!
As with the Accurate Miniatures B-25 I'm building, it's got some nice touches like two sets of tyres; one set with with flats, and separate hub inserts for easy painting.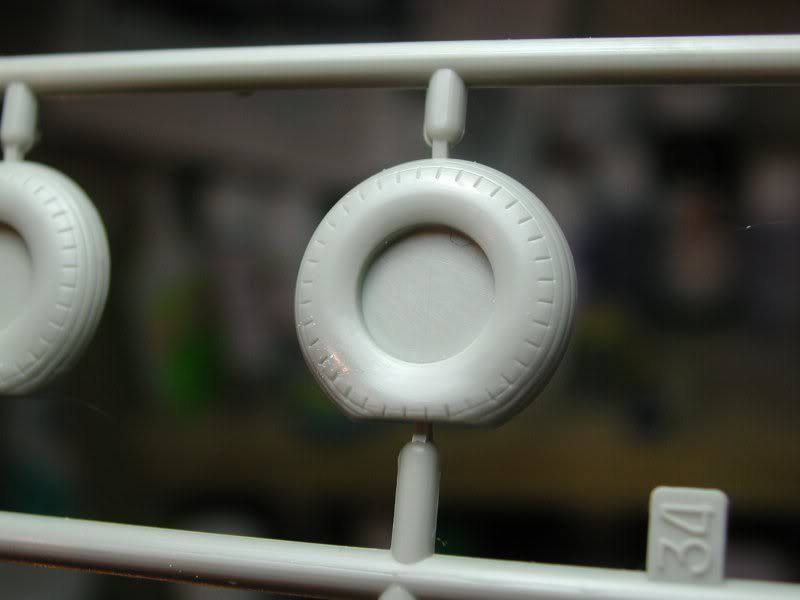
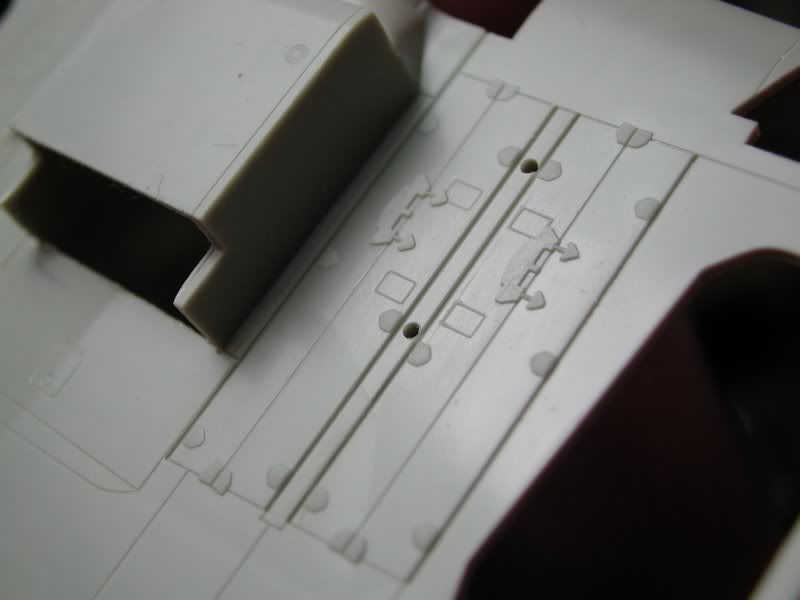
There are a couple of sink marks here and there, which may be due to whoever did the moulding, rather than Accurate Miniatures, but I don't have an original release to compare. Either way, they're small and easily dealt with.
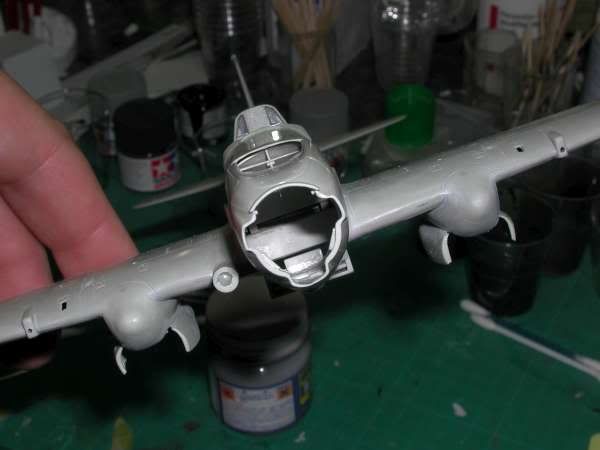
Here are the major structural components. It needs some careful construction to get the wings and fuselage properly aligned.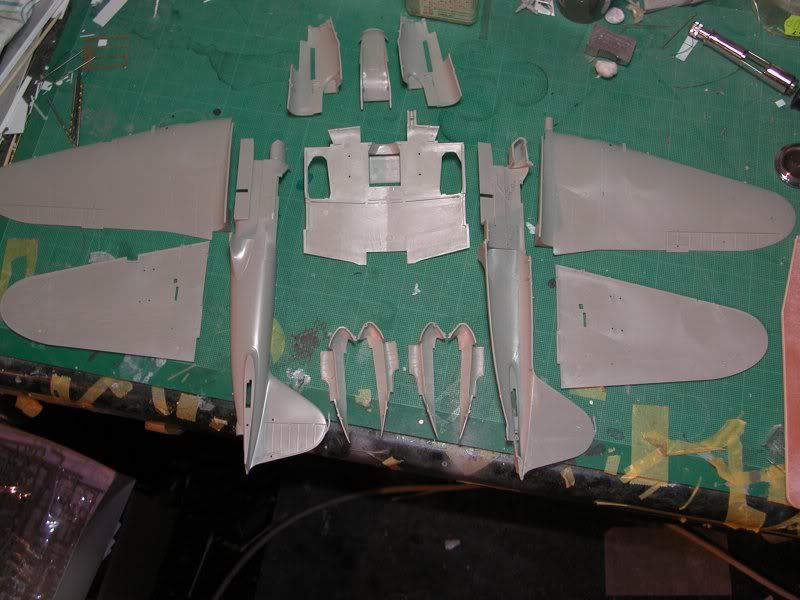
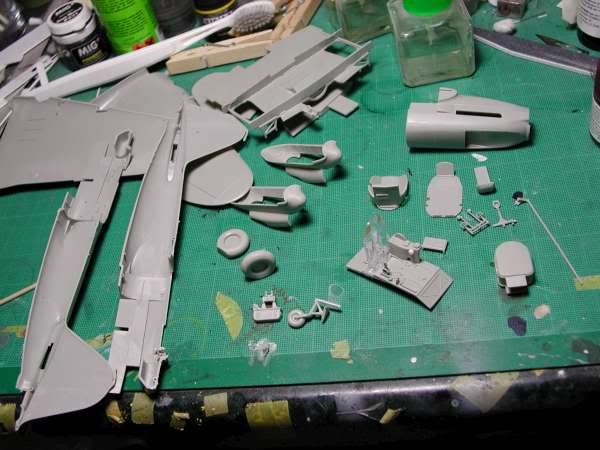
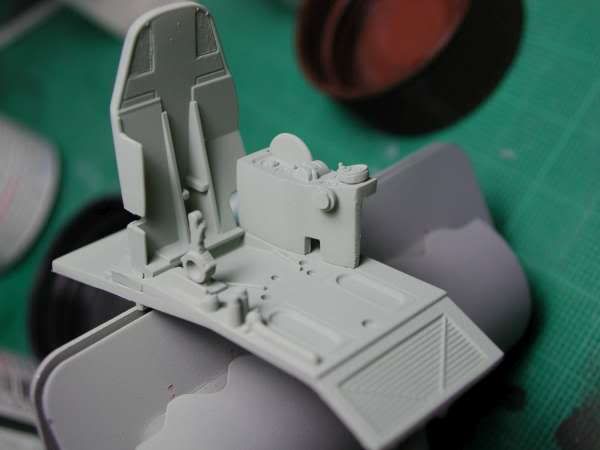
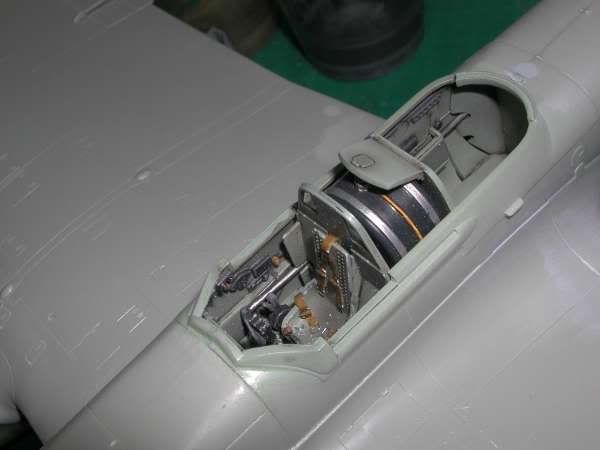
The cockpit went together easily, with a tiny bit of scratch building to replace a really badly moulded wheel.
I spent some time scratching my head trying to decide what colour to use for the interior. I've seen this one debated on a few forums and after getting tied up in knots, I remembered that I was interested more in completion than perfection, and settled on the slightly light green-grey that is Tamiya XF-12 (JN Grey), which isn't all that different from the colour of the plastic it's made of.
So this was squirted all over the interior parts and followed up with some shadow shading using a very thin mix of Tamiya XF-63 (German Grey) and XF-64 (Red Brown). I like the effect this gives, as it adds some tonal variation and stops the paint looking so flat. Here are some before and after shots. ...
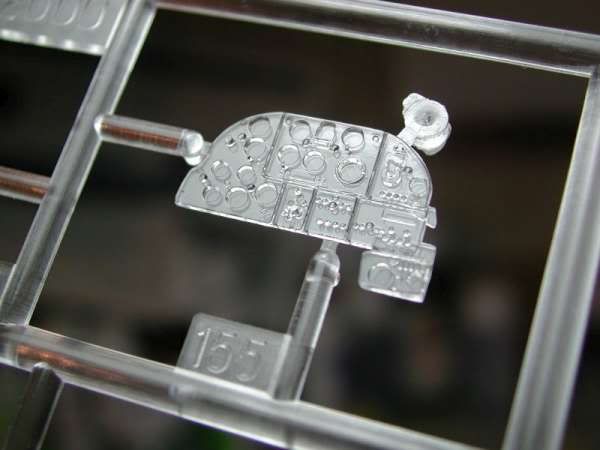
I did the instrument panel almost exactly the same way as I did the on in the B-25. I.e. filled the glass bits with maskol, then sprayed the whole thing light grey, then did an oil wash and some detail painting, followed by application of the instrument decal to the back and then sealed that in with Klear and painted black over the top to hide any gaps and transparent areas. Thankfully, unlike the B-25, an instrument decal is supplied....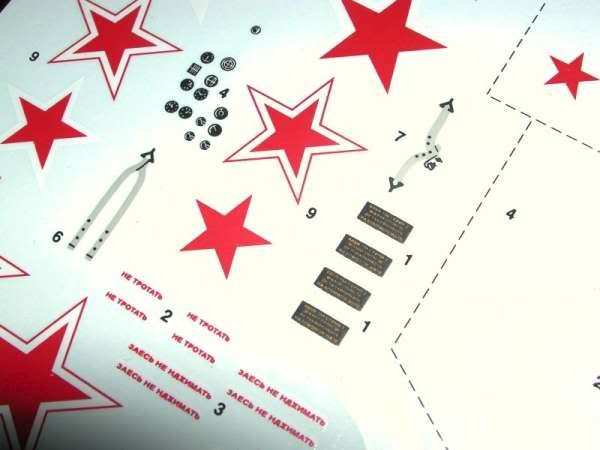
Unfortunately, it didn't completely align with the plastic part so I had to chop it into two parts before applying it.
So here's the final result...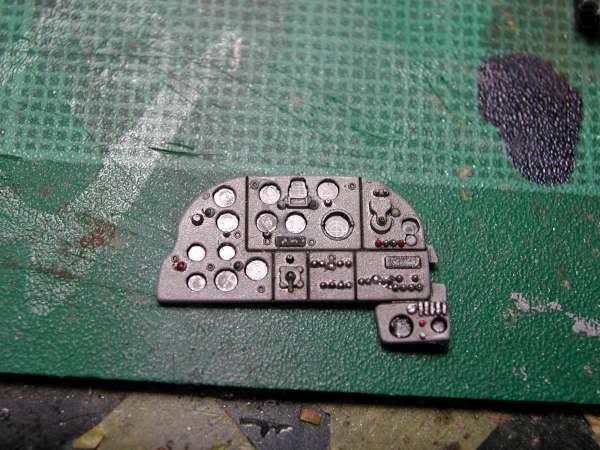
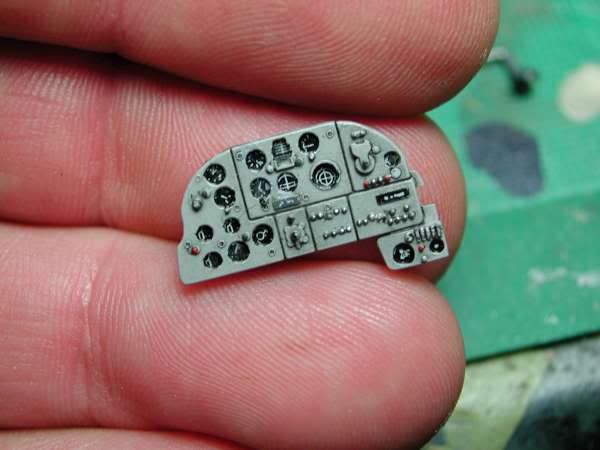
I'm quite pleased with it, and much prefer this type of IP to the very flat looking PE ones which seem to be all the rage now.
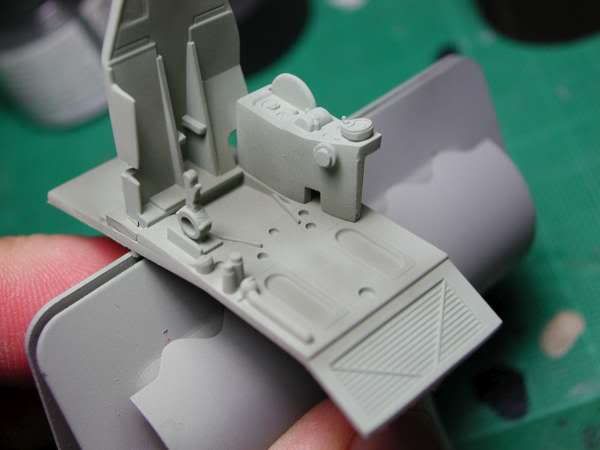
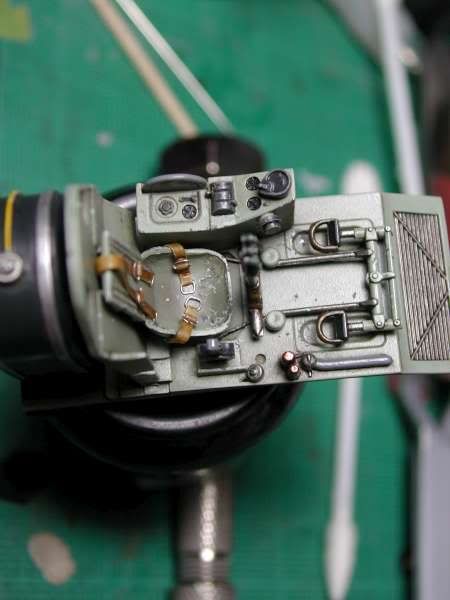
The interior paint work was done using the same method of airbrushed shadows / mottling to breakup the plain colour and add some depth. This was followed by the detail painting, a coat of Klear and 24hrs later, a couple of oil washes.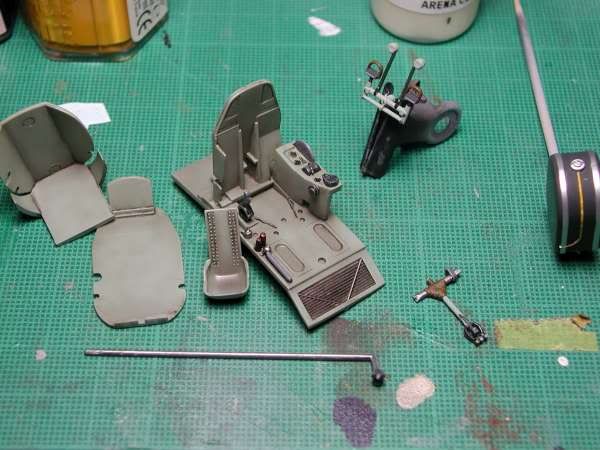

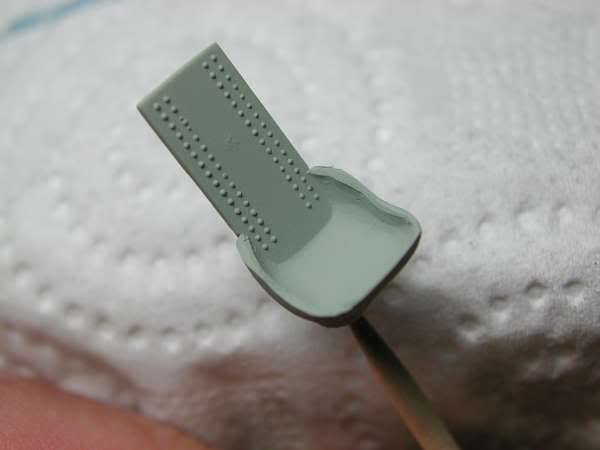
Next I scratch-built the seatbelts ...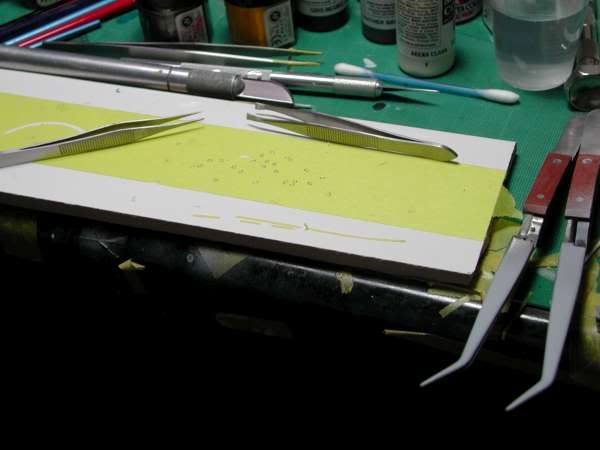
If you have an old bathroom tile to work from, they're great for this type of work.
These are the completed belts for the pilot's seat ...
And here they (mostly) are fitted ...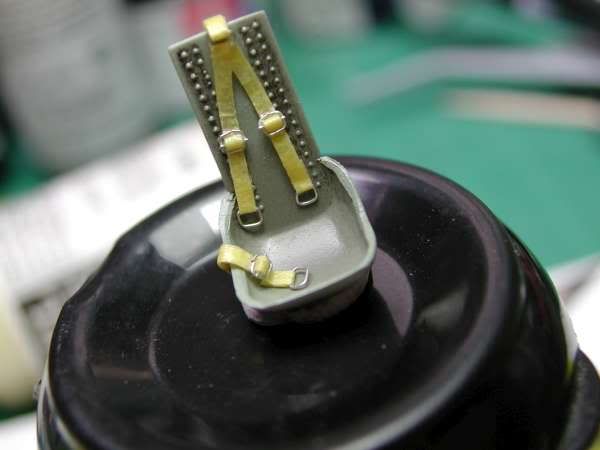
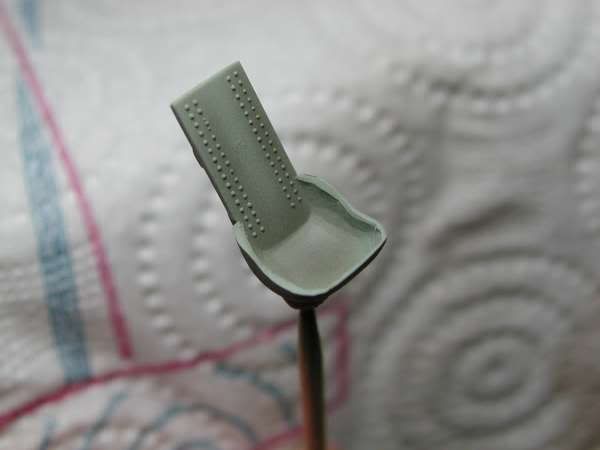
Annoyingly, I messed up the other lap belt and had to make another. Once that was done I applied some Games Workshop washes to them and they were finished. The seat it quite skinny which make the belts look a touch chunky, but that's 1mm tape you see and going any smaller would have been very difficult.
Here are the finished & painted belts ...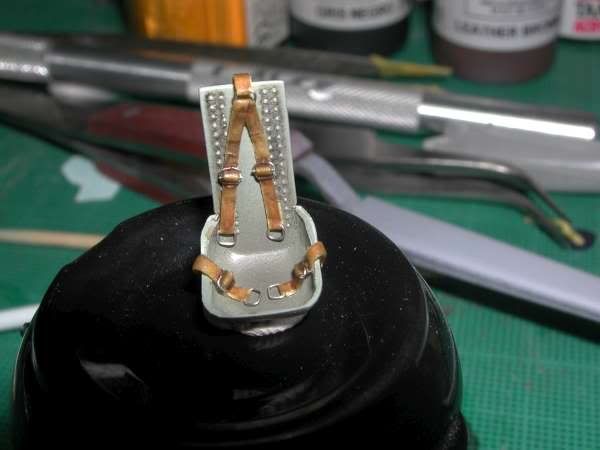
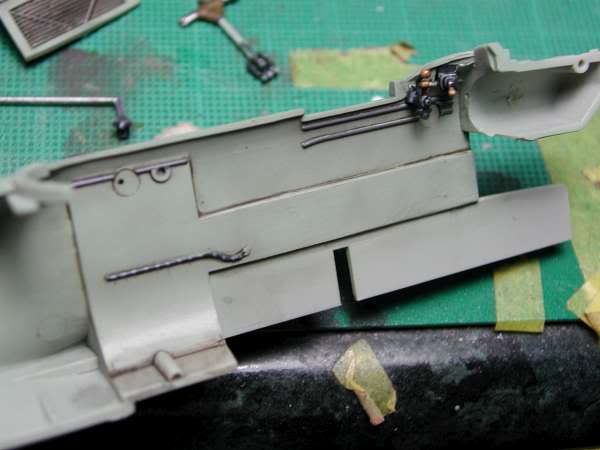
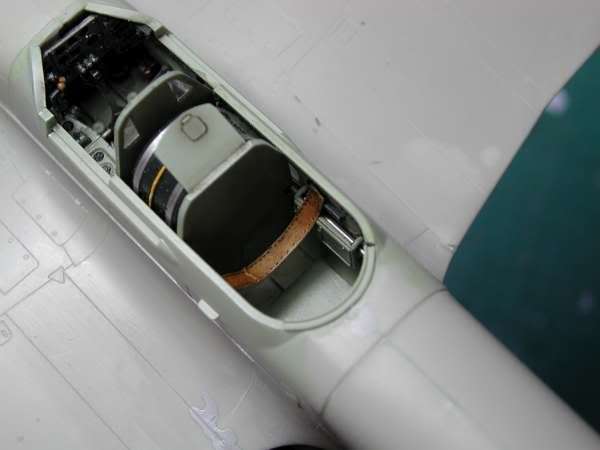
And here are the cockpit elements stuck together with a bit of weathering...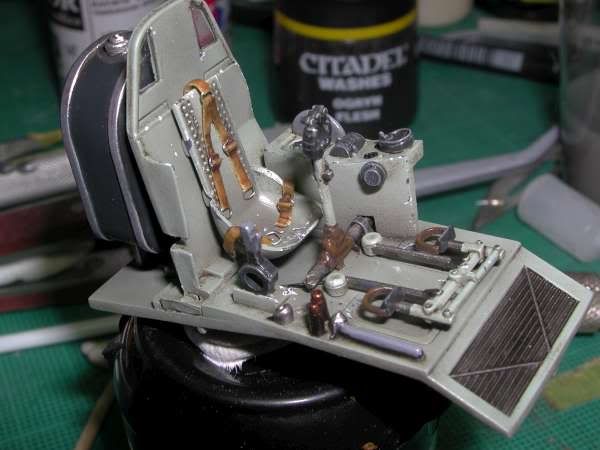
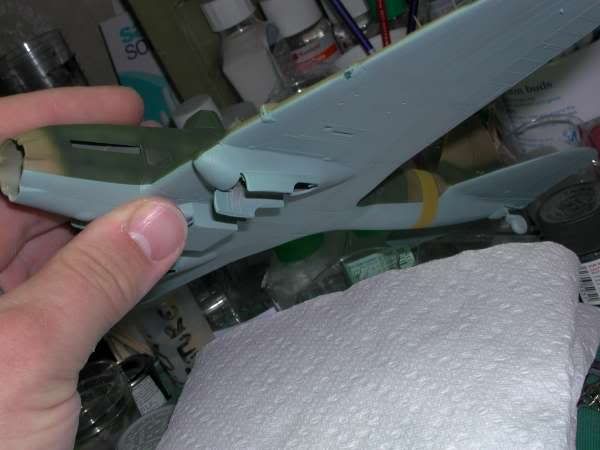
I deviated from the instructions and left off the the elevator push rod (which is a long spindly piece which connects to the control stick and feeds through to the rear of the airframe to the elevators). On it's way, it passes behind a guard situated in the gunners compartment. The instructions would have you attach it to the cockpit assembly, glue the fuselage halves together (with the guard stuck to the appropriate side) and then insert the cockpit assembly from underneath, carefully feeding the push rod through the guard.
Here's the offending section of the instructions ...
If I had done as I was told and read the instructions before assembly, I would have probably left off the push rod guard until the fuselage and cockpit had been glued together, and inserted it into the gunners compartment afterwards. Sadly I didn't read the instructions and study the parts before assembly so had to do it a different way.
I inserted the push rod behind the guard, and then added the cockpit assembly, sticking the end of the push rod to the floor of the cockpit.
Something like this ...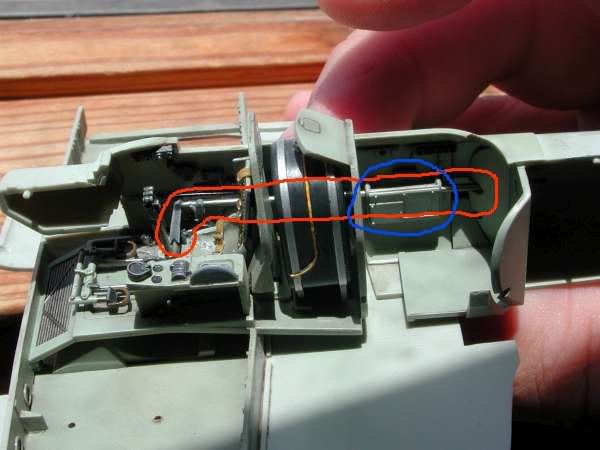
The red thing is the rod and the blue thing is the guard.
I then added the other fuselage half which was a bit tricky but quite possible. The nose was then stuck on, followed by the upper wing halves.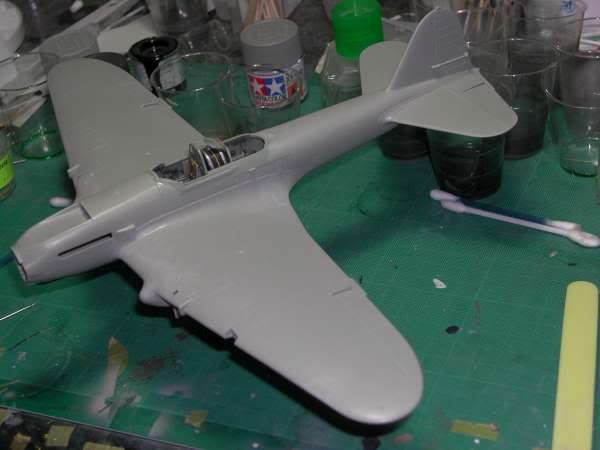
As expected, getting the major parts together and aligned with minimal gaps was a bit of a pig. As previously mentioned, I first joined one fuselage half to the wing middle piece. I then added the interior, and the other fuselage half. I then added the completed nose section, followed by the wing tops and lastly the wing bottoms. I used a lot of CA glue to join the parts, as I had to do a lot of squeezing and pushing to get them in place and regular liquid cement would not have set fast enough to hold the parts in place. I have not had to use this method of construction before, but it worked well and the major parts ended up pretty well in place with no horrible gaps in the difficult to fill areas.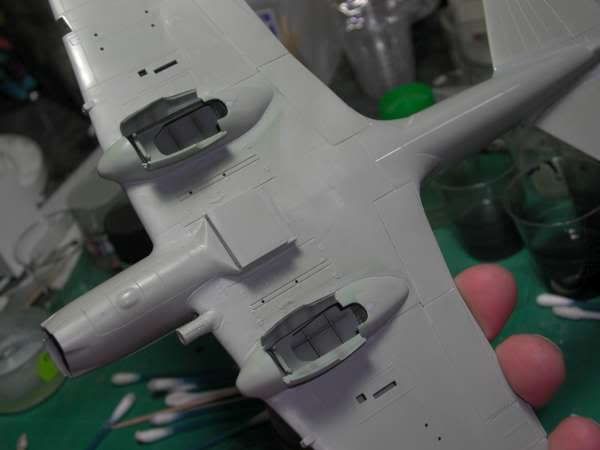
I did end up with a large gap along the bottom of the fuselage, which I filled with plasticard initially and CA glue to finish. The fine gaps were then filled with Mr. Surfacer which I love for these jobs, as you just let it set and wipe away the excess with a Q-Tip dipped in cellulose (lacquer) thinners.
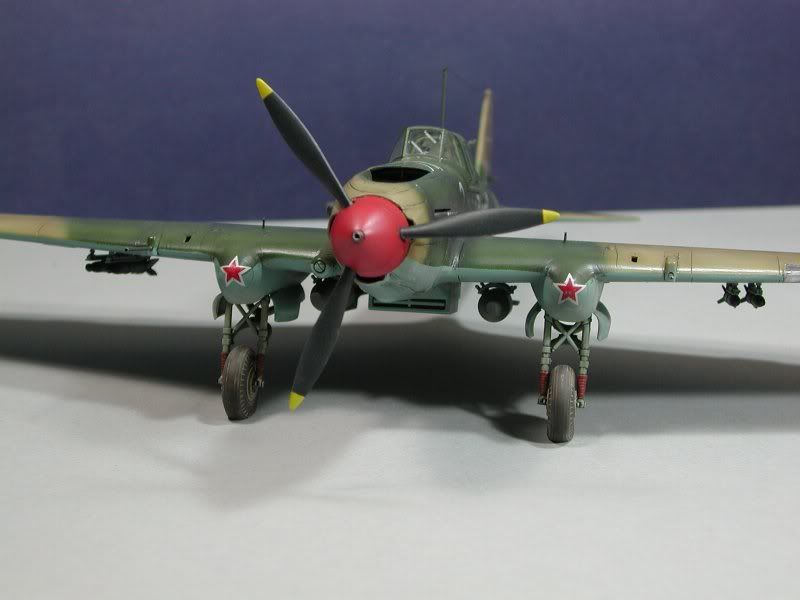
The landing gear nacelles fitted reasonably well, but did need some careful sanding and filling to neaten things up. I tried not to be too obsessive about the fit of parts like this as looking at pictures of the real thing, they often looked like Orks had put them together.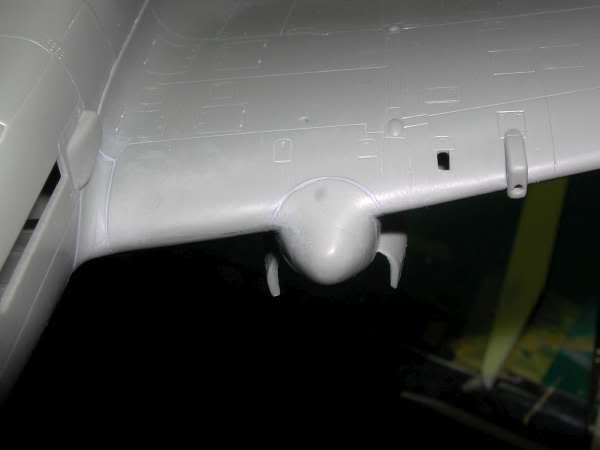
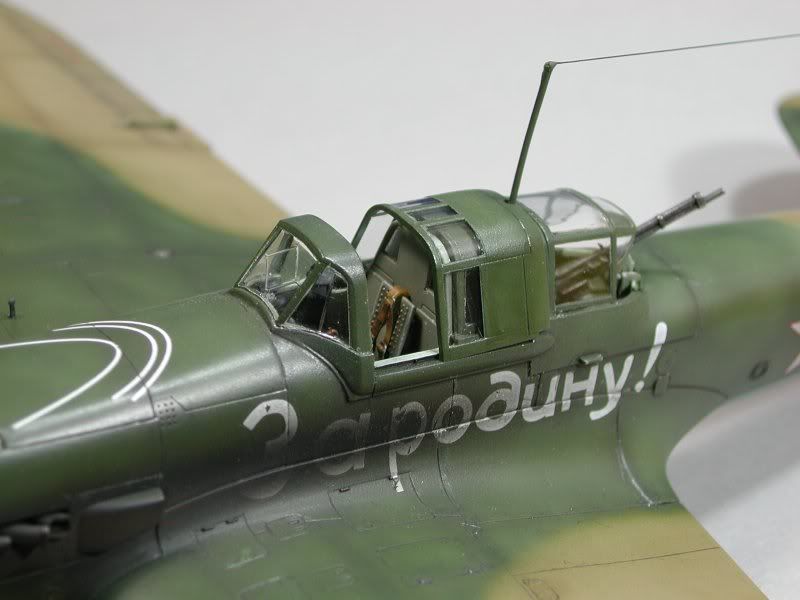
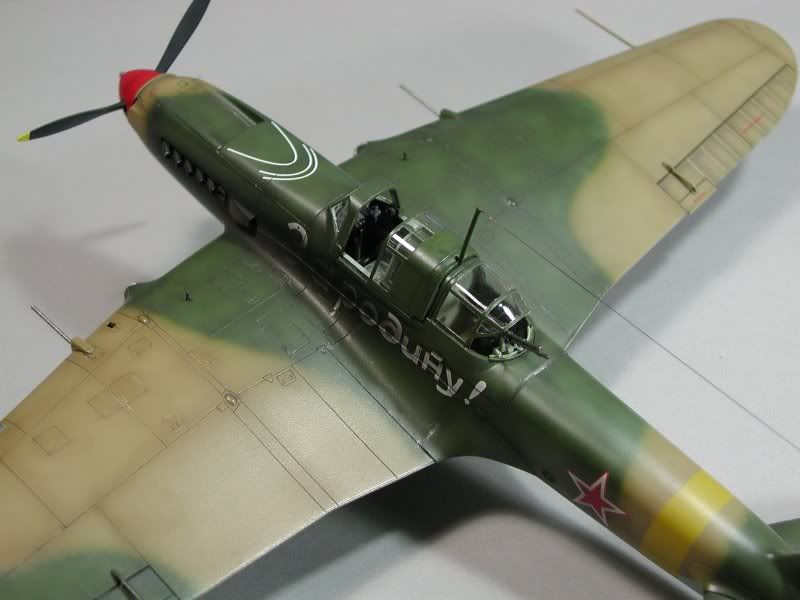
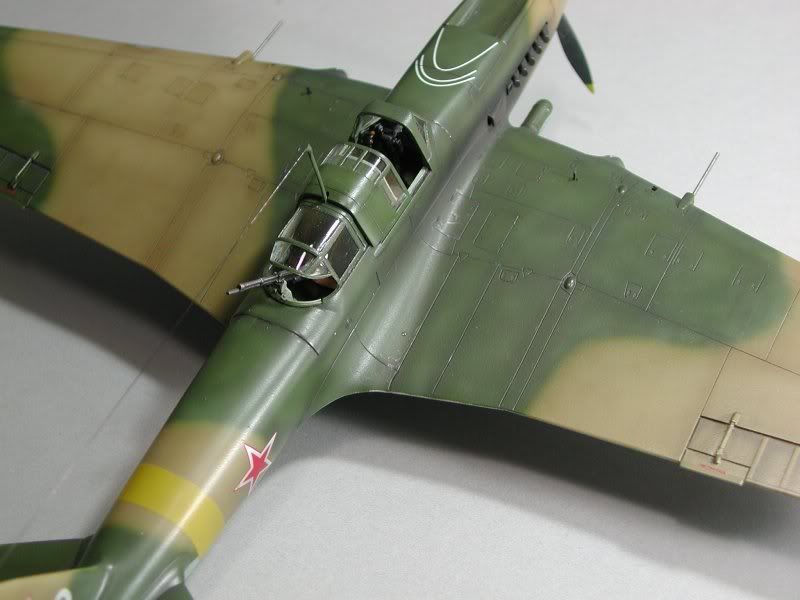
Boy the russians liked a lot of canopy!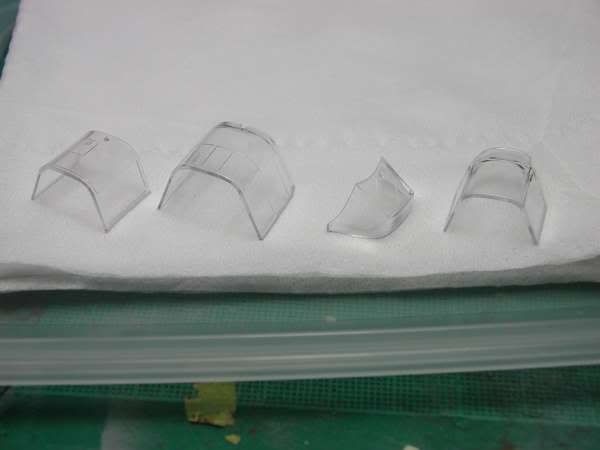
It was dipped in Klear (Future), left to dry for 24hrs and been masked up with good ol' 18mm Tamiya tape and a nice new Swann and Morton 10A blade. Those with the Eduard boxing will be laughing as it comes with their nice pre-cut masks.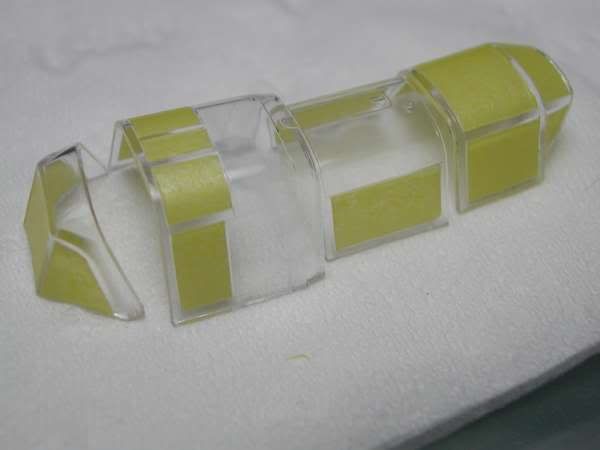
The fit of the various canopy parts isn't that great (apart from the front section), in that they're all not quite wide enough.
I was just about to start gluing the canopy on, when I thankfully remembered another quirk of the kit I'd been meaning to attend to ... the gunners seat.
I say seat, but the poor gunner actually had nothing more than a canvas strap to sit on!
The kit supplied part is completely rubbish, and looks little like the actual strap In the pictures and drawings I've seen. 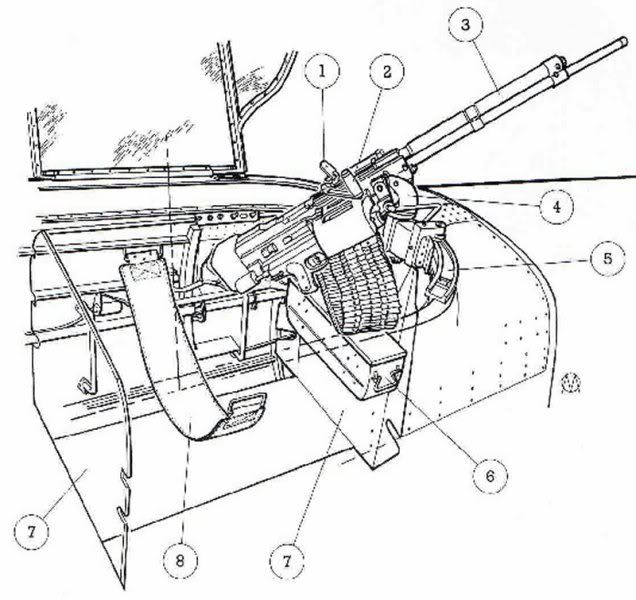
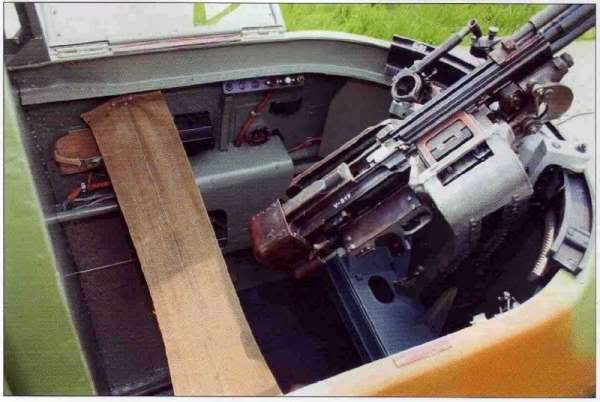
So, I made a replacement out of tape and wire, in a similar way to the seatbelts.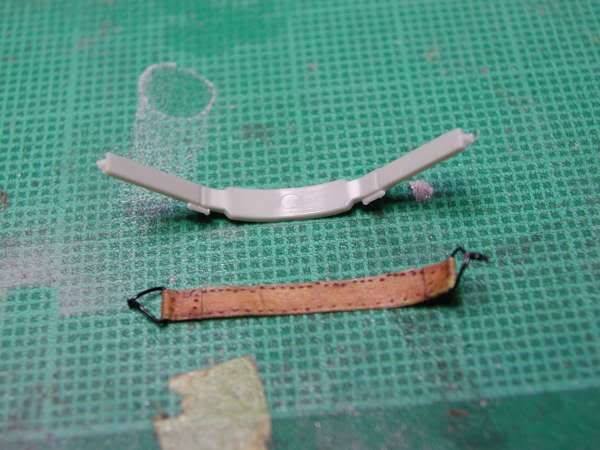
I got the canopy fixed on using Gator glue. I'm still undecided about this wonder-glue, as I just don't find it that easy to use. The rear sections needed some careful alignment and gluing. I ended up thinning the gator glue with some water and flowing it into the joins.
After masking up the cockpit cavities, I gave it a coat of Tamiya Fine Grey Primer. There were a number of seams which needed some attention which was followed up with another coat of primer.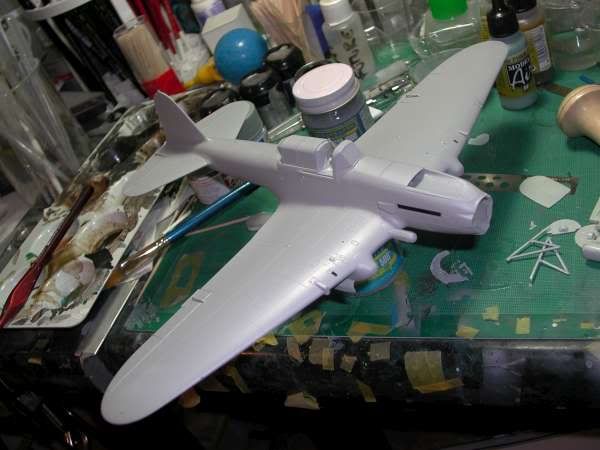
Finally, it was ready for some paint. On this occasion, I decided to give the Vallejo Model Air range another whirl. My usual paint of choice is Tamiya Acrylics, but I like the colours in the Vallejo range and the fact that they come pre-thinned in neat dropper bottles is a huge bonus. I've had problems with them in the past, whereby I felt the coverage was awful, requiring lots of coats that took longer to dry than the Tamiya paints. Furthermore, I found it more difficult to shade with them as I struggled to get the dilution and pressure just right.
The base colours used ...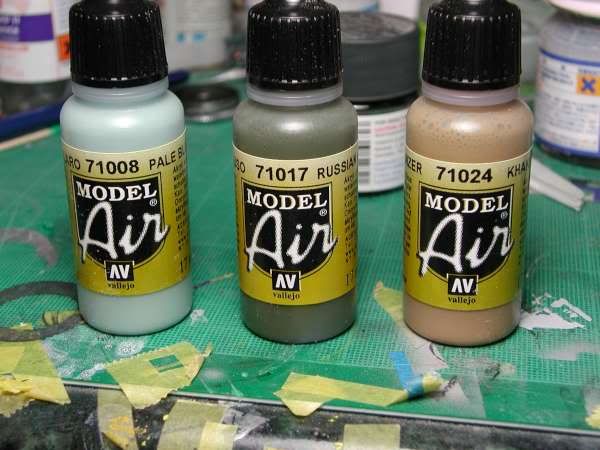
71008 Pale Blue, 71017 Russian Green and 71024 Khaki brown.
First I threw down some rough pre-shading using Tamiya XF-69 Nato Black as I've got loads of it!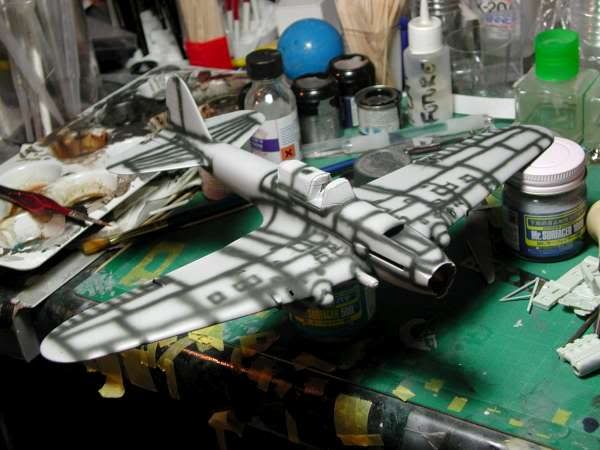
I'm not sure if I'll keep using the pre-shading technique, as I'm finding that I get more pleasing shading results with layers of post shading using different tones.
The blue on the underside went on really nicely. I followed it up by mixing two lighter shades and two darker shades by adding white and grey to the base blue respectively. To thin the paint, I used some Mr. Muscle window and glass cleaner, which is what I use to clean the airbrush after spraying Vallejo paints. This seemed to do the job really well for me, as I was able to shade with the control I usually only get with Tamiya Acrylics.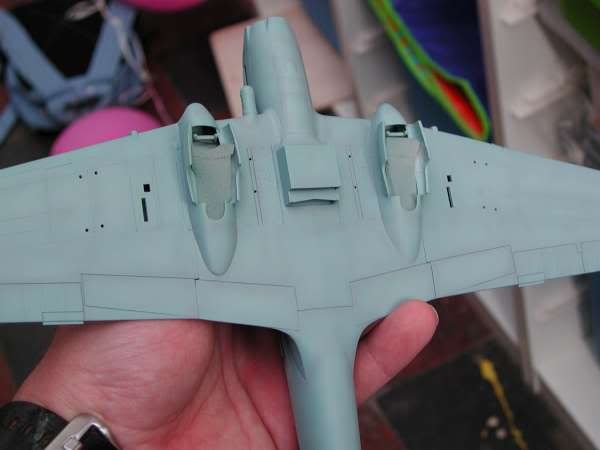
Next, the tan went on and was shaded using my usual method of two lighter and two darker shades, first sprayed in focused areas then randomly.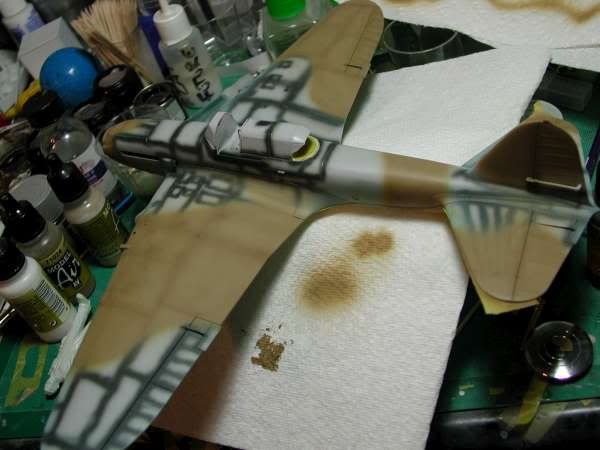
An then the green, shaded in a similar way, but found it to be a little more tricky to do than the tan ...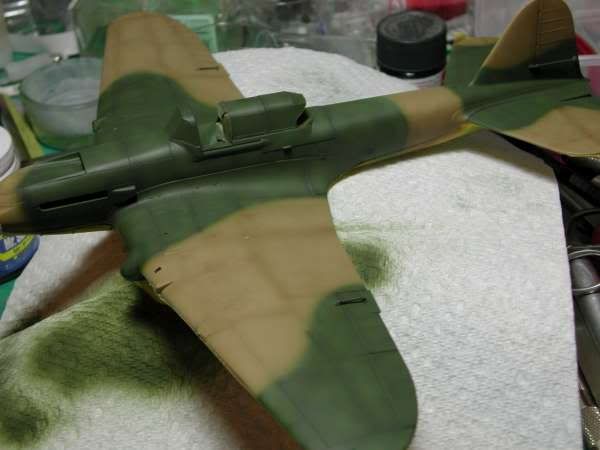
There were a couple of spots I needed to re-do where I overdid and underdid (is that a real word?) the shading or overlapped the freehand camo unintentionally.
The Vallejo model air sprayed reasonably well. Thinning it with Mr. Muscle window cleaner when shading really did the trick, but I did have to spray at a higher pressure than I do Tamiya paints and thus, I had to keep the brush moving fast to prevent wet spots and spidering. Rather than using the kit decal for the yellow fuselage band, I simply masked it up and sprayed it using a mix of Tamiya XF-3 flat yellow which was toned down with some flat earth and then given some random highlights and shadows.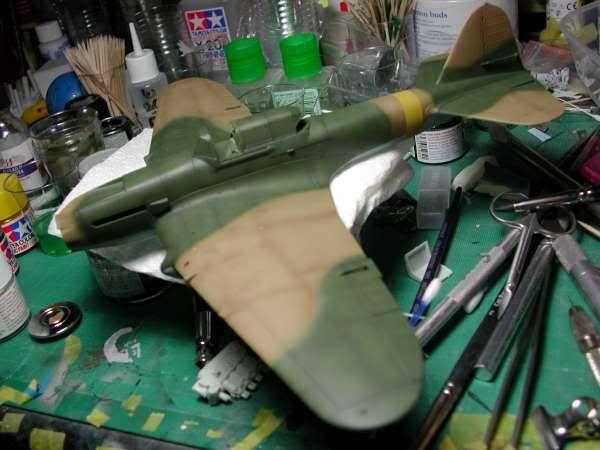
The wheel wells were then masked up, sprayed and shaded ...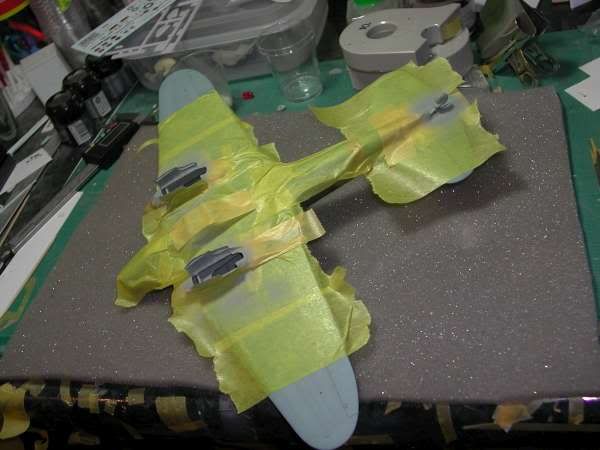
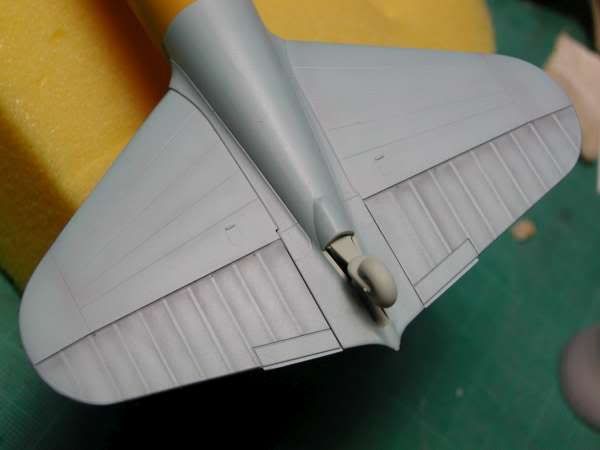
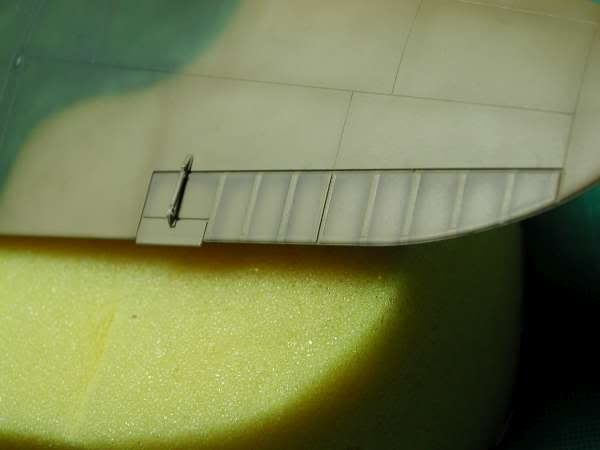
I was just about to apply a clear coat and crack on with the decals when I decided to have a go at shading the fabric flying surfaces. I opted to copy a technique I'd seen others use whereby you mask the ribs and spray a shadow shade alongside to give some artificial depth. The masking is a bit of a chore, but was made more bearable thanks to lovely Jammydog fine masking tape....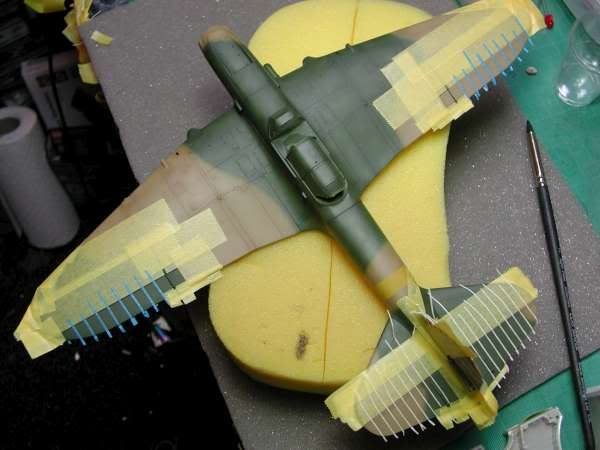
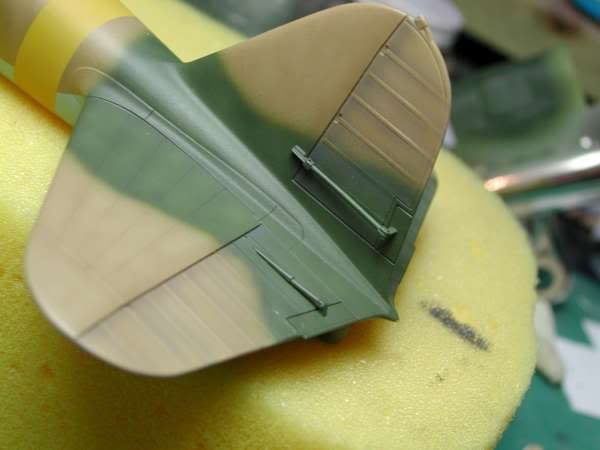
I chose tamiya german grey as my shading colour, and in hindsight, I shouldn't have, as I'm not that happy with the results. I should have not been lazy and shaded the areas with darker shades of the base colour instead of trying to use one colour for all areas. It's OK on the blue undersides and the tan is almost bearable, but it doesn't work at all on the dark green. Trouble is, you only get to properly judge the effect when the tape is all removed.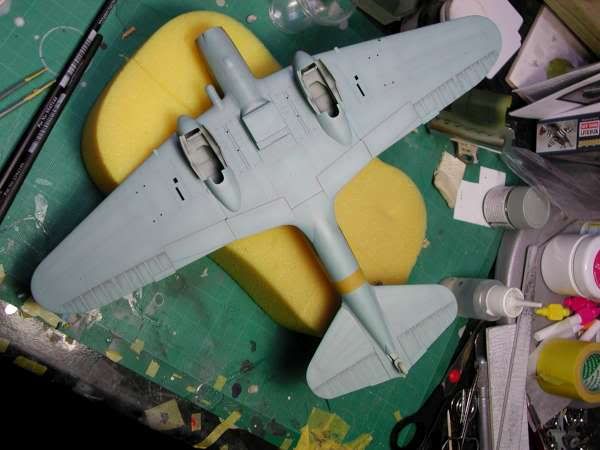
I should have probably also done it after the decals were on, but brain was clearly not completely engaged that day. Next I sprayed on a clear coat using Future (Klear). Actually, I sprayed the first coat and then reverted to brushing it on, as I actually find that I get a better gloss coat faster that way.
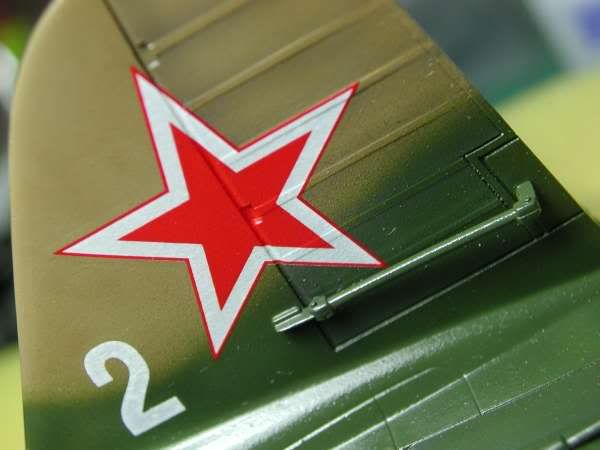
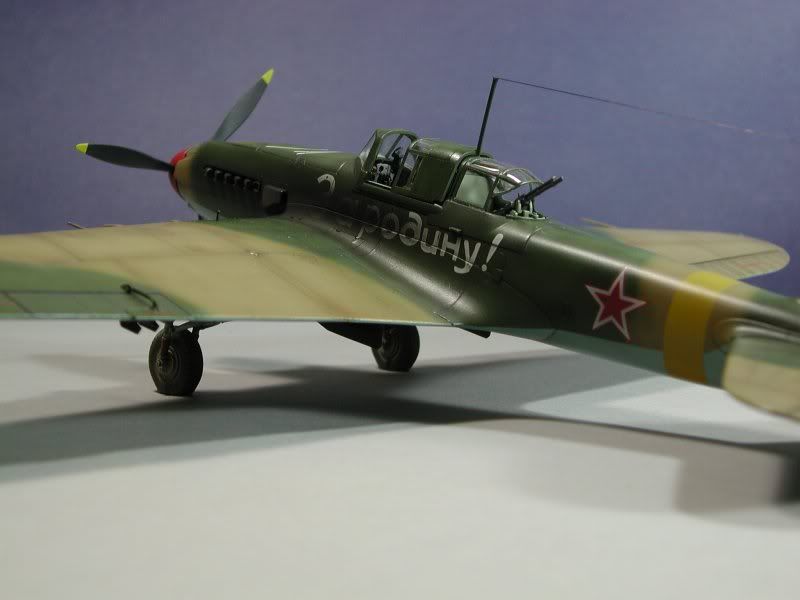
Then the decals went on. Unfortunately, Italeri have stuffed up and don't provide sufficient red stars without the fine red border to decal it properly as per the decal instructions. Thus, I had to use the stars with the fine borders meant for the other schemes. They are a touch on the thick side, but responded well to microset and microsol. The slogan conformed to the curves and panel lines well, but I did have to run a knife along some of the inside edges, to get it to bed down completely.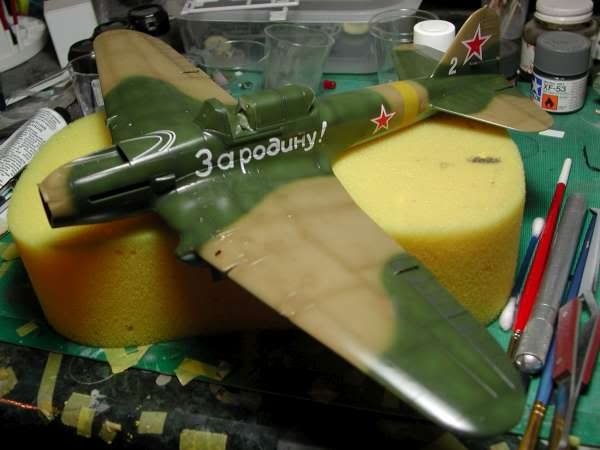
This is what I love about Russian tanks and planes - big slogans!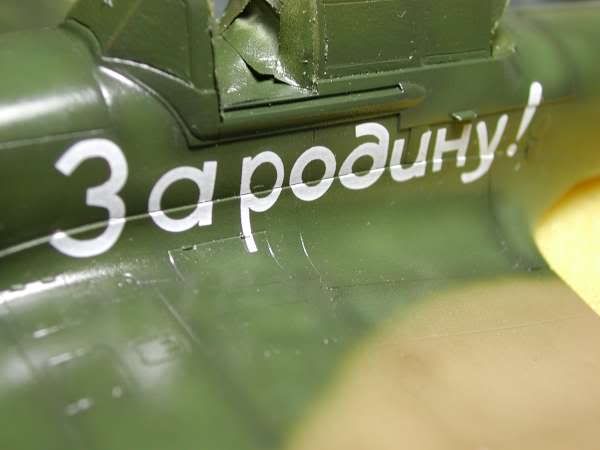
I was quite worried about placing the stars on the pointy wheel wells as I was conviced that they wouldn't go on without a fight.
I first tried to place one of them and just used loads of microsol, followed by Mr. Mark Softer. This worked OK, but for the second one, I decided to cut the decal so that it could over-lap itself and conform to the curves more easily, like this ...
And here's how it went on ..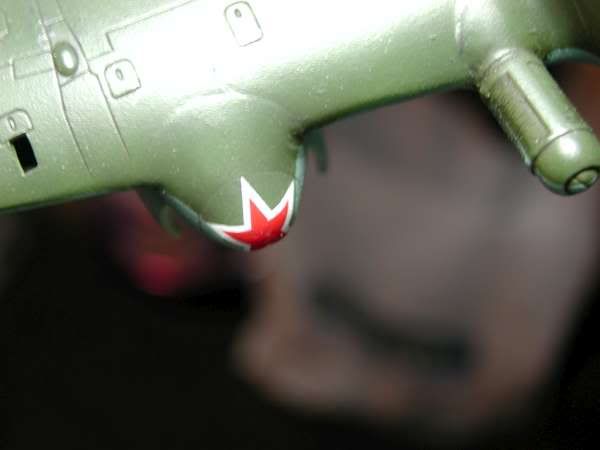
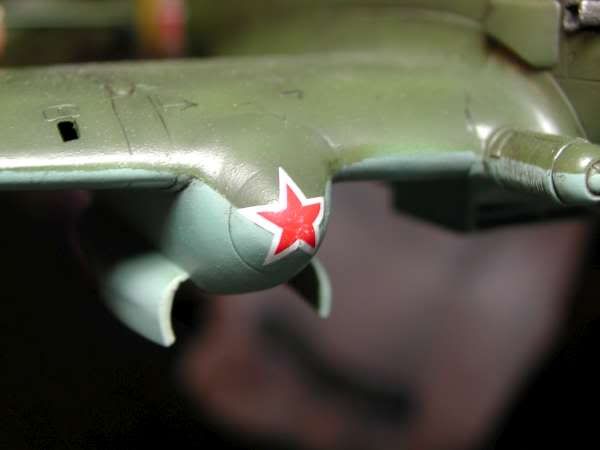
Sucess! So much so, that I carefully added the cuts to the first one, and it settled down perfectly. I then attacked these and the other decals with a needle to add some scrapes and chips. Later, I toned them down a touch by hitting them some thin black / grey as they're silly bright as they stand. Once all the decals were dry and any water marks were cleaned up, I gave the whole airframe a satin clear coat using Tamiya X-21 flat base and Klear.
I then gave the airframe panel lines an oil wash (a mix of black and wash brown Abteilung oil paints, thinned with odourless white spirits [mineral spirits]). I left it to dry for about a half hour, then using a mix of dry and very slightly moistened cotton buds, I removed the excess by streaking the paint in the direction of the airflow. I then added some scrapes and chips with various pencils concentrating on high traffic areas.
Next, I moved on to finishing all the little bits and pieces. The tyres were painted with Vallejo model air black-grey, then the hubs were stuck on and the assembly was given a matt clear coat, mixed from Tamiya X-21 flat base and Klear. Once that was dry, I gave the hubs an oil wash with the same black-brown mix I used for the panel lines. Finally, I gave the tyres a good coat of Mig Productions pigments, applied dry.
The undercarriage also received an oil wash and the rubber boots were painted with Vallejo model colour acrylics and washed with Games Workshop washes. Assembling them was a tricky affair, as the upright just makes a simple butt joint with the pegs poking out of the lower wing section, and the link part's locating holes are almost impossible to see in the wheel wells.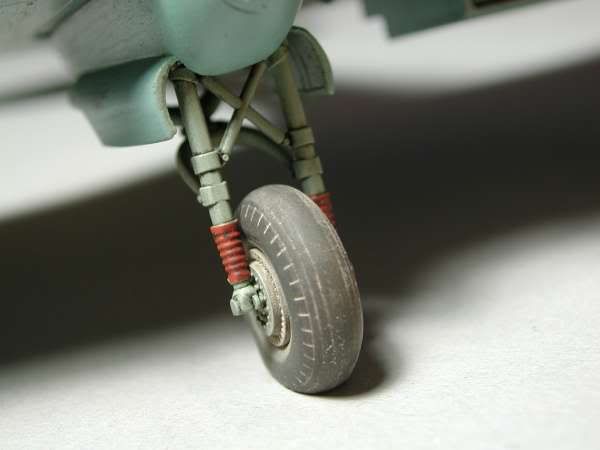
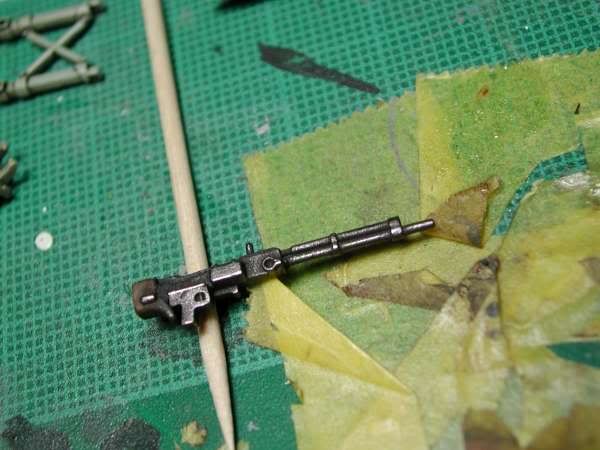
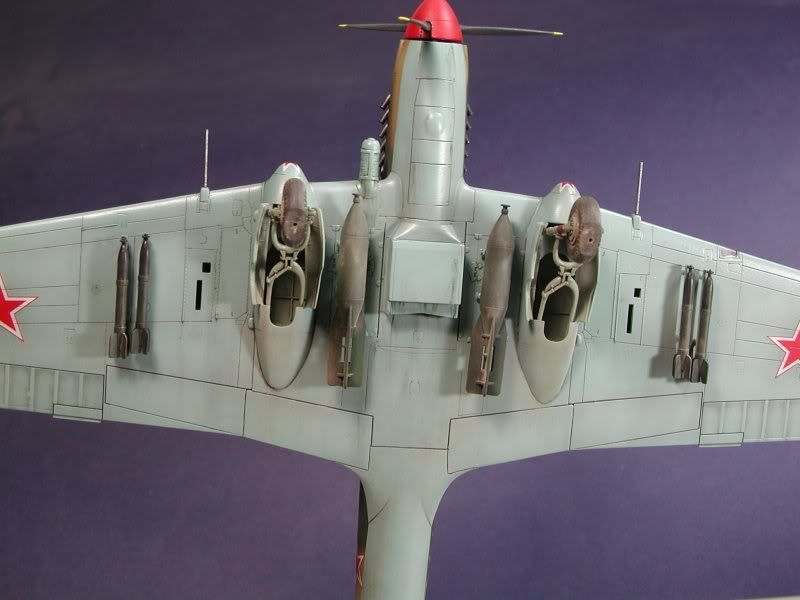
The bombs and rockets were painted with Tamiya acrylics and given some shading, an oil wash, and a dusting of Mig Pigments. The gunners machine gun was painted with Mr. Color Dark Iron and buffed up. I'm not entirely happy with the result of this, but I had to try it out somewhere!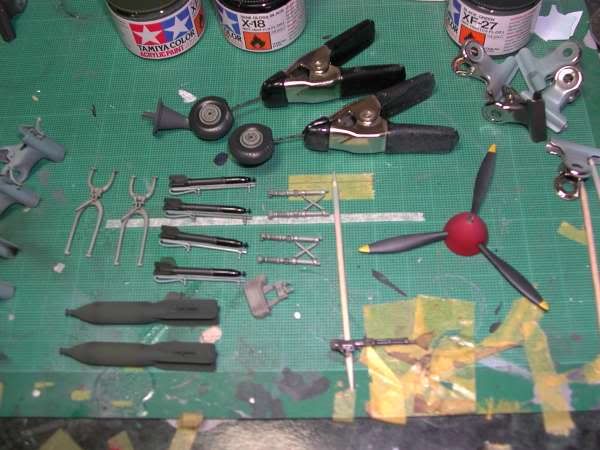
Next, I added the antenna post and glued on the antenna wire using fine nylon mending thread coloured black using a black Sharpie marker pen.
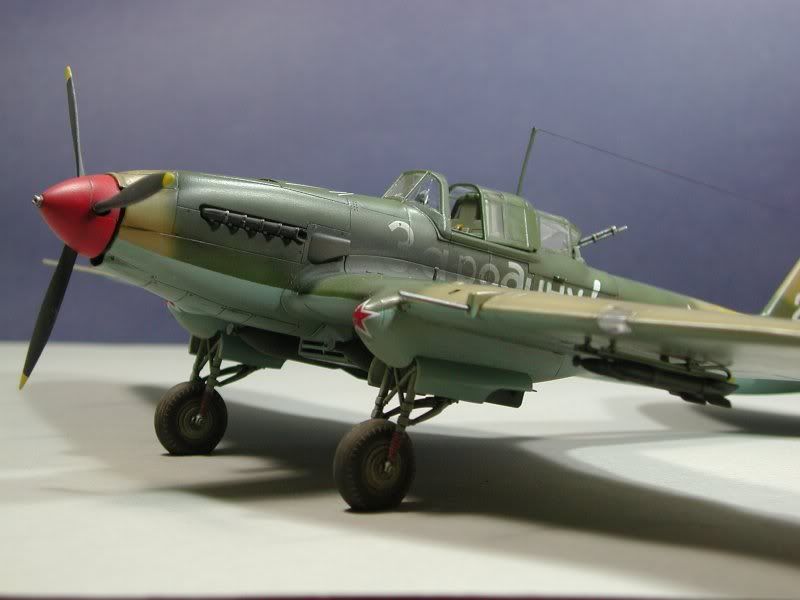
The prop was painted using Tamiya acrylics. I used the shading method described by J.Villalba in his FAQ book whereby I shaded the leading edges with a grey and added streaks back across the blades. I then added some subtle chipping with HB and silver pencils.
The cannon barrels were replaced with 0.8mm fine brass tubing from Albion Alloys. Once glued in place, I painted them with Games Workshop boltgun metal.
I added some oil leaks and streaks with abteilung oils. I simply dot these on using a fine brush, neat from the tube and then use a flat brush slightly moistened with thinners and draw the colour back.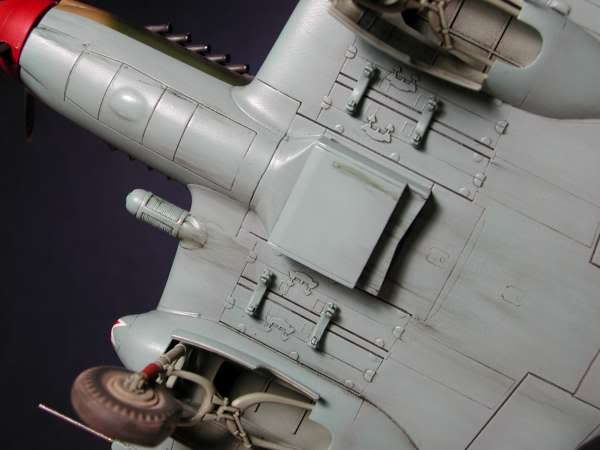
Finally, I sprayed on some exhaust staining across the fuselage using very thin Tamiya XF-1 flat black, then XF-19 sky grey and finally XF-68 NATO brown.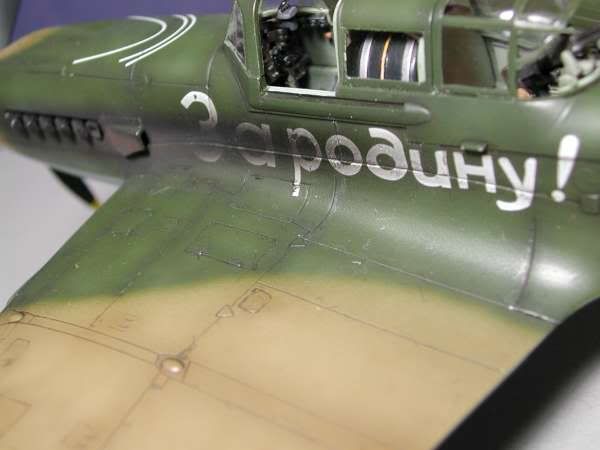
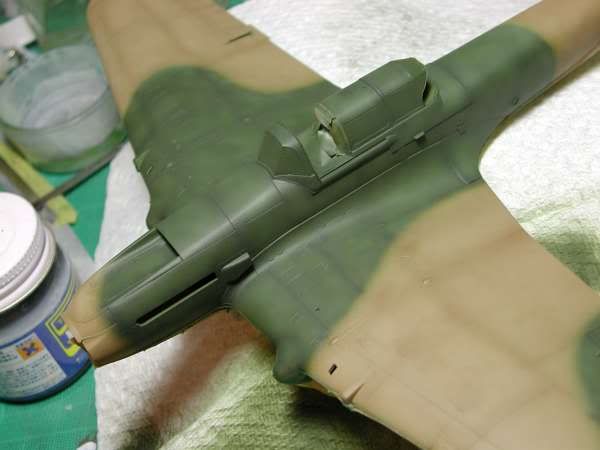
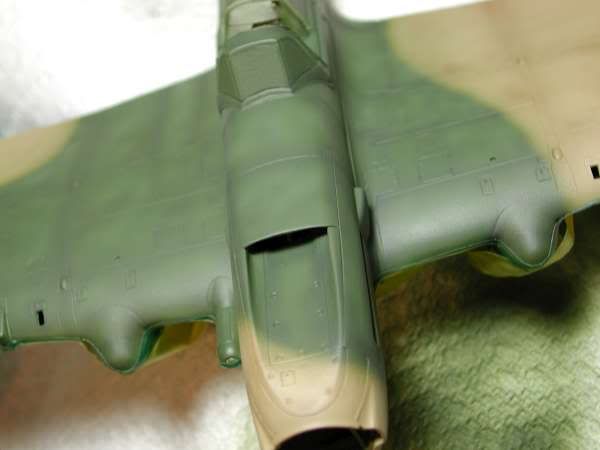
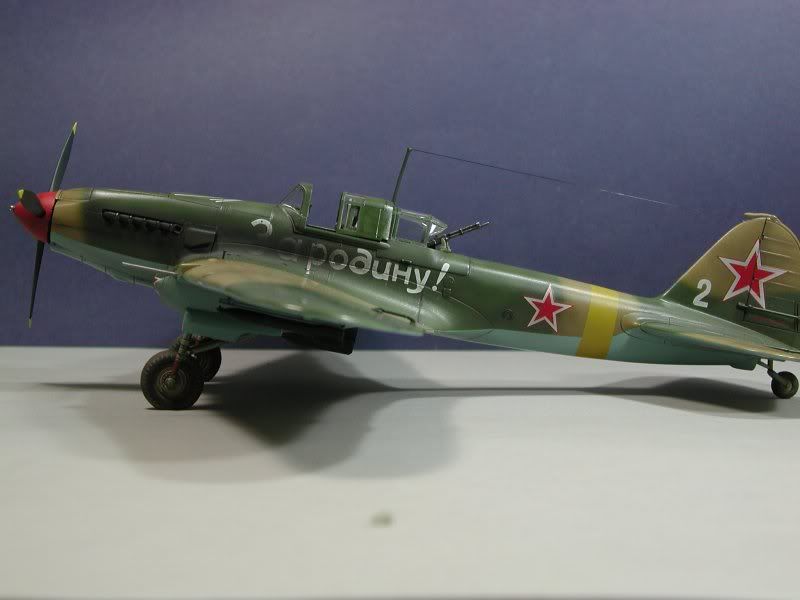
Finished pictures ...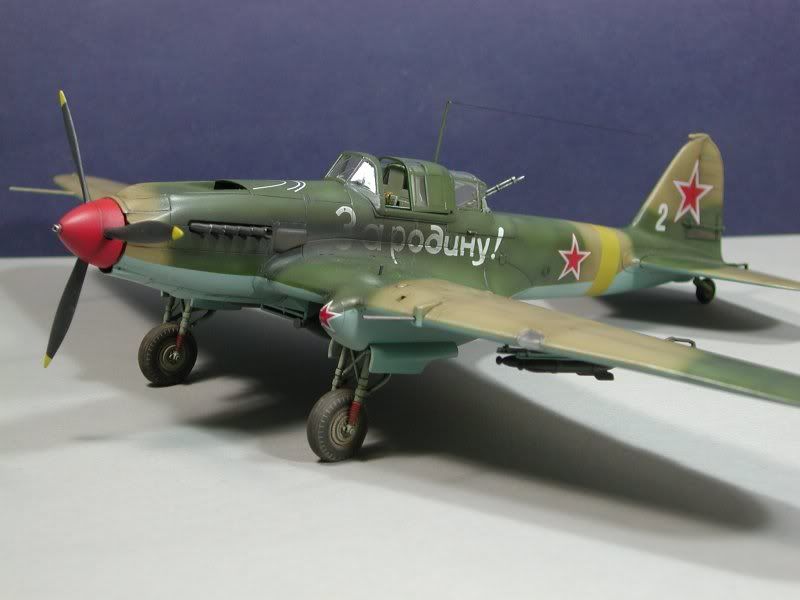

Thanks to everyone who followed the build thread, posting positive encouraging comments. And thanks to Hans (Lavochkin7) for his support and research.


Store


Kit Reviews

Video Builds


P&M Models