


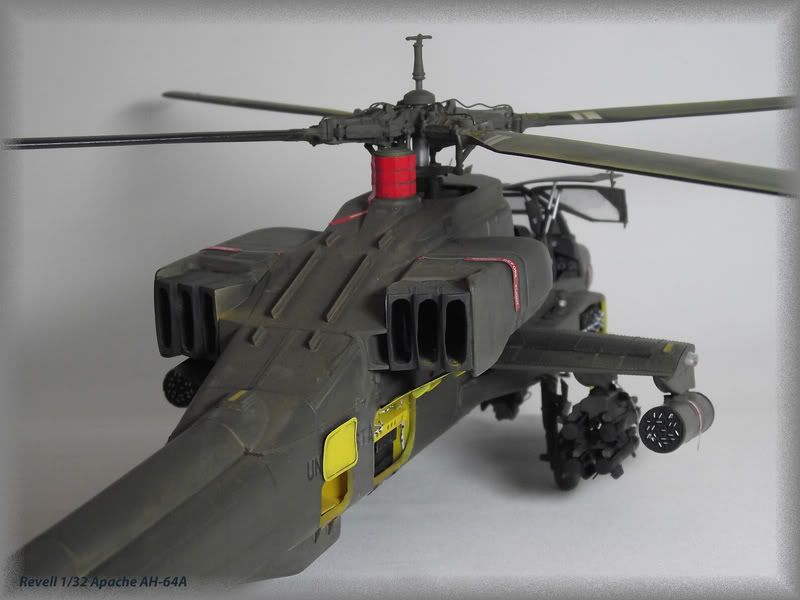
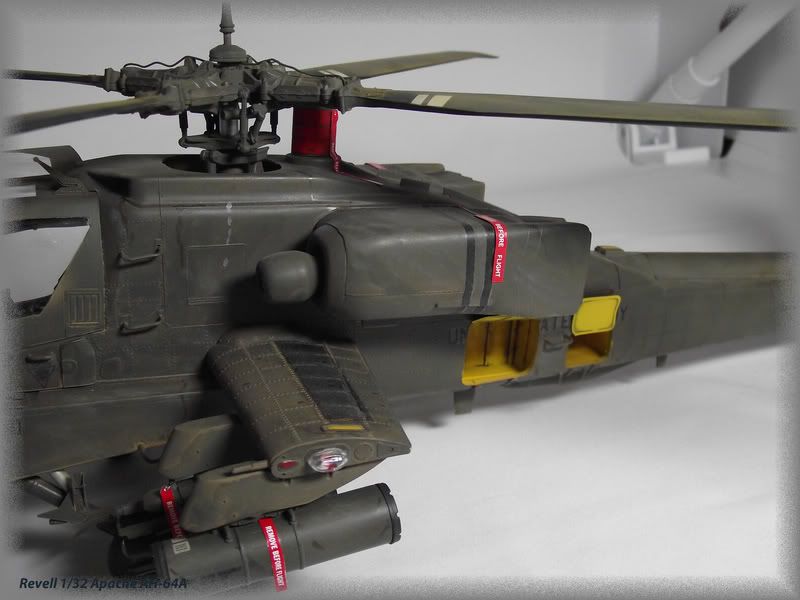
1/32 Revell AH-64A Apache
by Adrian Jefferies
Build Time: 3.5
Months
- Kit:- Revell 1/32 AH-64 Apache
- Extras Used:- Verlinden Detail Set 2198, Eduard PE Harnesses, Astra & Eduard RBF Tags & Lead Wire for detailling.
- Paint:- Revell Aqua, Vallejo Model Air, Tamiya Acrylics & Gunze Mr Hobby Metals.
- Weathering:- Flory Models Sand Wash & Pigments, Tamiya Pastels, Lifecolor Tensocrom & Mig Dark Wash.
- Decals:- Kit supplied & Self made.
Hi all,
Well they say no rest for the wicked so I'm now moving onto my next build.
A couple of firsts for me: my first 1/32 scale model and my first
helicopter. So it will be both an experience and hopefully a good learning
exercise.
You maybe be wondering why such an old kit? Well other than I'm a
glutton for punishment a good friend of mine bought this for me some years ago
for Christmas and I just thought it was about time I got it built.
This won't be OOB - I've purchased the Verlinden detail kit which contains
both resin and PE which from first inspection seems rather nice. And I'm
no rivet counter so if there's any inaccuracies with the kit I probably won't
know about them and will just enjoy the build!
So without further ado here are some pics of the various parts........


So I'll just get my head around
what needs modifying for the resin before I begin.
Firstly, I'm enjoying this build immensely due to the fact that it's been
the first time I've done some proper research into what I'm building. Most
notably, the Lock on #13 book (which Phil used in his Apache build) is a superb
reference giving me an insight into not only the Apache but also ideas on the
weathering, wiring and painting of internal parts.
First things first. This involved cutting out the various hatches on
the sponsons and fuselage halves. Below I've marked which parts needed
removing.......


Once removed the resin parts
were fitted and they were an excellent fit (well done Verlinden!). The
very rear opening is storage bay and I've got a PE "tube" to fit in there but it
will require some careful test fitting later. All these internal parts
will be painted yellow.

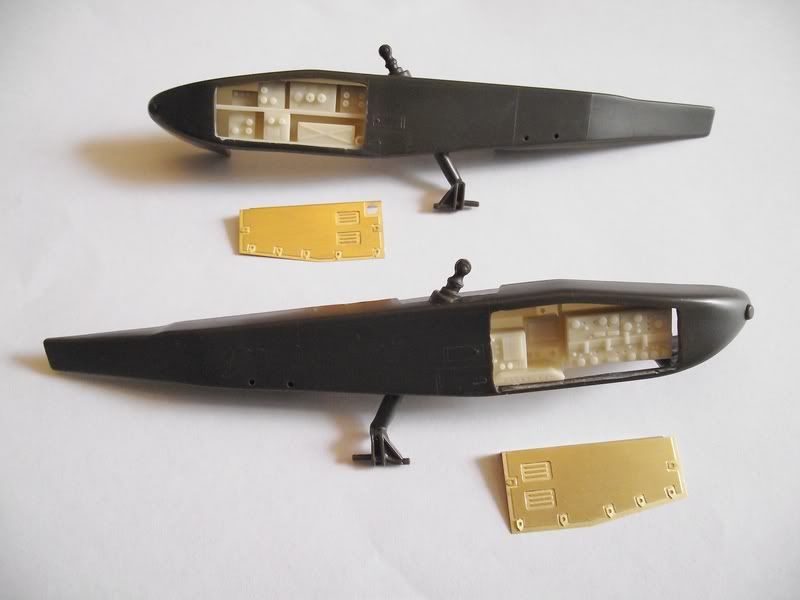


The PE hatches are shown here also which will be painted and fitted near
the end.
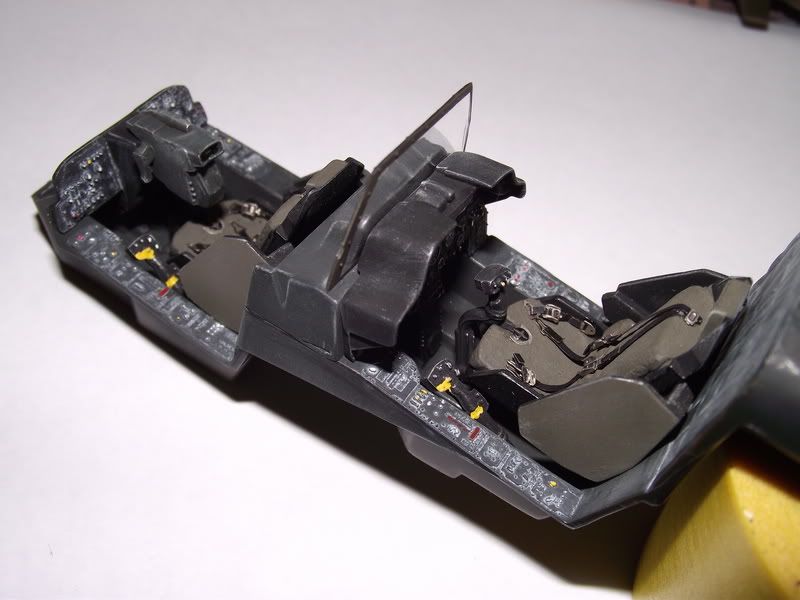
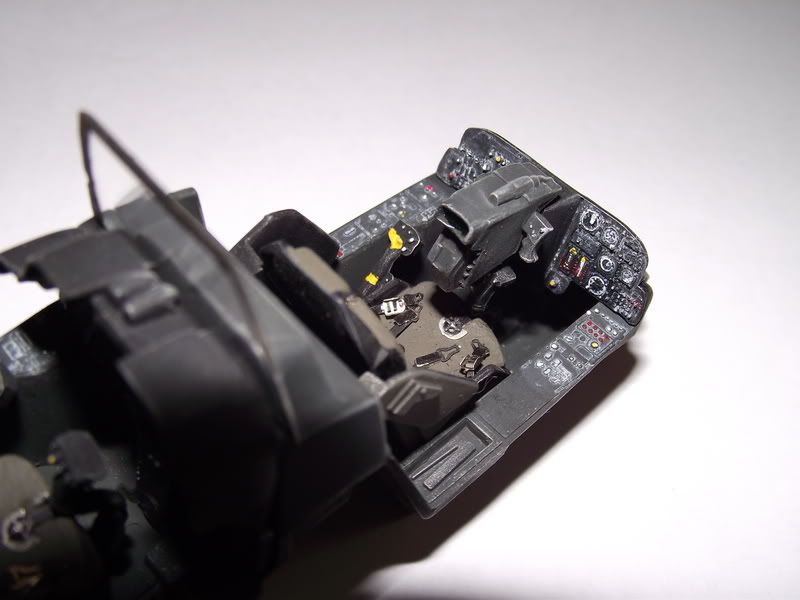
Most of my time has been spent on getting the cockpit all painted,
weathered and put together. Various shades of black and olive drab were
used along with dry brushing with Citadel metallics and some FM light wash.
The whole Apache including the cockpit was very dusty so a light coat of
FM pigments (sand mixed with white) were applied throughout. I'm very
happy with how this came out although a slight dip in the clear shield can be
seen but this should not be noticeable to much once it butts up against the
canopy on that side. Some wiring was also added at the rear underneath
where the blades will fit. Eduard PE harnesses were also used.
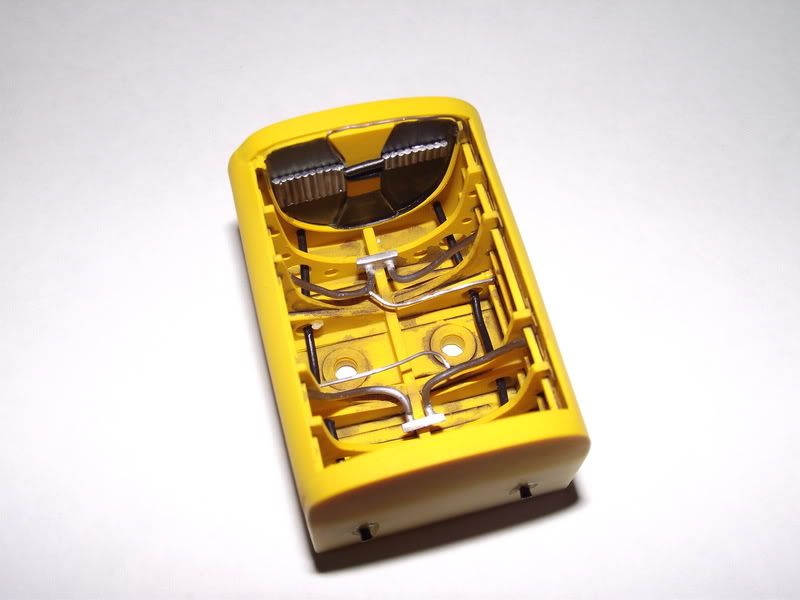
The resin ammo bay received a coat of yellow and then I added in some
detail using black wire, lead wire and some scratch built connectors and machine
gun feeder rounds using styrene rod glued together........
A couple of the resin hellfire missiles with PE attached. Only
another 6 to do!
The canopies were masked inside and sprayed with the main olive colour.
Here's the main one after fitting the upper control panel.......
The Verlinden PE storage bay
which runs completely through the rear fuselage was a pig to fit and shape so I
made a new one out of plastic sheet. I used the PE one as a template and
cut and molded the four sides so they fit. Rivet detail was added using a
riveting tool and some dark pigment applied.

The inside fuselage halves with
the resin and storage bay fitted......


Here are the front wings with
PE added. The ends needed sending down to remove existing bumps. The
four weapon holders were also added.

As the majority of detail on
this kit is raised, I purchased some resin decals so that the detail can be
reinstated if removed.


Here are the engines after having the raised panel lines put back using the
decals......
I finally joined the fuselage halves and as you can see a fair bit of
clamping was needed!
A test fit of the main canopy.
Note I've had sand and remove the raised detail (mainly windscreen wipers)
which are to be replaced with PE parts near the end. The rear part
actually butts up at the overhang to the rear.

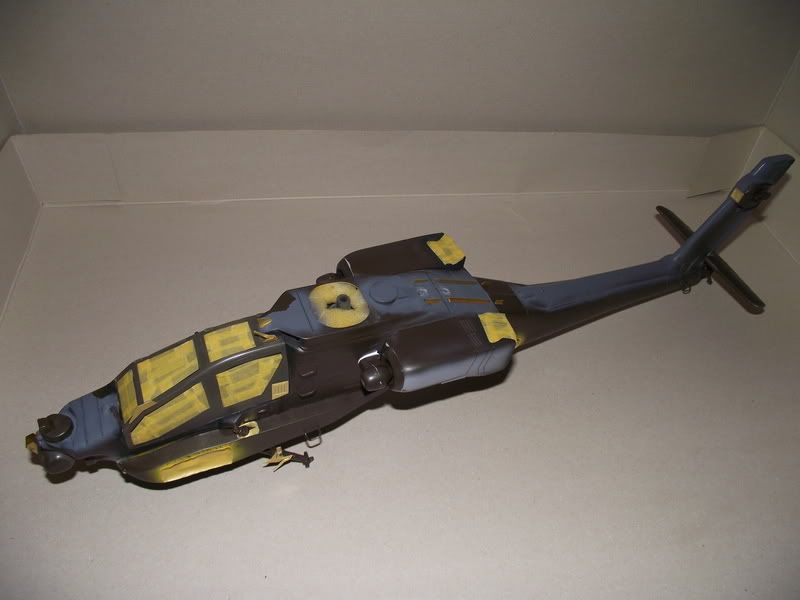
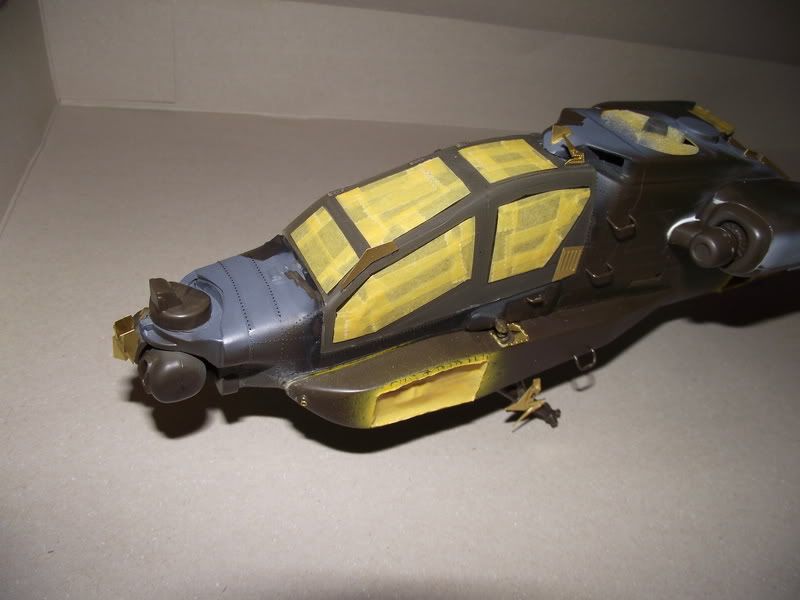
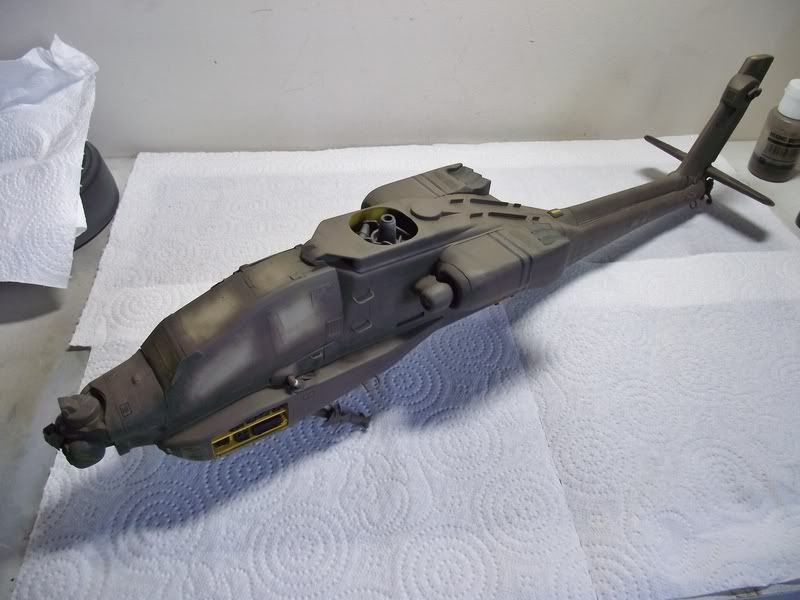
And after a long, long time
sanding, filling, spraying, etc........ this is where I'm currently at after
fitting various other parts including the front sensor, sponsons, front struts
and under cover which houses the machine gun. The resin internals were
sprayed yellow and masked up. Note the ballistic shield inside the cockpit has
been removed as it needed some sanding to allow the main canopy fit
properly.


Still some work to do on this area to blend the lines in.........

So the next step is to put back
all the rivet detail lost and panel lines on top as well as a load of other
things......I may get to prime it one of these days!


Firstly, I'm not the fastest builder and this one's really taking time and
its toll! I did a bit of searching on the net and some of the few I did
see ended up in the bin with someone saying this is 'Revell's most evil kit'.
I can see where they're coming from but I'm persevering!
Not many photos to where it's at now as I just got stuck in but anyway a
quick rundown. Got the rivets put back using the decals I got and
hopefully when it's primed up they should blend in pretty well. Got the PE
fitted to the main fuselage, fitted the engines (the exhausts sprayed black Grey
and masked up) and the grab handles along with the rear stabilizer. It's
ready for primer now (thank God!) so here's some pics so far........
I'm spraying the front stabilizers separately and will fit those near the
end once the weapons are finished and fitted.
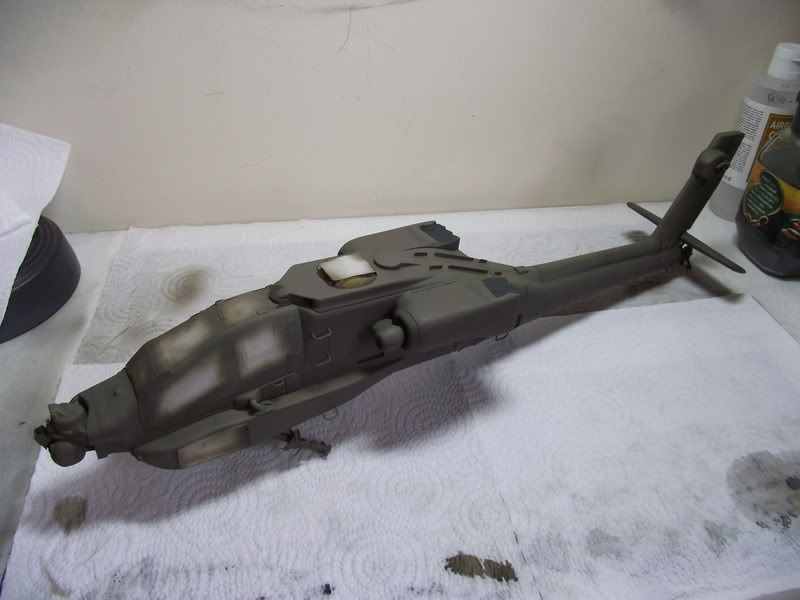
I've got the main fuselage finally painted! Just some shots to show
the process I used......
First up I primed with Vallejo Grey Primer - first time used and goes on
really nice straight out the bottle. It's quite a light Grey but I found
later that was a benefit! The resin rivet and panel line decals I applied
looked really good once they got some paint on them so definitely
recommended.
Next up i preshaded using Tamiya XF-1 Black......


The main paint is a mix of
Revell 90% NATO Olive and 10% Olive Grey. I put these into a mixing bottle and
thinned quite heavily with Tamiya thinners as it's pretty thick
paint.

Then applied - because I had
thinned it quite a lot and because it was going onto a light Grey primer I was
able to fade some of the paintwork without having to add any white paint later.
The pics may not show it too well but hopefully I can work on that when I
get to the final revels pics........


So next up is to get it glossed
and decalled along with sorting out all the other bits and
pieces.
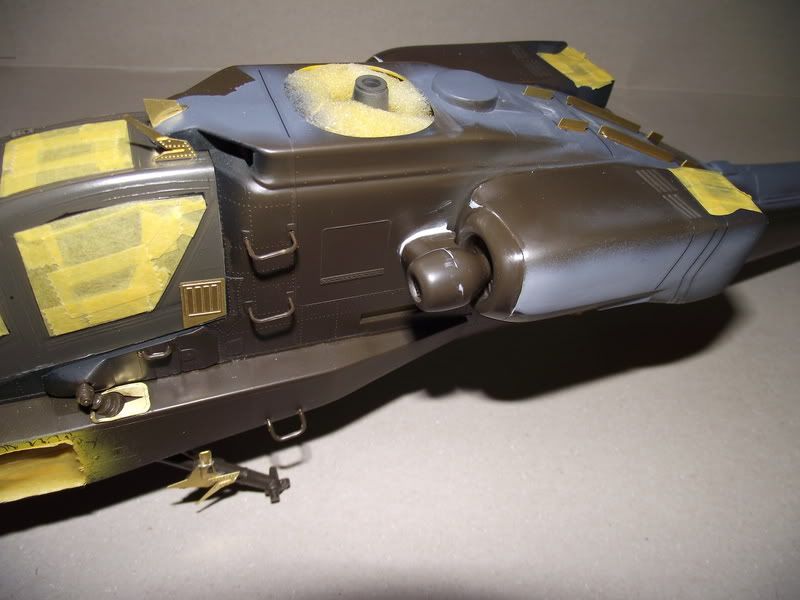
In no particular order, I
proceeded to get the 30mm cannon sorted. It's made up of some kit parts
(on the left) and some resin parts from the Verlinden kit.


Painted them all separately then assembled. Added a piece of lead
wire for a hydraulic cable (which you can't see - it's on the other side!) and
use some MiG brown wash. Still need to weather up with some FM pigments.
I had to sand the top part for it to fit but you won't see that once it's
installed.
Next I worked on getting the rotors put together. These are the kits
parts.
Then painted up and decaled the
main rotor. Here it is next to a pot of Tamiya paint to show you how big
this thing is! Going to weather it with some dry brushing and
pigments.

And the rear one. The
sprocket was sprayed with Mr Hobby Metal aluminum which I believe is enamel
based but IMO that range is great for metal work.

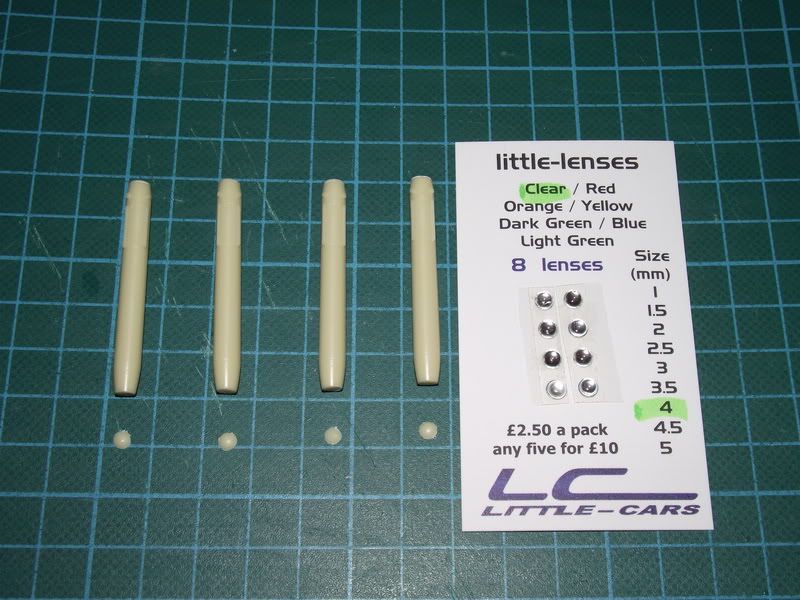
Then onto the hellfire
missiles. I wasn't happy with the first 4 that I made (luckily you get 16
of them in the Verlinden kit). I wanted to have the lenses on the front of
them so I bought some from Little Cars and cut of the tips. Here's 4 to
show you.......
I remove the fins I had put on
the 4 I did originally (after painting them black) but I originally used Gator
glue but found that using superglue was the better option in the end.
Here's all 8 ready for painting (I'll paint and fit the lenses
later).

After I get them painted they need decals applied and then I can fit the
lenses. But that's my next job to do!
So onto getting the deals on and the decal instructions are probably the
worst I've seen. They only take up half an A4 side so it can be difficult
to assess where some of them go......


I also attempted to make my first decals using a reference shot from a
book. This is what I was attempting (maybe a bit racey!). I did 4
but only needed 2. They go on the front of the sponsons.
I bought some clear decal paper and some spray varnish which is sprayed
lightly over them once they're printing. I used an ink jet. They
came out ok but I think I need to do better in the future as they silver quite
badly so need cutting right up to the image. But you live and learn.
After spraying with Alclad Aqua Gloss the decals were applied then sealed
again. A flat coat was then applied (75% water / 25% Vallejo Matt
varnish).
As promised in my previous posts, here it is next to a 1/48 Spitfire to
give you a better sense of scale.......
I'm not that happy with the decals as there's quite a bit of silvering
still which I just can't get rid of (but thanks to Bob for the tips - much
appreciated). Using Phil's tutorial on his Chinook build, I then sprayed
(read - laced!) the entire model with FM Sand Wash and let it fall and dry
naturally. I then went round with a cotton bud and some kitchen towel to
rough it up a bit. Not sure it shows completely in these pics but I'm
happy with how she's looking at the moment (bit more work to do
though).......
And finally, here are the front
stabilisers with the anti-tank missiles - obviously not fitted properly yet but
you get the idea. Need weathering by the way. (I also messed up the
the decals on the front top of the missile pods - should have been straight
rather than curved around but oh well!)

I just thought I share with you where we are with this build seeing as I've
exceeded the 3 month mark! I placed some wiring in the avionic bays but
wasn't happy with it so last night I removed it and am now beginning to replace
it with lead wire which will then be painted up.
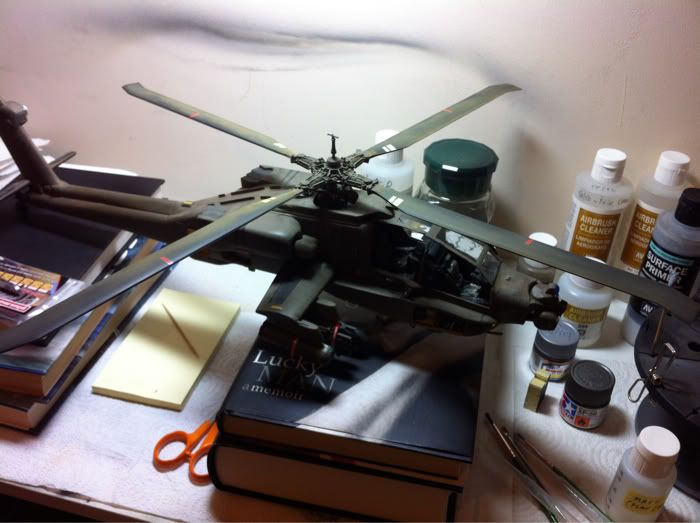
I took some pics with my phone last night (so forgive the quality) just to
give an indication where I am (as well as sending them to my good friend who
bought me this kit some years back). After the wiring is complete there's
not that much to do so hopefully I'll get her finished in the next day or two
and then get the final reveal pics up.
Please forgive the inappropriate advertisement of a certain Michael J Fox
book! I just need to get her elevated whilst I put the lead wire
in place!


And a quick one with the main rotor.....
Well, after 3 and a half months I can finally say it's finished! Part
of me is elated to get it done and part of me feels slightly sad that I won't be
working on this build anymore as it's been one of the most enjoyable I've done
to date.
Just to go back slightly on the pics I posted last, here are the hellfire
missiles finished with the clear lenses attached which I painted clear orange on
the back before fitting.......


I had to use 5 min Epoxy to attach to the sponsons due to their weight.
Once done, the front stabilisers needed the Epoxy also as the original
tabs which go right through the fuselage had to be cut down because the resin
ammo bay covers the gap where they go. They needed supporting with some
stiff foam whilst the Epoxy set which took 15 mins........note the original
wiring I fitted which to be honest looked crap and was later replaced with lead
wire.......
On a side note, I mainly used
these RBF tags which are decals. You use parts of the bag to fix them to
then apply MicroSol to set them. Once set, you just need to trim either
side. I liked these as they are very flexible (unlike the PE ones) and
conform easily to any curves.......

The opened canopy side panels
were first super glued in place then the supports added later. I also
added some lead wire to the main rotor blades to liven them up a bit.
You'll see this on the final shots.


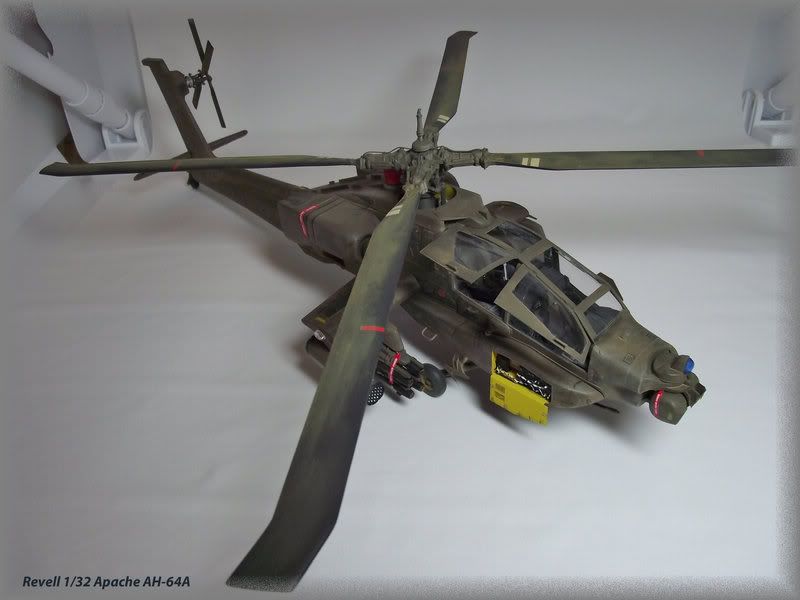
Here she finally
is....three and half months later! Overall, this has been one of the most
enjoyable builds I've done due mainly to the fact of the subject (I love
Apaches!) and also utilising reference material.
Things not happy with?
Mainly the decals which silvered quite badly but I did the best I could
(especially not happy with my own main decals at the front of the sponsons so
certainly won't be attempting that again! If I could have removed them I
would of!).


Thanks also to all of the comments along the way and some tips early on from Stealhranger and Lloyd as well as some decal advice from Bob.
All the best and thanks for looking.

Adrian 