


1/35 Tamiya Sturmpanzer IV 'BRUMMBAR' sdkfz166
By Bob Baillie

By Bob Baillie
- Kit:- Tamiya Sturmpanzer IV Brummbar Sdkfz 166
- Scale:- 1/35
- Extra's Used:- Eduard Big Ed PE set BIG3519, Great North Road Models GNR055 The 'Cottage' Diorama Base, Woodland Scenics various diorama foliages, Esci German Camp Rest Area (German Figures), Various Tamiya Jerry Cans and Fuel Drum Sets
- Paints Used:- Tamiya/Vallejo acrylics and a mix of Revell and Humbrol enamels
- Weathering:- Flory Models Washes & Pigments.
Right lads, here we go!! This is my entry for this SIG and will be be my second foray into the world of PE - albeit in a MUCH larger scale!!
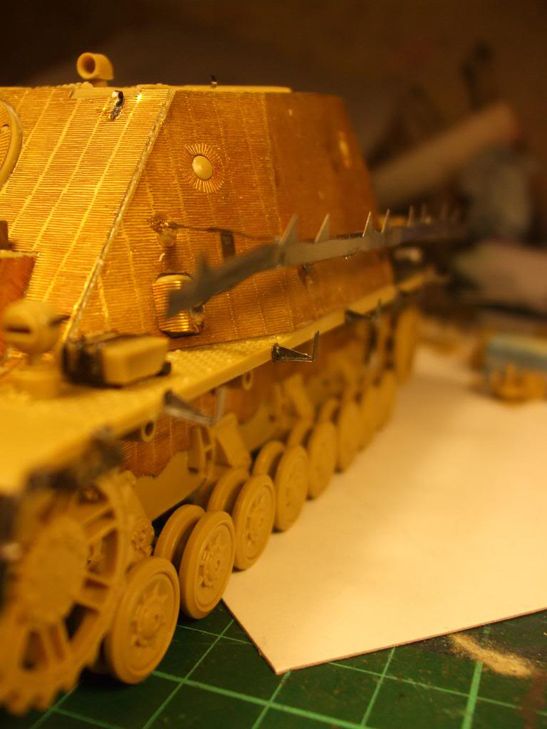
Will be including PE Zimmerit and schurzen to this one to add a bit of interest.


This is the exciting part of armour builds as I'm sure a few of you are going to find out the hard way!! THE WHEELS!! Depending on what you are building, you may have a lot, or if you are very lucky very little at all!!
I usually lay the wheel parts out on my mat like this as I find it helps me visualise what's to be done. Any other preliminary parts will also be laid out. This is when I do any clean up of flash and sanding of sprue stubs. Once that has been done, I'll commence assembly.
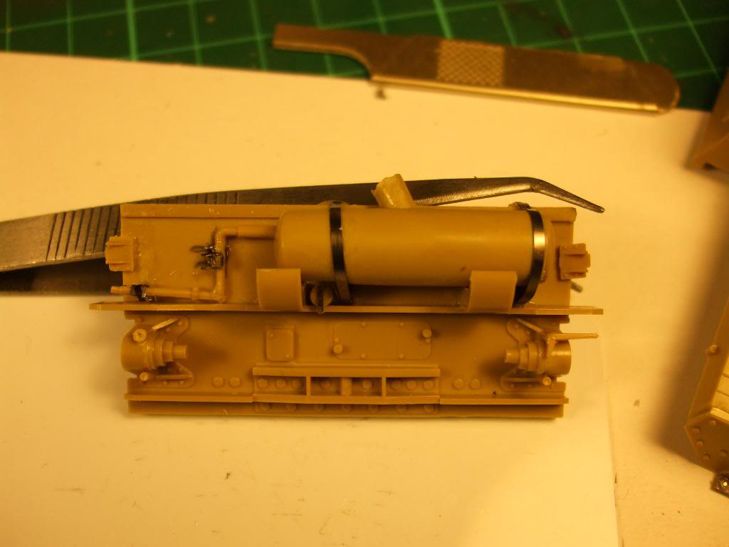
In this case, the exhaust and rear plate has some PE to be attached and kit parts have to be sanded off or removed. Not much else to show at this stage!!
Some pics of parts prior to assembling:
Overall view
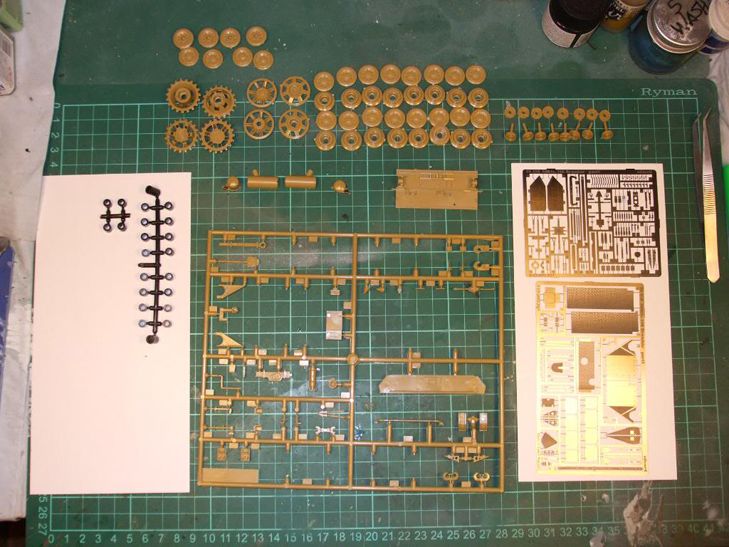
Wheel Parts

Polly Caps

Smaller items still attached to sprues.

PE frets for this stage.

Got wheels glued together and sanded. Like Steve (f4sooty) I'll be leaving the 'rubber' tyre seam line on some wheels to give the impression of new replacements and some of the 'worn' tyres will have nicks and lumps out of them.
Removed some plastic off the exhaust before attaching it to the supports with PE straps. Some other small PE details added tonight. Still pretty fiddly, but not as bad as 1/72 stuff!!


Noticed on the bottom hull that this kit was intended for an electric motor, so it has slots and holes in the bottom that need to be blanked off and filled. Started to do this..

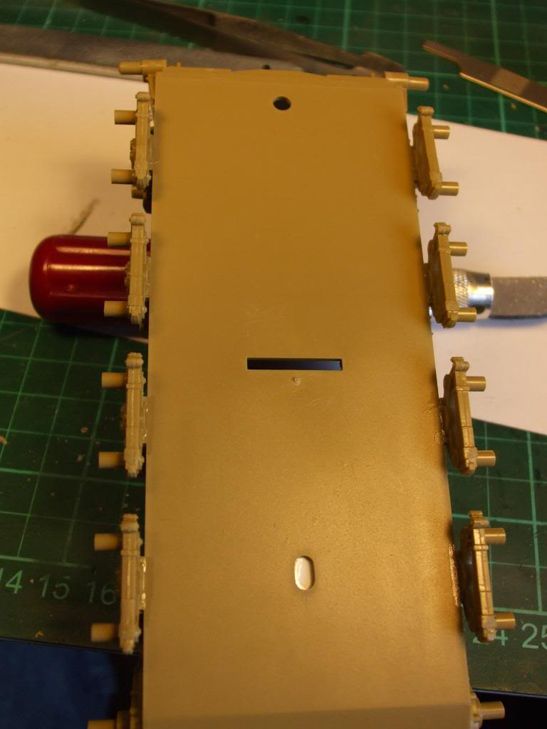
And a wee bit of filler required in the rear corners.


Started the Zimmerit that I actually forgot and had to pull all the parts off the rear plate again to get it on. Will have to be very cautious with this build, as the PE parts have to be done in very carefully planned fashion with various kit parts requiring to be removed. The Zimmerit will have to be applied first, then all the fiddly parts attached afterwards (I think?) Not something that can be rushed!!
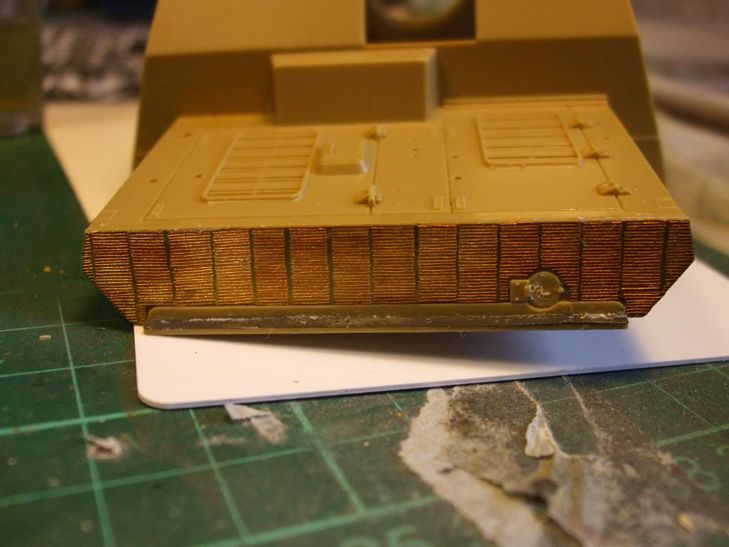
Allrighty, Zimmerit done!! Started off trying to attach it with PVA glue just to try it as it's a bit easier to work with than CA. Seemed to be working OK, until certain parts started falling off while others stayed fixed. Decided then to use a thick CA which will hold it forever!!
Had to use some thin CA as well, to catch edges etc which needed a little prompting to stick flat sometimes. The white marks that are visible are the results of kicker on excess glue which I didn't notice at the time. Might be able to disguise it with weathering later if necessary . That's the beauty of armour modelling guys, it can be more forgiving than planes!!
Having said that, the PE Zimmerit was almost a perfect fit for this kit, with only some minor adjustments and alterations being required, some of them being due no doubt to my inherent clumsiness
As I mentioned in my previous post, the PE for this has to be carefully planned and thought out as to steps and procedures taken. It also cannot be rushed - this is the most important consideration IMHO. I'm sure I'll still make mistakes, it's all part of the ongoing learning process!!
Hull Filled and Sanded

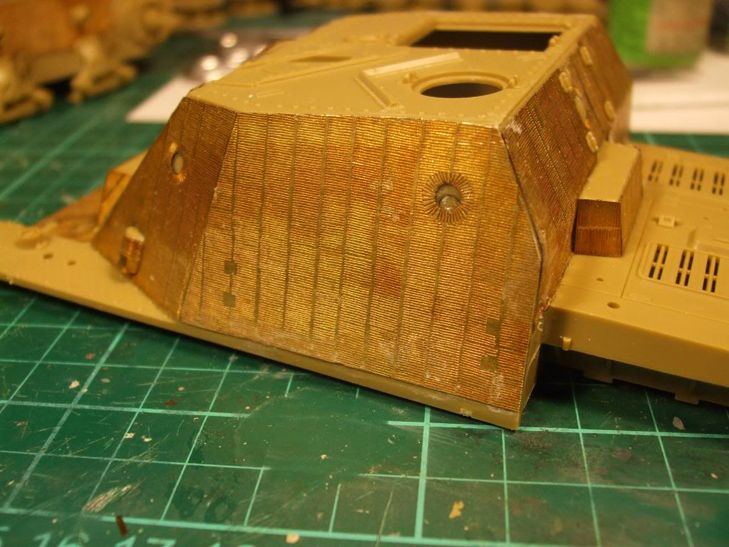
Bottom Hull Zimmerit.


Upper Hull Zimmerit.


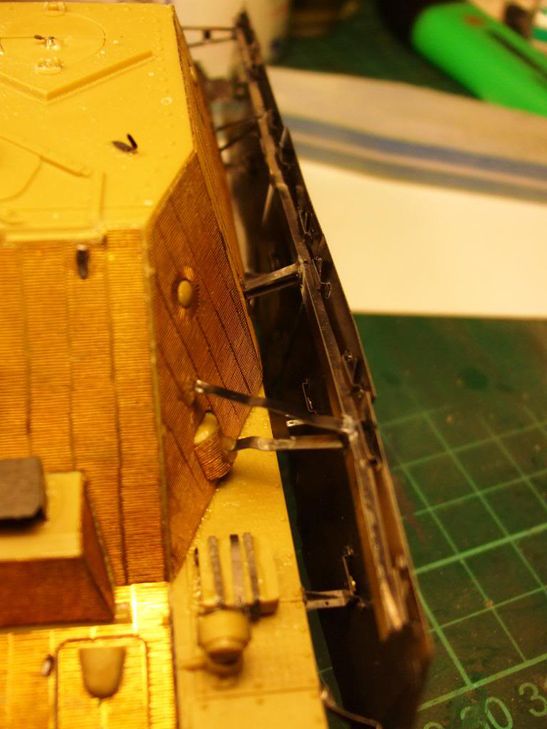
Got a bit PE stuff done tonight and posted some update pics - the work looks a bit rough and ready as I've not tidied it up yet....
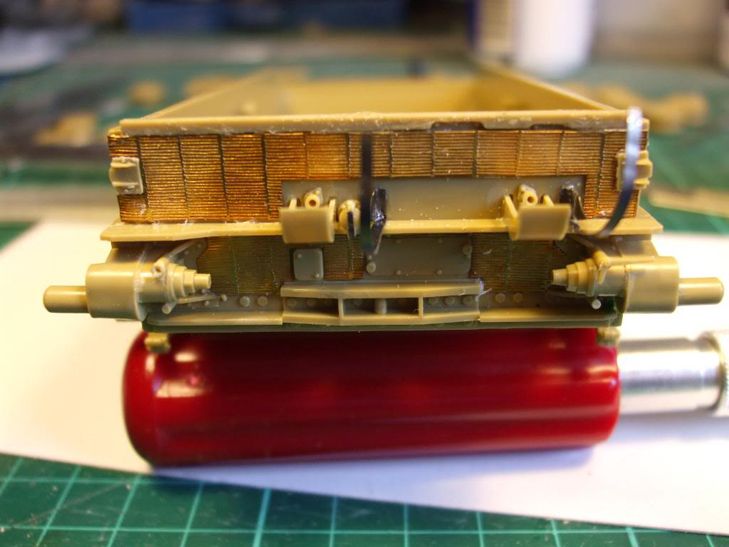
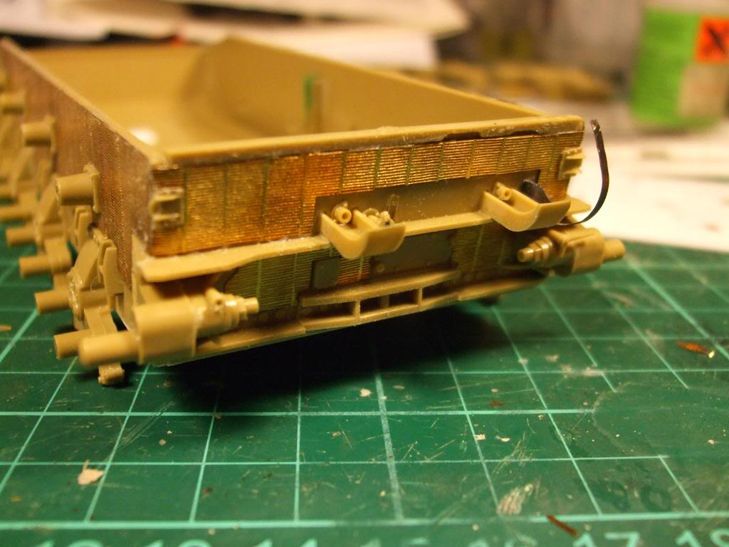
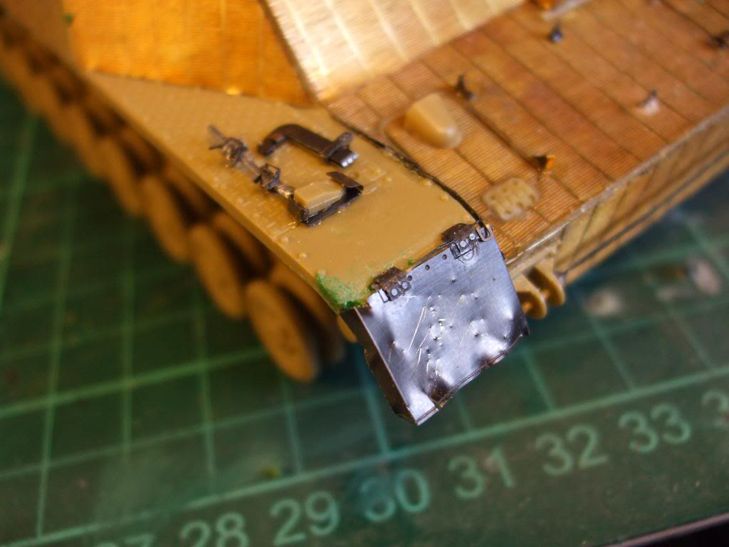
Rear Fender - Kit Part Off and On the Hull


Opposite Side - Same part modified with PE.

Rear Mud Guard.


Most of the smaller and fiddly fragile PE parts will go on last when the top and bottom hulls have gone together. Still got some remedial and scratching work to do - no point in all that PE being knocked off and lost. Having said that, made up some of the larger PE components and put safely aside for later.
Looks like I'm going to have to fill this gap - can't possibly leave that!! Shame on Tamiya for such a glaring omission with such a nice kit. Will need to fill the holes on the underside of the mudguards as well.

Cut this fender too short before attaching the side PE parts which would have acted as a cutting guide. Confirms what I said about concentration (or lack of it!!) and taking your time. Will need to do some jiggery pokery rectification!!

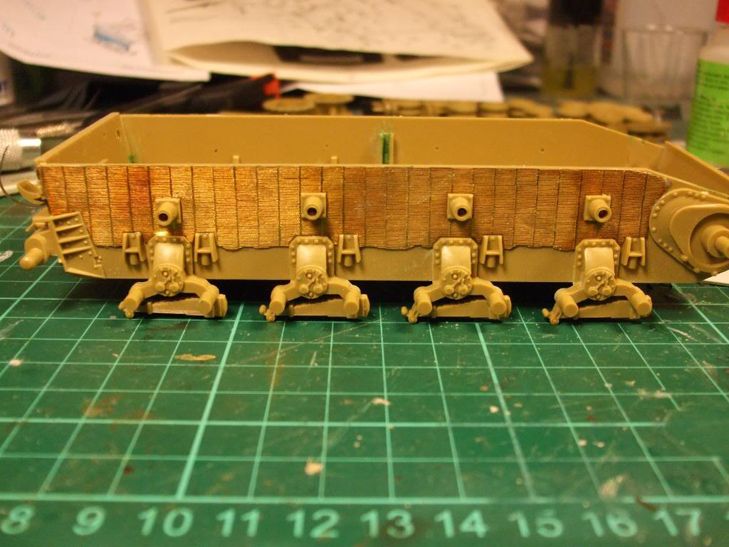
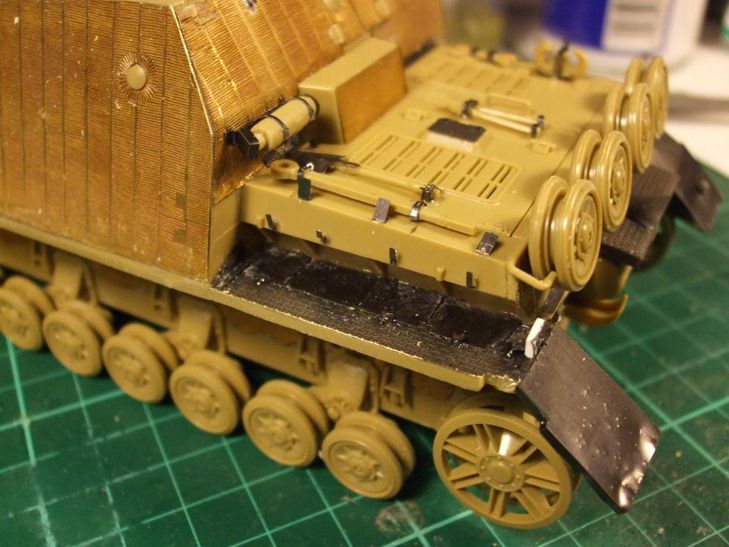
Some other PE parts attached, wheels on temporarily and hull top and bottom just resting on each other at this stage.

Added some plasticard pieces to underside of hull to fill in huge spaces (that shouldn't have been there in the first place IMHO!!)

How it looks compared to the previous post!


Some filler ready to be sanded.

Remedial Work on Front Fender which was cut too short

A bit of Tamiya Flat White mixed with a few drops of Buff to give a bit of colour to the interior before I join the top to the bottom. Most won't be seen as the hatches will be mainly closed, but I don't want bare plastic to be seen in there.


Spent all afternoon today attaching PE to the front section of the hull and my eyes are truly killing me!! Some of the parts are excruciatingly small and just want to fly away of their own accord. The pictures look as though I've slabbered CA glue all over the place, as I probably have in my frustration. Anyway, it might look better once it's painted?
Some more pics....
This is the method I use to keep track of the PE parts which have been done

'Distressed' the front fenders.


Other PE parts.


More PE pics. Must be getting used to this (or just getting better?) as I actually managed to get some of the most minuscule parts attached, even though they won't or can't be seen?? Thought I was done until I realised I've still got to attach all the brackets and attachments for the Shurzen plates.
Mind you, they don't look too bad (famous last words??) And here was me thinking too that I'd get a coat of primer on today.


The PE Saga continues...........had a go at attaching the Shurzen armour plate brackets and honestly wish I hadn't bothered. Don't know if you gotta have a really clear head for doing this kinda stuff, but I just don't seem to be able to cope well with it after working all day.
If one part came off more than once, they all did at one time or another! Had to scrape the CA off, apply more and then kicker, then knocked the part off again 5 mins later!!
The runner for attaching the plates to also caused me some problems - the instructions weren't very clear on how to fold and construct them, with the result I did it wrong. Had to straighten it out again very carefully ensuring that it didn't shear down the fold line and then re-fold it correctly after printing out a larger instruction sheet.
Will do the other tomorrow, but I'm not sure how they will attach to the brackets. They don't look very straight and I might have some fit issues. I could always revert back to the old standby if you make a cock-up with armour, you can always disguise it as battle damage!!


Got all the brackets assembled and put on which was fairly straightforward. Attached the brackets to the back of the LHS Shurzen plates and 'distressed' them a bit with light and heavy bullet hits and damage. Will complete the RHS tomorrow night and then hopefully some paint!!


Take a long lingering look at all that nice, shiny PE lads because it will be the last time you see it like this!! Tomorrow night if I get peace (babysitting 2 sets of grandkids) I'll get my red/brown primer coat on at last and all this shiny stuff will be covered up!!
Did the RHS Shurzen and had a few problems attaching it, mainly due to the fact I buggered up the hanging rail and I had to do some life-saving surgery on it The plates are barely hanging on the rails!!


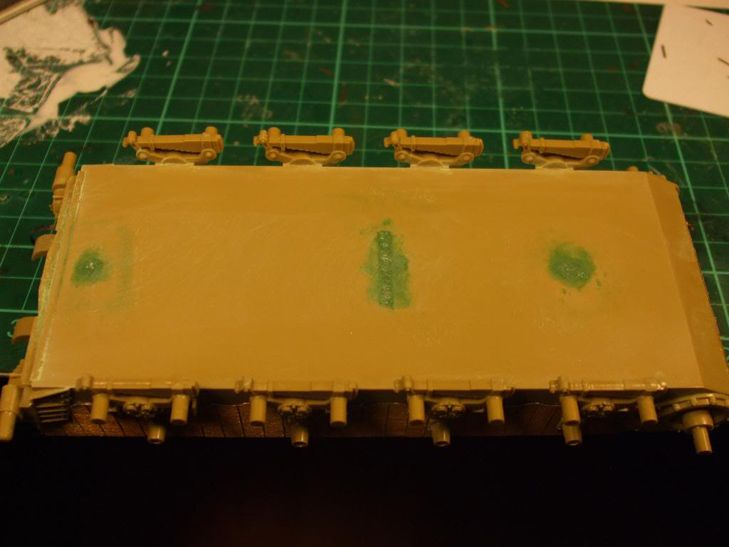
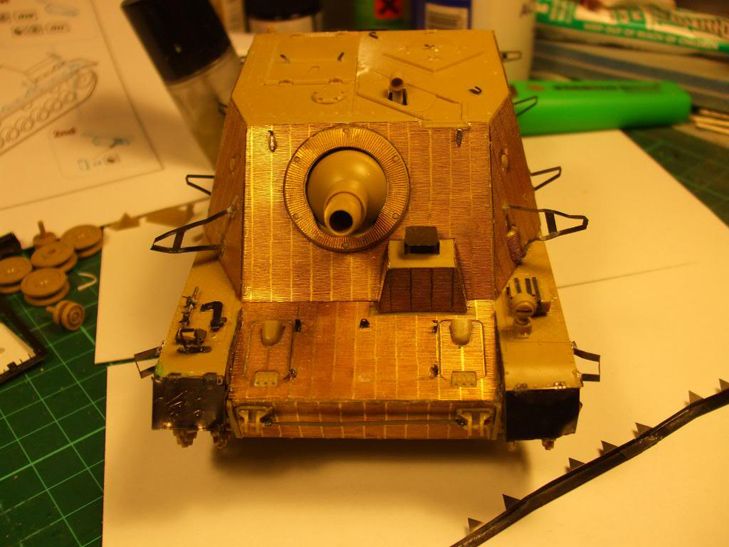
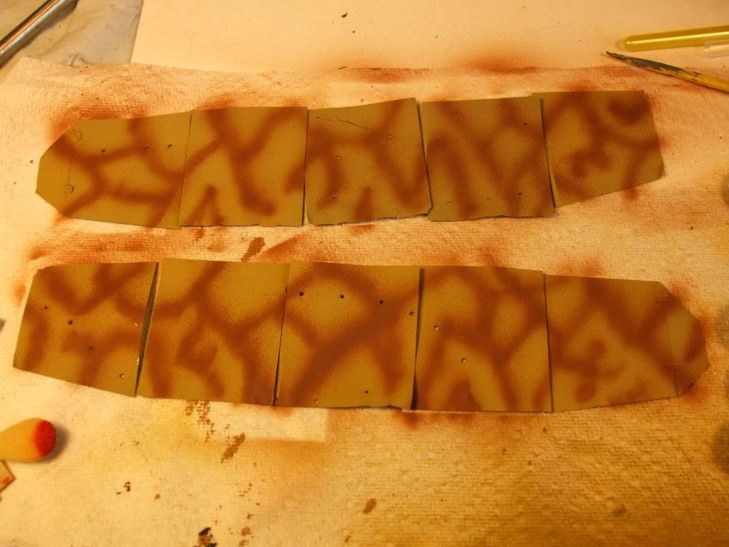
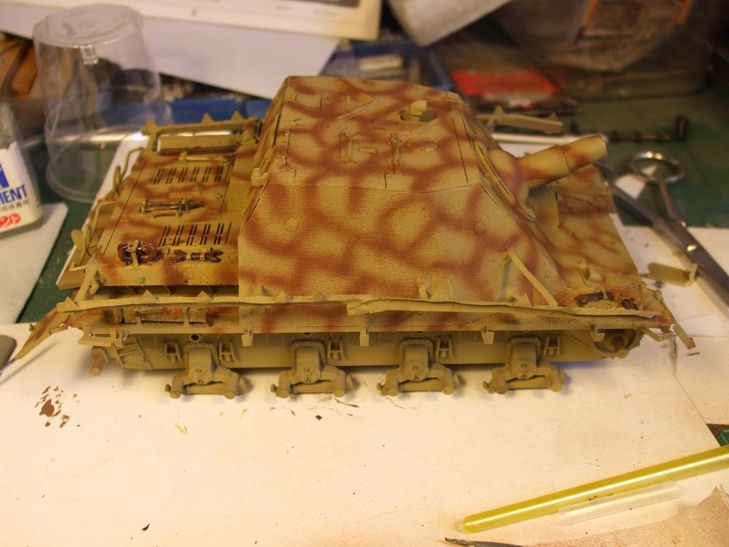
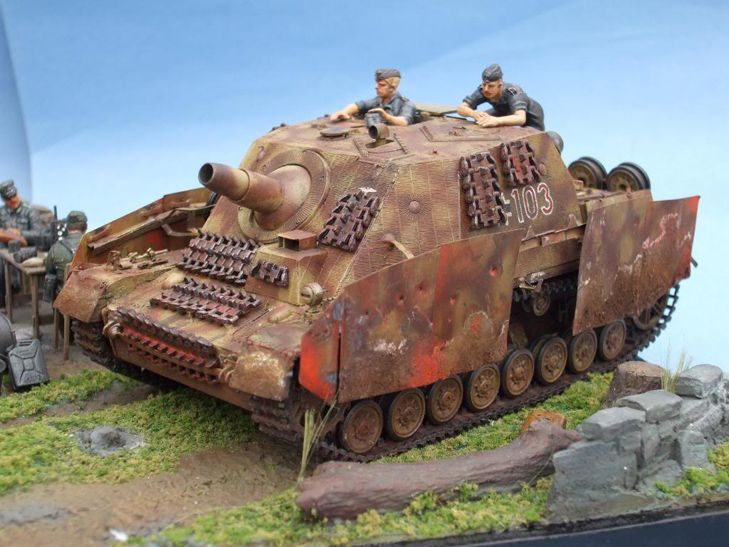
Sprayed some very thin coats of Tamiya XF-64 Red Brown as a base coat prior to laying down XF-60 Dark Yellow.
Unfortunately, I ran out of XF-64 (will need to get some more next week when I come back from holiday) with just the upper idler wheels to do, but the base coat has shown up some areas that will need a little attention like filling and smoothing off the edges of the Zimeritt with some PVA glue.


get a coat of Tamiya XF-60 Dark Yellow on - thinned approx 50/50 with Tam thinners and sprayed in thin coats at about 12-15psi and my needle set back a bit. Didn't put too much paint down as I tried to get the Red/Brown to show through slightly. Think it worked better on the Shurzen plates, of which I'm happy with the effect. Hand-painted the road tyres on the wheels with a thinned mix of XF-63 German Grey with a few drops of XF-1 Flat Black.
Will try to get the details on the hull picked out tomorrow and get the camo done.


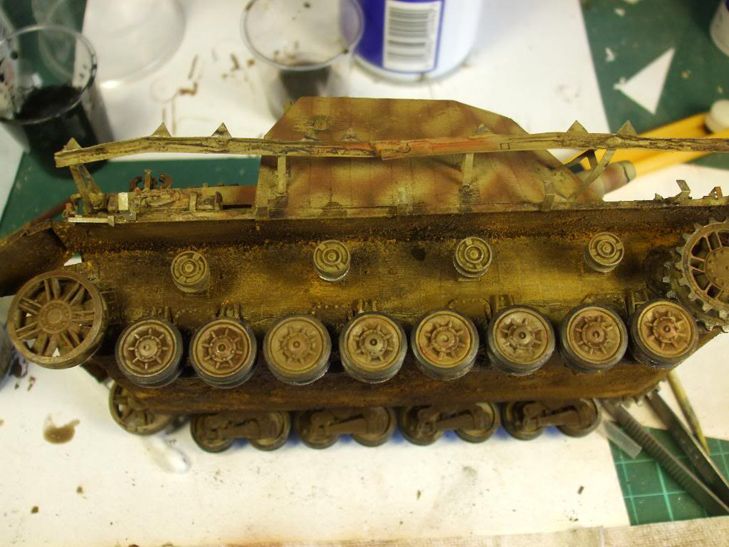
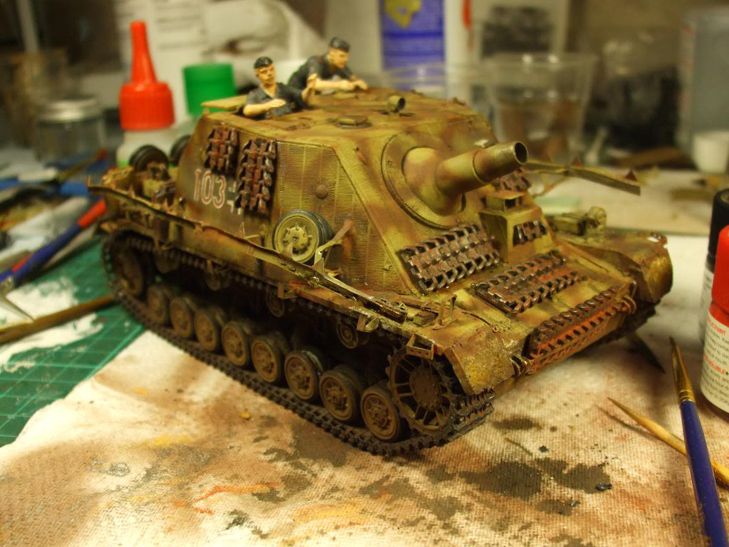
Got some Tam Red Brown on for the camo, but I'm not happy with the plates. May have to tidy them up a bit. Started weathering the wheels and painted and 'rusted up' the tools


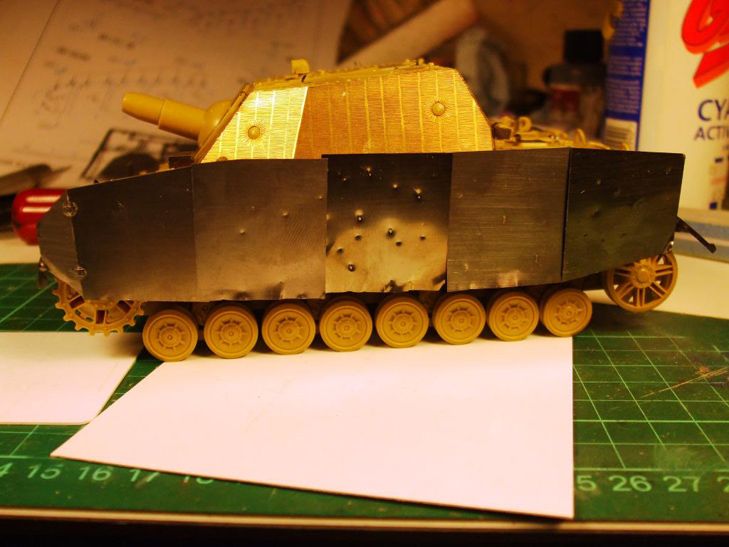
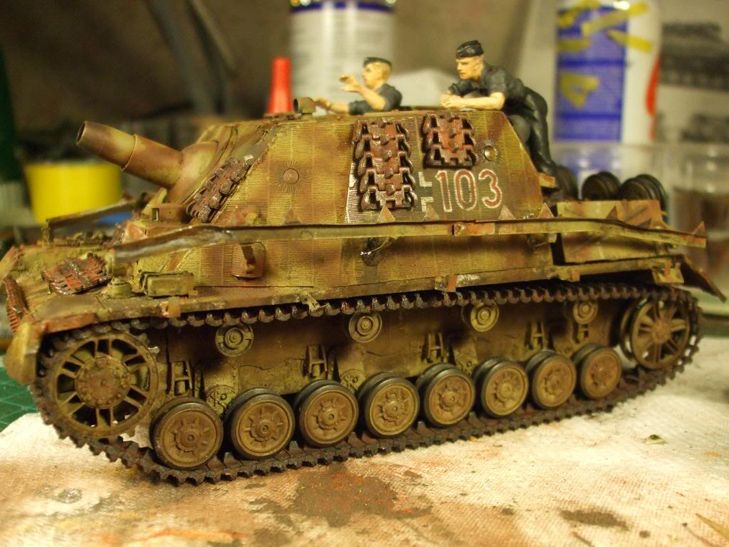
I've posted some pics with the Shurzen on the tank. Because of the delicate nature of the PE - which comes off at the slightest knock - I've only attached it to one side to show the effect and already 2 or 3 PE parts have come off with handling! I'll need to do some repair work with CA again!!
This is the stage where you have to be ultra-careful in handling when doing detail painting and weathering and why I only attach most of the ancillary parts when I'm ready to complete the model.
Have attached the wheels temporarily for effect, but still have some pre-weathering and damage to apply to the whole model before giving it a coat of Klear prior to oil washes and final weathering.
Applied wear by dry-brushing Tamiya XF-56 Metallic Grey across the top of hatches etc. I like this particular colour for metal effects as it isn't too shiny and gives a good 'bare metal' look.


Used the same for dents, scratches and bullet holes on fenders and Shurzen plates...


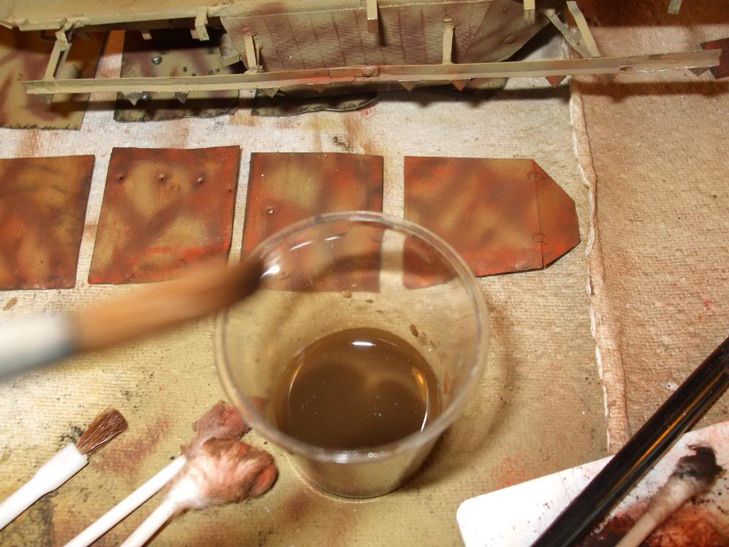
My full set of FM Pigments arrived today and I thought I'd do a wee bit of experimentation with them on a couple of parts to see how they look.
This was applied wet and dry to various items with an angled fine make-up brush, a mangled brush and a damp cotton bud to achieve different textures and effects, using the Rust, Dark Dirt and Black pigments. They have been applied directly on top of the paint without a coat of Klear to seal it, as I would normally do.
What I would like to know is - as this would be a departure from my normal method of oil washes - does this look better or worse for it before I progress any further? I really need some views and thoughts on this, lads!!
If it's not right, I can still clean it all off - hopefully - and do it my usual way!!
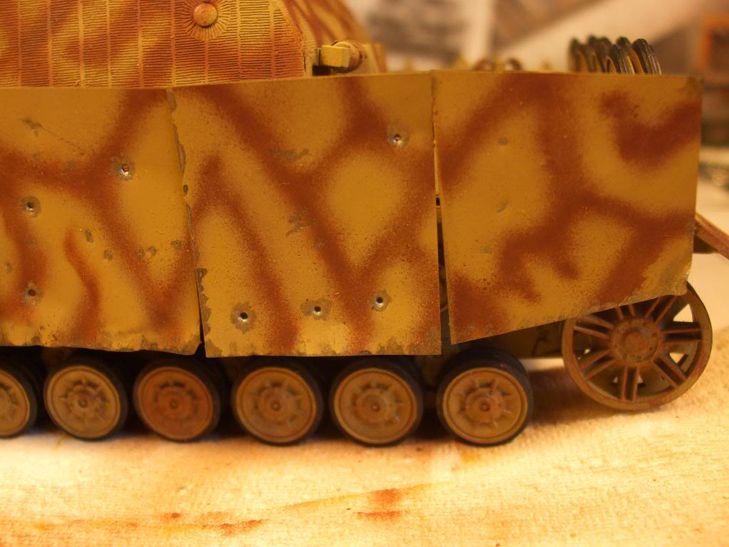
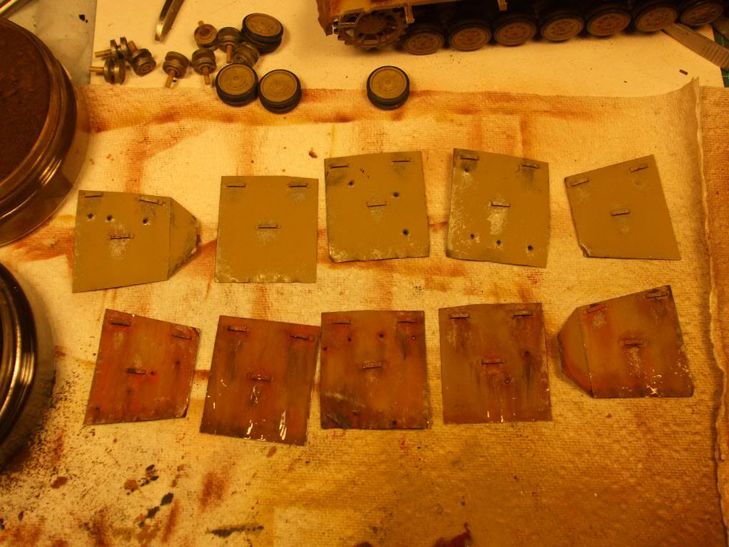
Shurzen plates - external faces. LHS weathered. RHS only slightly

Shurzen plates - inside faces. LHS weathered. RHS only slightly

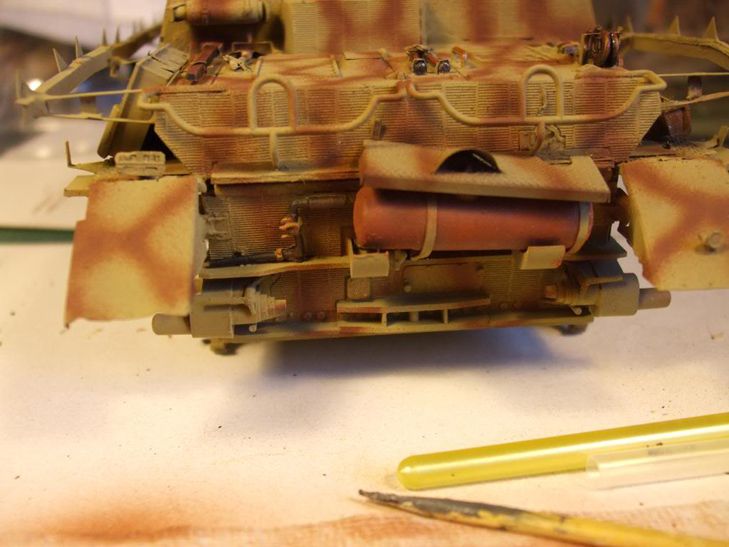
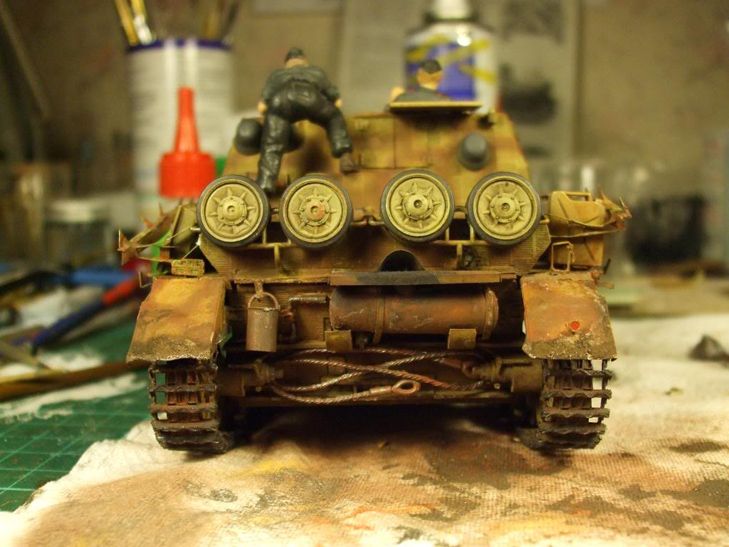
Exhaust Box.

Exhuast cover plate.
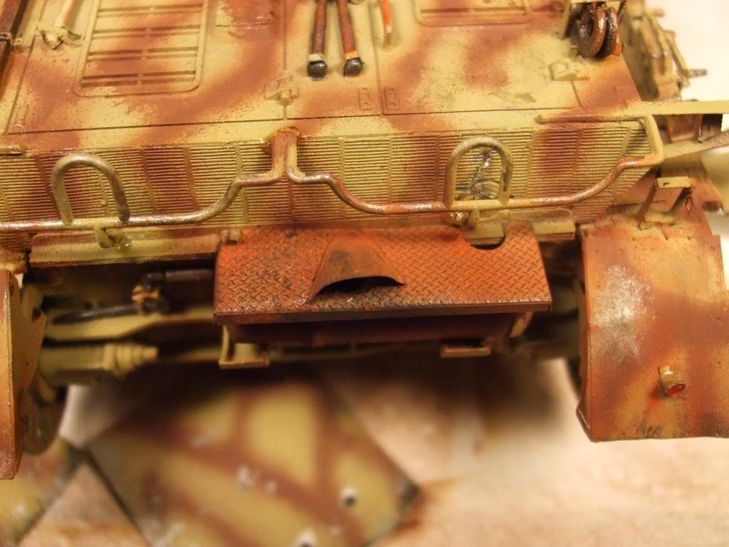
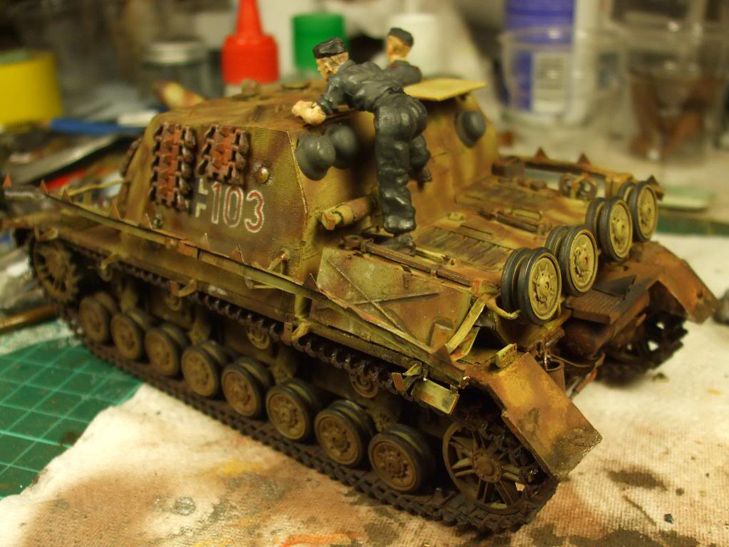
Rear view with fenders weathered.
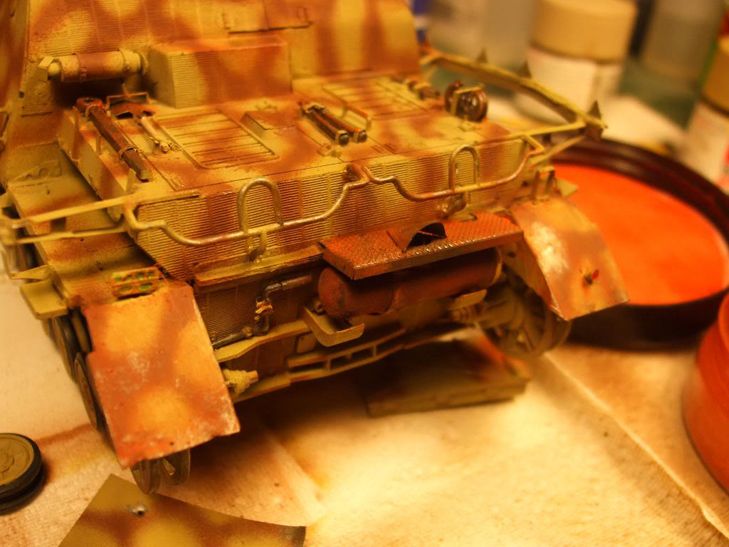
Lower Hull Zimmerit with some dark dirt pigment brushed on.

Some more done - still can't make my mind up about this. The camera doesn't really show it to advantage and tends to over-emphasise the weathering. It actually looks not too bad in 'real life'.


Had a look at the build with a lesser jaundiced eye than I've had all week and as soon as I started, everything just seemed to fall into place for a change!
This was such a fresh revelation to me that I was inspired to take some pics of my progress today and try to show the methods I'm using. As I've previously said, I'm trying a departure from my normal methods of weathering ( i.e. oils ) and experimenting with FM's pigments that I received this week.
Anyway, here we go.......
Started off by mixing up some Dark Dirt and water and brushing it with a large(ish) soft brush all over the bottom of the hull, covering the wheels and bogies etc.


This is when I suddenly got a flash of inspiration (shock horror!!) and decided to add some of my secret mud making ingredient - Baking Powder! - while the wash was still wet.

Using a large brush, I loaded it well with baking powder and then proceeded to sprinkle it generously over the bottom of the hull...

...and continued to add it to the underside of the fenders and up around the front.
When this was done, I loaded the brush with the Dark dirt pigment mix and let it drip onto the baking powder (without actually letting it touch) and letting the capillary action draw the liquid through the powder.
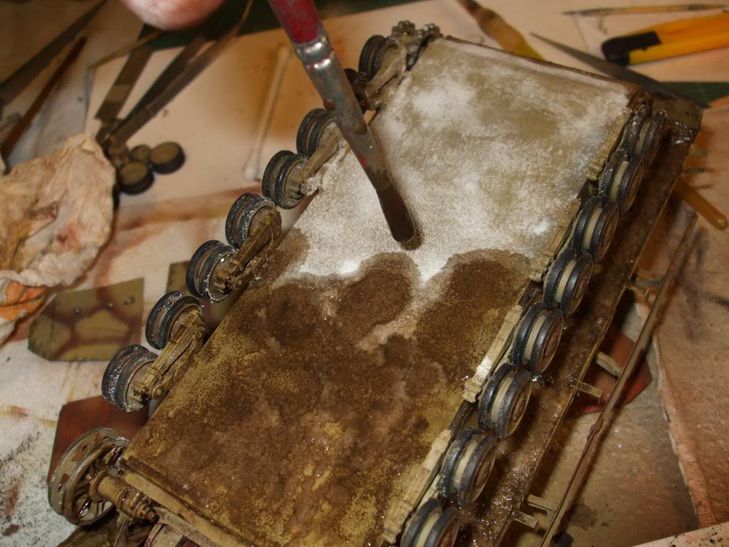

This will be finished off by dusting pigments onto it when it has dried to give the appearance of dried mud and general debris.
A wash of the Dark Dirt pigment was then applied over the rest of the hull, where it settled into the Zimmerit giving a 'dirty appearance' and toning everything down.


With this lesson learned, it was time to apply the same technique to the bottom edges of the Shurzen plates. A small amount of wash was applied to the bottom edges....

....and then powder was sprinkled over where the liquid wash was.

Some detail highlighting done with a thin pin wash of FM Black pigment mix, mud effects done with Mud, Sand and Dark Dirt pigments dusted and brushed on in differing quantities.
I think I'm actually getting quite pleased with the way this is going!!


Some detail highlighting done with a thin pin wash of FM Black pigment mix, mud effects done with Mud, Sand and Dark Dirt pigments dusted and brushed on in differing quantities.
I think I'm actually getting quite pleased with the way this is going!!


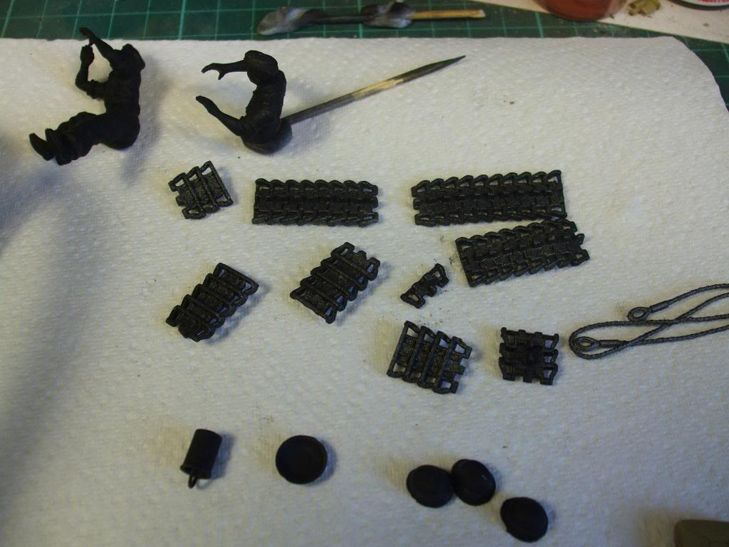


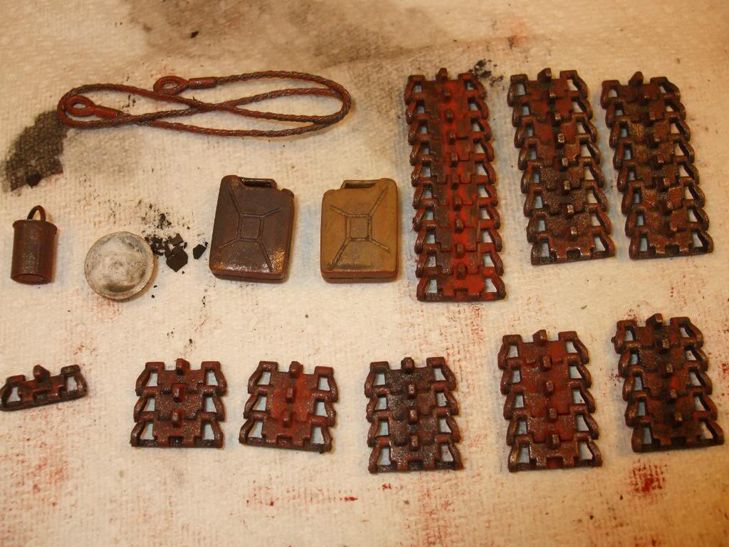
Some weathering done on spare tracks etc:-
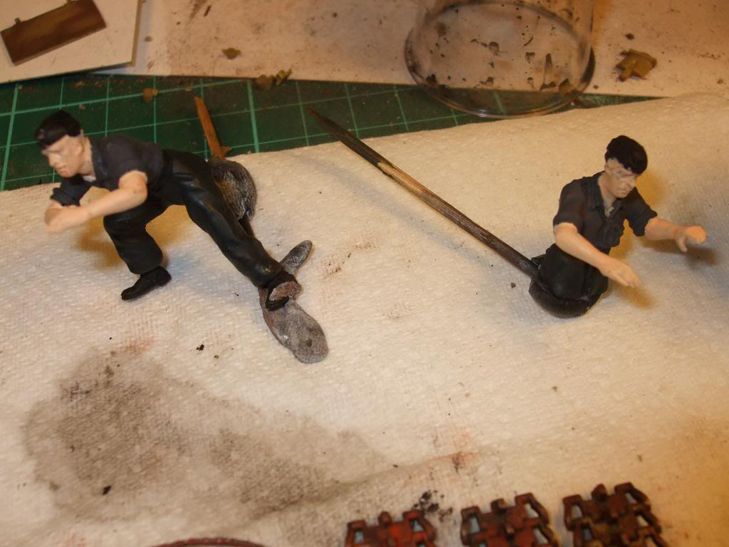
Figures started.
Got some bits and pieces to finish off and a coat of matt varnish to go on. I could go on with weathering etc., but I think you can overdo it and I don't want to get to the stage where I think that I have.
Fed up knocking bits of PE off with handling and having to glue them back on as well - especially the Shurzen hangers.


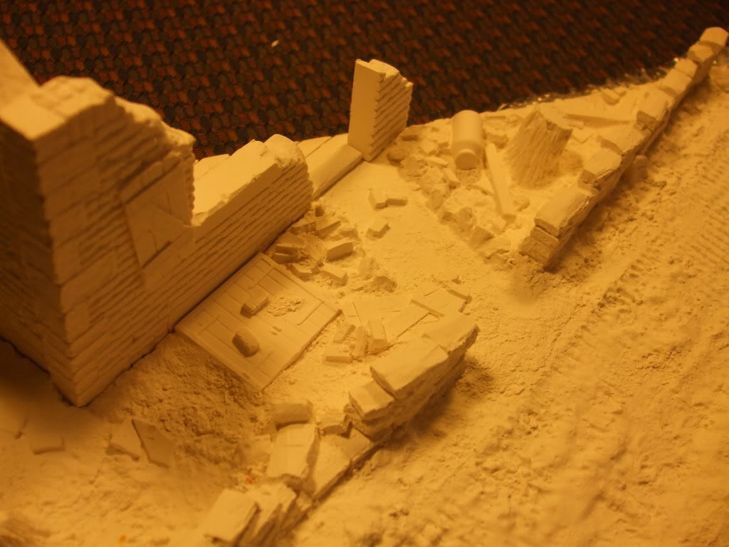
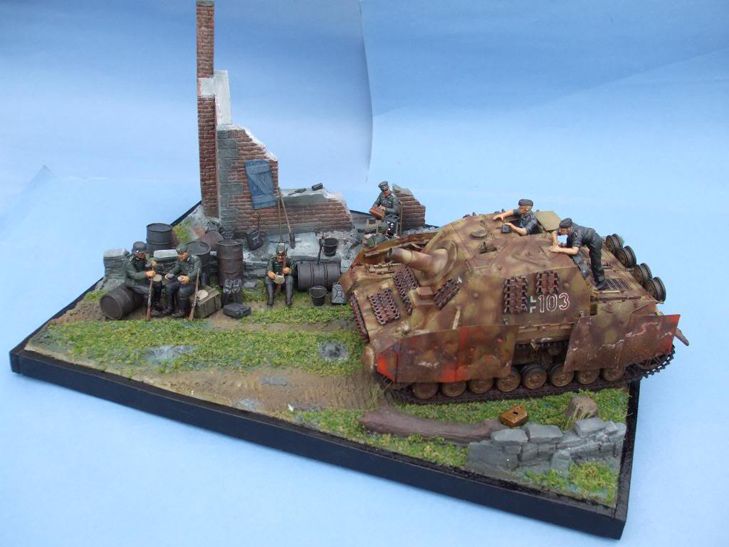
This will be the base for the Brummbar and presents a new challenge for me - how to paint it and make it look 'real'!! And in the time left!
The detail and texture is spot on, but a couple of pieces require a little cleaning up before I glue and assemble it all together. Plus it will need to be sealed with some diluted PVA as it is moulded in porous plaster. Maybe have to also position it on a wooden base to prevent it cracking or breaking? Gonna leave it until the weekend to give it some thought and start with a 'fresh' mind.
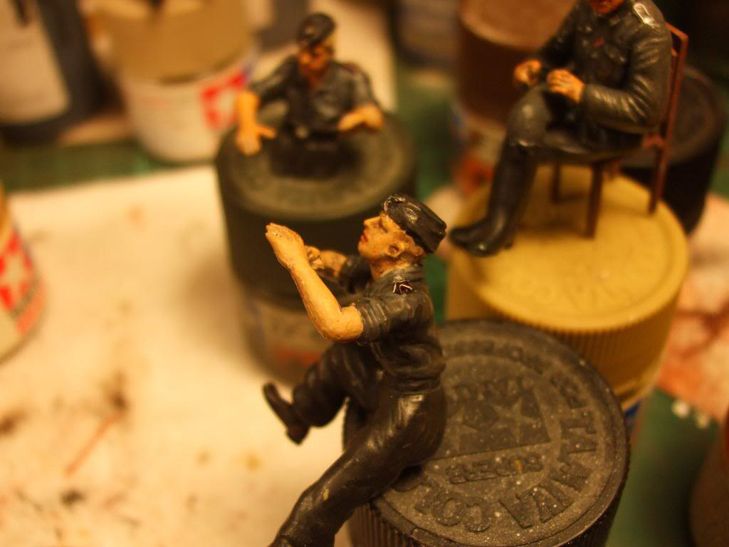
Got the Shurzen plates finished as you can see, but the fixings for them are very brittle and fragile and some have broken off. I might have to attach them to the tank with CA. Got some German figures from an unfinished project that I might repaint and position them to add some additional focus points.


Been working on some of the accessory bits and pieces and just thought I'd post some pics of progress to keep the interest going. Sorry about the figure work - I'm not very good at them, but they look OK from a distance! As they should, so I'm reliably informed!!


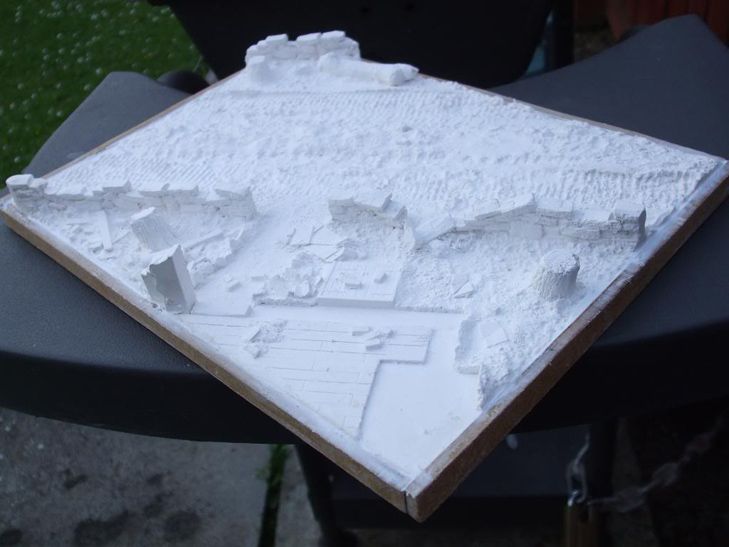
Built a frame and a base for the plaster dio to give it some additional support - don't want it cracking! Had some 6mm hardboard lying around, so using the dio as a template marked it out and cut with my jigsaw, along with some pieces for the sides and ends.
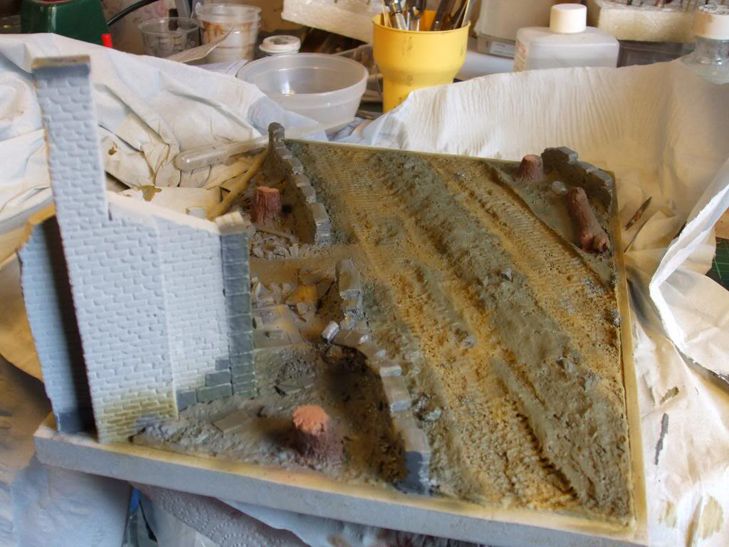
Glued it all together using some proprietary 'No-nails' stuff and now just waiting for it to dry before sealing it with diluted PVA before I start painting. Also got some dio material from one of the local model shops to give it a bit of 'texture'.


Sprayed a mix of PVA/water 50/50 to seal the plaster and provide a 'key' for the paint to adhere to. Once that had dried, it was sprayed with grey primer from a tin for quickness. It also helps to 'define' the details.
I'll leave it until tomorrow now I think to let it all cure and harden off before starting to paint the details..........


Sprayed the ground bits with a slightly diluted (water) liquid pigment specially formulated for dio scenes (that's what it says on the bottle!) from Woodland Scenics and it was expensive!! Takes ages to dry though. This will act as a base shade before I start applying different earth tones using Tamiya paints. Well, that's the plan!

Some paint on. Basic colours to start with - Tamiya XF-24 Dark Grey, XF-61 Dark Green (also lightened with White) and XF-10 Flat Brown. Still some to do for brickwork etc.
Once I've got all the base colours on, the fun starts with foliage, tones and weathering!!


Well, to all the faithful who have been following this build religiously, here it is at last! I hope I've done this kit justice, as there were a LOT of firsts for me in it - namely PE and a dio base! Not to mention NO oil or pin washes!!
I can now go off on holiday with a clear conscience and come back to renew my acquaintance with my WW2 Multi-Engine GB Condor build!!
Apart from some annoying moments with the PE Shurzen hangers and brackets, this was a most enjoyable build for me and I learned a lot from it and really appreciate everybody who was kind enough to post and PM comments and encouragement throughout.
After the frustration and pressures of not completing the Diorama GB, I feel a certain pleasure in having actually completed this one! And a measure of pride! If it has helped some of you armour novices to embrace the Dark Side even just a little, then I hope I have accomplished my task here.
I can now go off on holiday with a clear conscience and come back to renew my acquaintance with my WW2 Multi-Engine GB Condor build!!
Enjoy the pics - there are a few........


Bob
